Tag Archives: Green crafts

Ocean Drum From A Pie Box – A Thanksgiving Music Craft

Ocean drum completeWho doesn’t love the soothing sound of the surf?  And who doesn’t have too many pie boxes around this time of year?

Combine those two things and you can have a handy, functional ocean drum made from a few materials found around your home.

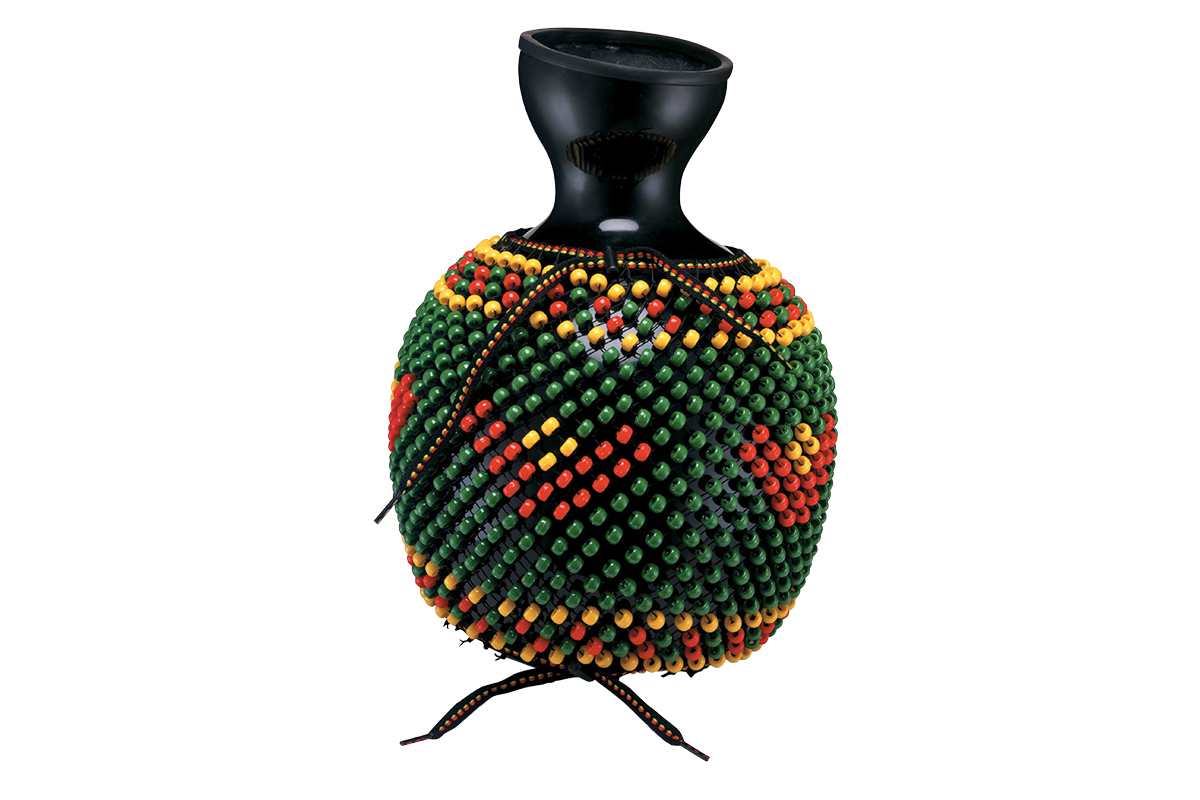
What Is An Ocean Drum?

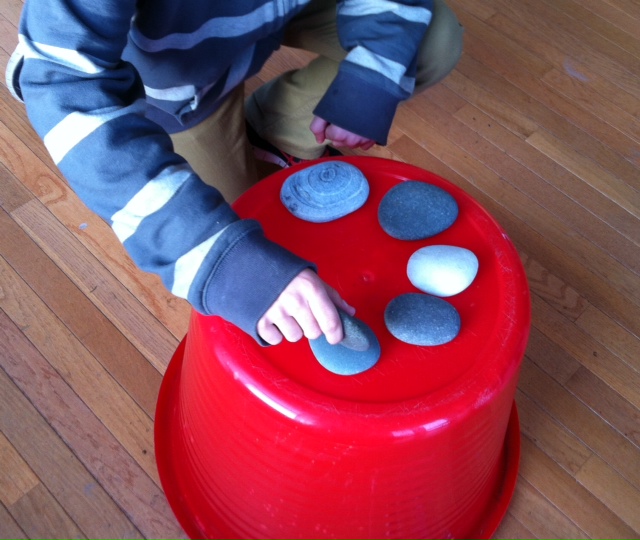
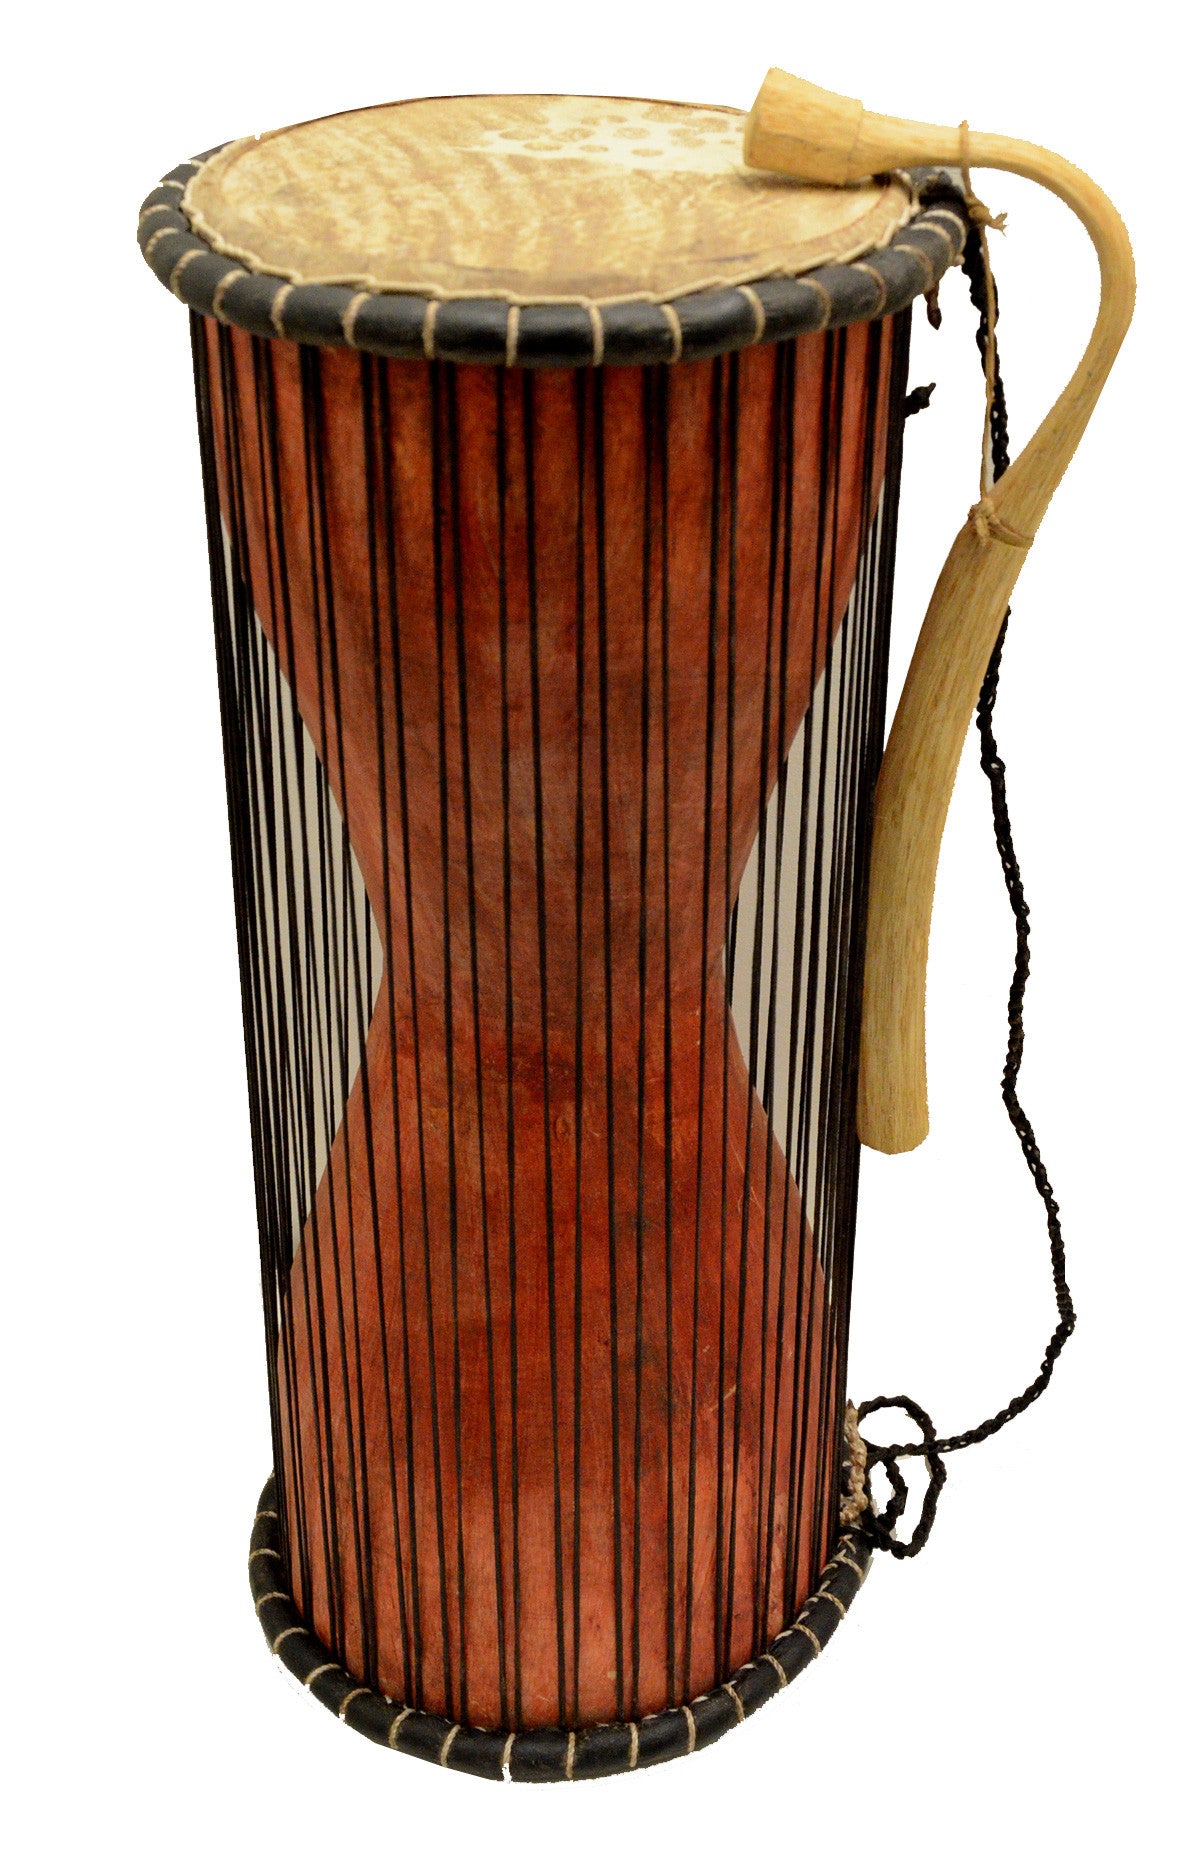
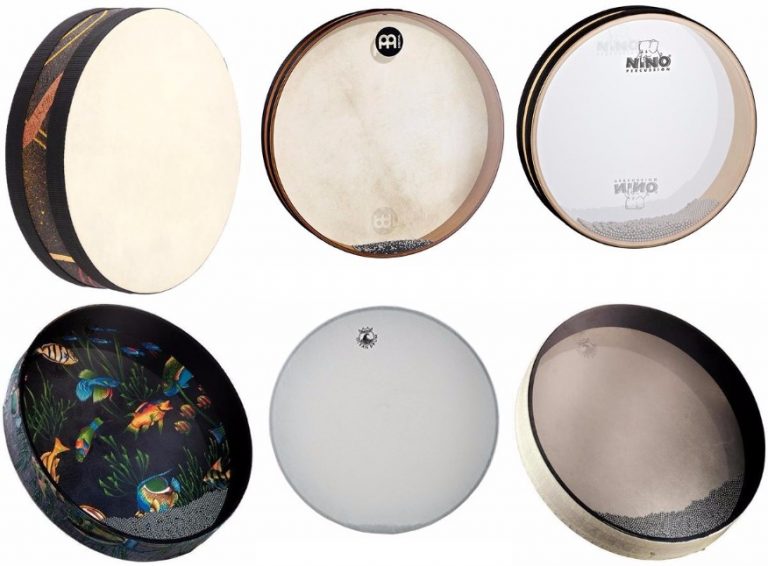
If you haven’t already fallen in love with an ocean drum, it’s a simple frame drum with small round objects between the two heads.  (You’ll get a chance to see and hear one below! ) When you tilt it from side to side, the little objects roll and the sound created is like waves lapping against the shore.  And even our craft version can create the relaxing and hypnotic effect of this quieting drum.

apple pie ocean drum suppliesGather A Few Supplies

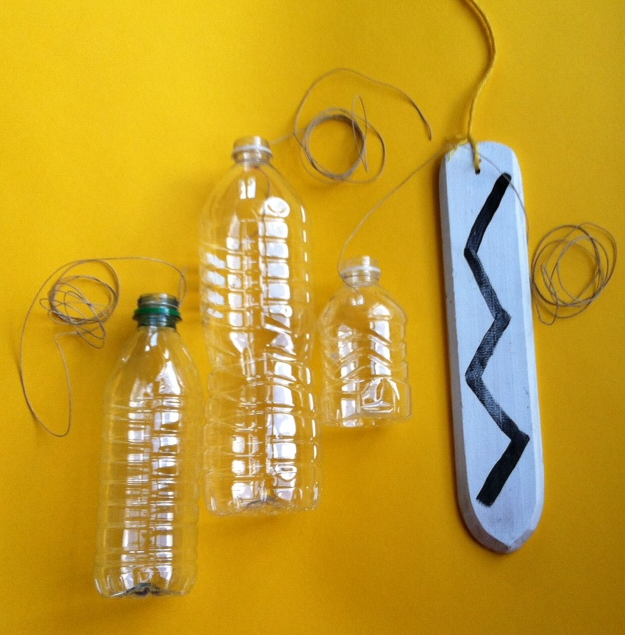
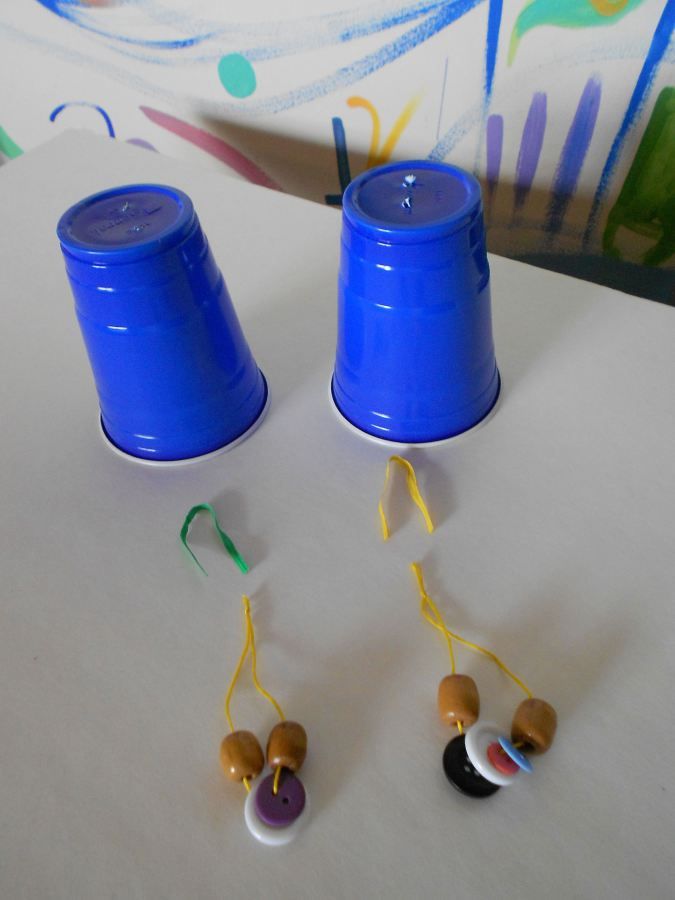
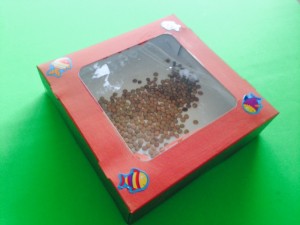
Make sure you have a sturdy pie box, then look for whatever you have around your house that is small and round.  Almost any item will work, but objects like seed beads or round “acini de pepe” pasta will sound remarkably like the ocean.  Remember, the smaller and rounder the object, the more it will sound like the surf!

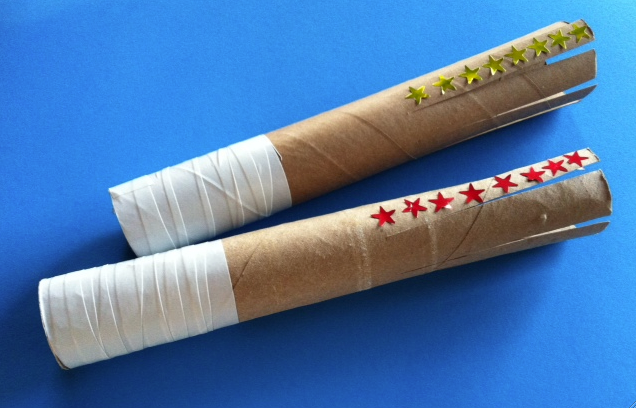
Then check your craft area for any supplies to decorate.  You can leave your pie box plain or feel free to make it unique by adding paint, stickers or other creative design ideas.  In the image at the top of this post, you can see that we painted the sides and added our favorite fishy stickers to keep with the ocean theme.

Add It In, Seal It Up!

ocean drum contents 1When you’ve completed your decoration, add your filling to the drum and see how it sounds.  The sound will change when you add more or less of what you’ve chosen to use, so adjust the contents until you’ve found the perfect sound for you.

Last, seal up with clear tape – packing tape works the best to keep all the tiny objects secure inside the box.

Check out the Real Thing… And A Sturdier Craft Version

Love this drum?  Here’s a short video of a real ocean drum demonstration.  And below is a link to a step-by-step tutorial for a sturdier version made with a packing box.  The larger size and the stronger cardboard make for a more resilient version of this enjoyable musical craft.

Special Kids and Adults And the Ocean Drum

This is one of our favorite crafts for creating with kids and adults of all abilities.  There are dozens of ways to personalize and play it, so these crafty oceans drums have been a bit hit when we are asked to do workshops with our special friends!

polka dot ocean drum kimbertonWe hope you love them, too!

Links and Resources

Ocean Drum Tutorial From The TeachersPayTeachers Site: https://www.teacherspayteachers.com/Product/Ocean-Drum-Craft-1567951

Earth Day Craft E-Book With 10 Green Crafts (Including The Ocean Drum)  https://www.teacherspayteachers.com/Product/Reduce-Reuse-Recycle-Rock-Out-E-Book-With-10-Musical-Activities-653502

FacebookTwitterGoogle+Share

Shake Them Rattles… And Bones!

real and homemade quijadaSo many kids love Halloween and this particular holiday invites you to explore things that are fantastic, creepy or even a bit scary!  So why not add some musical rattles to your slightly spooky fun?  And this recycled project is doubly scary, because it’s based on an actual set of bones – a jawbone to be exact!

What is a Quijada?

The quijada (this word means jawbone in Spanish) is a real musical instrument colorful quijadamade from the jawbone of a donkey.  It’s a part of Afro-Peruvian music and keeps the beat by making the sound of teeth rattling in their sockets- like the teeth you see here (to the left).  Most often it is played by striking it on the side of the jawbone with your fist but you may also see someone running a stick up and down the rows of teeth as seen here: http://multikidsmusicvids.com/?p=1530 .

A Green Version Of This Spooky Instrument

Since most folks won’t have access to jawbone and probably would not want to play one, we’ve created a version of this instrument from a recycled egg carton.  quijada suppliesYou get to pick what take the place of the teeth in each of the 12 spaces of the egg carton.  Try marbles, pebbles, rocks, pine cones, paper clips, beads, erasers buttons or any other object that that fits easily into that space.

Counting, Sorting and Listening Skills

One look at the empty egg carton and it’s easy to see how to incorporate counting and sorting skills into the creation of  this musical rattle.  Don’t rush to complete and close the rattle.  Stay and play at this stage as long as you like.

And since each set of objects will make a distinctly different sound, you can fill the rattle (or several egg cartons) several times and discover the different making a quijada recycledsounds each set of items makes when placed inside.

Will a paper clip egg carton rattle sounds the same as a marble rattle?  No way!

Seal It And Decorate

Last but not least, your rattle will need a great funny face.  The activity pdf below has a series of full color and colorable images that range from scary to super-silly.  Or create your own by outlining the top of the carton and designing away!

And since some egg cartons have holes in them,  we suggest taping the finished rattle up with clear packing tape so none of the small pieces can escape.

Then, all that’s left to do is make some scary noises with the rattle and have lots of Halloween fun!

egg carton rattlesLinks and Resources

Step-By-Step Instructions/Coloring Pages from TeachersPayTeachers
(.99 on TPT)
http://www.teacherspayteachers.com/Product/EGG-CARTON-QUIJADA-MUSICAL-RATTLE-1146672

What is a Quijada (Free on TPT)
https://www.teacherspayteachers.com/Product/What-is-a-Quijada-Jawbone-Instrument-1406336

World music crafts and coloring pages for kids from DARIA MUSIC
http://www.dariamusic.com/crafts.php

Watch a Real Quijada Be Played on Multicultural Kids Music Vid’s
http://www.youtube.com/watch?v=6wmJsBNIh24

Turn a Milk Jug Into a Recycled Shekere

recycled shekeres in classDo you know the three R’s? Reduce, Reuse and Recycle.

How about the four “R’s”?   Reduce, Reuse, Recycle… and Rock Out! While you’re going greener and thinking about reducing or reusing plastic, here’s a fun way to turn large containers into child-size versions of African shekeres.

What’s a Shekere?

I wonder if shekeres were “original recycling projects”. Perhaps someone looked at dried gourds and decided they could be made into musical instruments. To do this, a netting of beads (called a skirt) was crafted around the gourd and small beads, seeds or shells were strung in the fiber to create the sound of the instrument. Most music historians believe the shekere began in West Africa but can now be found with variations in size, beadwork, shape and manner of playing throughout the African continent and around the world.

A Milk Jug Shekere

Since you probably have more plastic containers than cleaned and dried gourds, start by finding an empty milk jug, large water bottle or similar item from your recycling bin. Before you begin, make sure it fits nicely into your child’s hands.

Recycled shekere plus paper to beadBeading With Stickers or Markers

Doing intricate crafts like beading is great fun but takes practice and patience, plus motor skills that can be a difficult for small children. Here’s an easy alternative.

If your container is clear and clean, you can place stickers directly onto the plastic bottle or draw “beads” with markers, making colorful patterns or shapes. If there’s a label on the container, you can cut out a piece of poster board or construction paper to fit the container and lay the paper flat. This makes for easy “sticker beading” and a fun way to explore patterns, shapes and colors with your young child.

If you’re working with a classroom of kids or have a limited time to do this project, you can skip the aspect of trying to “bead” the shekere and allow the kids to simply decorate the outside of the container.

Sounding Good!

mini shekere for storeIn traditional shekeres, the sound comes from the beads or seeds rattling on the outside of the gourd. In our recycled version, we’ll need to add something inside the container to create the sound.   Here are some suggestions for a quieter recycled shekere: sand, salt, sugar, tiny pasta (like acini de pepi), seed beads, Q-tips and paper clips. Here are some fillings you can use to create a louder instrument: pebbles, dried pasta, dried beans, popcorn kernels, marbles or pennies.

Once you’ve filled your shekere and you like the sound it makes. Put the cap on and seal it into place with heavy duty tape to keep this project child-safe.

plastic shekereTime to Play

Although a shekere is a rattle, there’s a lot of different ways you can play it. Here are some playing suggestions:

Hold the handle and shake.

Hold both sides and rattle the contents back and forth.

Hold both sides and toss it gently while twisting it.

Hold it vertically and toss it gently from hand to hand.

Peru_Preschool_ShakureSit a short distance from a friend and toss it back and forth.

With a group of children, sit in a circle and toss it from child to child around the circle.

Try any of the above ideas while singing or while music is playing. Try to shake along to the beat.

Links and Resources

Hear A Shekere

http://www.dariamusic.com/shekere.php

Color a Shekere Online

http://www.dariamusic.com/color_Shekere.php

Bead an African Shekere

https://makingmulticulturalmusic.wordpress.com/2013/12/04/bead-your-own-african-shekere/

2 recycled smilk jug shekeresMake a Classroom Shekere (From A Gourd)

http://tinytappingtoes.wordpress.com/2013/08/05/easy-gourd-shekere-for-a-child-or-a-classroom/

An Alphabet Shekere Game

http://www.trueaimeducation.com/2012/10/guest-post-learning-letters-with-an-alphabet-shekere.html

Sekere.com – Beaded Sekeres from Master Craftswoman, Sara Fabunmi

http://www.sekere.com

Cultural Value of the Shekere, Article By Sara Fabunmi

https://makingmulticulturalmusic.wordpress.com/2011/10/25/the-cultural-value-of-the-sekere/

Outdoor Musical Play – Make Your Own Bullroarer!

bullroarers - plastic

You may not recognize the word “bullroarer”, but you probably recognize the sound it makes. Used by both Native Americans and Aboriginal Australians, this simple instrument spins around and produces a whirring sound that is truly unique.

Since it’s really hard to describe, take a minute to watch “Jungle Jay” demonstrate his homemade bullroarer here:

What Is A Bullroarer?

Made from a simple piece of wood attached to a string, the bullroarer is spun with one hand then swung around in a circle with the other. As it spins, a remarkable whirring, buzzing noise is produced that can be heard quite a distance away.

bullroarer - realIt’s easy to see how this was used originally to signal other people or to communicate in times before telephones or modern devices.

Make Your Own Version

This activity could not be easier. All you need are recycled water bottles of various sizes and sturdy string or twine. Start by tying the string around the neck of the plastic water bottle, securing it tightly with several sturdy knots.   If you like, add a stick to the other end of the twine or tie the string into a loop to make it easier to hold while spinning.  A good length for the string is about 3 feet, but feel free to adjust this length for the size and shape of any player.

Although this technically isn’t a bullroarer, your plastic bottles will make odd, eerie noises when swung around in a circle just like the authentic aboriginal instrument. One hint: pick plastic bottles with smaller openings as they seem to make the best sounds when used in this project.

Safety First

Although spinning a plastic water bottle is much safer than spinning a piece of wood, it helps to consider safety when playing this instrument. Anyone playing a bullroarer should be outside in an open area, away from people or things that things that could be hit accidentally.

How To Play A Plastic Bullroarer

Once you’re positioned safely away from any people or objects, simply hold the one end of the string and swing it around. Swing it either in a circle in front of you, to the side or over your head. As you vary the speed, the sound will shift both in volume and in tone. Play with your one plastic bottle or different bottles to find the type of sound you like the most.

A Bullroarer Orchestra

If playing with a group, you can position kids or people in different areas with plenty of space between them. For instance, if you’re on a playground, you can position kids within large chalk circles with ample distances between them. Participants can all play together or someone can call out names so each player can add their instrument or stop playing. This is a fun way of creating a sonic landscape, especially if different size and shape water bottles are used.

Be safe – and have fun!

All Natural Instruments – Sticks, Stones and Bamboo Percussion For Kids

natural instruments

How were the first musical instruments created?

It’s most likely they were made from “all natural” materials and were probably the result of wonderful coincidences.  Perhaps someone was gathering wood and realized that two sticks tapped together could create a beat.  A rock fell on another rock and made a pleasing sound.  Bamboo made a wonderful noise when rustling in the wind and inspired Hawaiian rhythm sticks. And since these noise-makers are made of such basic materials, they make great “first instruments” for exploring music with children at home, in the classroom or in the homeschool environment.

Here are three of our favorite “all natural” percussion instruments.

Austalian Clapsticks – “Bilma”

stick bilma1In Aboriginal Australia, two sticks struck together form a beat that can accompany the didgeridoo and become a part of singing, dancing and celebrating.  Whether you tap together two unsharpened pencils or take a nature walk to retrieve two perfect sticks, bilma making dots with q-tipsthese simple clapsticks can keep a beat while you sing or play along to any your favorite songs.

If you want to decorate your clapsticks with an Australian theme, you can use a dot motif.  In the activity below you can find step-by-step directions for making several different versions of crafty “dot” bilma.

hula rocks on blueRiver Rocks – Hawaiian `ili`ile

Can rocks make music?   Take a nature walk, collect a few and see for yourself.

In Hawaii, special smooth river rocks are part of the hula tradition. These small stones; called ‘ili’ili, are held in a dancer’s hand and tapped together for a percussion sound and that becomes part of the arm movements of the dance.  If you want to play “Hawaiian-style”, check out the post below for more about this tradition.

But you can also get creative and make up your own way of “playing rocks”.  Try josef rocks outsetting a few rocks out on the ground or table and hold one in your hand.  Use the rock in your hand to tap out a beat on one – or several- of the other rocks while you sing along, play recorded music or create your own rhythms with a friend, sibling, parent or fellow musician.

Bamboo Rhythm Sticks

Hawaiian pu’ili are rhythm sticks with one distinct difference.  They are made of lengths of bamboo, left whole on one side and split on the other.  When tapped together, the split ends rattle against each other making a unique sound.

Although making traditional bamboo pu’ili is not too hard, it does require some special tools and involves sharp edges.  An easier version; especially for young children, can be made from cardboard rolls from paper towels. They are easily cut and decorated and sound great for percussion play.

You can get complete instructions for homemade pu’ili at the post listed below.

Explore Nature and Music

Sticks, stones and reeds can make music.  Why not combine an exploration of music and nature to see what kind of inventive creations you can discover and play!

Screen shot 2014-03-03 at 5.26.10 PMLinks and Resources

Australian Bilma (From Teachers Pay Teachers)
http://www.teacherspayteachers.com/Product/Australian-Instruments-Make-Your-Own-Bilma-Clapsticks-1133140

Playing River Rocks As An Instrument – Hawaiian `ili`ile
(Post in Making Multicultural Music)
http://makingmulticulturalmusic.wordpress.com/2014/02/13/playing-river-rocks-as-an-instrument-hawaiian-iliile/

Play Some Pu’ili  (Post in Tiny Tapping Toes)
http://www.tinytappingtoes.com/classroom-music/make-your-own-puili-hawaiian-rhythm-sticks/

Musical Craft pdf’s from DARIAMUSIC
http://www.dariamusic.com/crafts.php

E-books, CD’s and more Musical Fun from DARIA’s TeachersPayTeachers Store
http://www.teacherspayteachers.com/Store/Daria-Marmaluk-Hajioannou

Jingle Marching Sticks

making jingle sticksOne of the most wonderful things about making music with young children is that it easily becomes part of an active day.  Who can resist making a parade or dancing around the house or the classroom when they are carrying a marching jingle stick?  Best of all, the materials needed for this craft are often trashed (extra ribbon, tape, cardboard wrapping tubes, stray jingle bells) so this craft encourages you to upcycle, exercise and make music all at the same time.  What a great way to begin the holiday fun!

Make Your Own Jingle Stick

Here are the supplies to assemble:

A jingle stick – look for a cardboard tube from wrapping paper, 3 foot ruler or large stick

1 (or more) pipecleaners

6 – 10 jingles per pipecleaner

Colorful electrical tape or duct tape

Optional: Paint, stickers, yarn or duct tape, for decoration.

Screen shot 2013-11-15 at 3.05.34 PMBegin by stringing any number of jingles onto a pipecleaner.  Use electrical tape to fasten the pipecleaner into place on the stick.  It helps to fasten the pipecleaners to the stick between the jingles as well.  If you like, make several pipecleaners strung with bells to add to different parts of your stick.

Once the jingles are in place, decorate the rest of the marching stick.  Use paint, more tape, colorful ribbon, yarn or stickers to make it unique and wonderful.

Time To Play!

Other then using the jingle stick to lead a parade, there are lots of ways to get creative with your new instrument.

Sing any of your favorite holiday songs along to a beat created by your marching jingle stick.

Try tapping the stick on the floor while marching and use that sound as part of the rhythm being created.

Use marching jingle sticks as part of a holiday music presentation.

Try playing the jingle stick at a particular part of the song (like the chorus) or when you hear a particular word in a holiday song.  For instance, a class can jingle the bells only when you hear the word “jingle” in the song “jingle bells”.

If you like, try it along to this version of Jingle Bells which shares lots of different ways to say “Happy Holidays” in different countries around the globe.

Resources

Jingle Anklets –  http://www.dariamusic.com/docs/jinglebells.pdf

4 Easy Jingle Bells Instruments For Holiday Fun  – Craft Booklet from TeachersPayTeachers http://www.teacherspayteachers.com/Product/4-JINGLE-BELLS-CRAFT-ACTIVITIES-940926

4 Easy Jingle Bells Instruments For Holiday Fun  – Craft Booklet from DARIA’s Little Village Store http://dariasvillagestore.storenvy.com/collections/34585-all-products/products/3498803-4-jingle-bell-craft-activities-booklet

Halloween Musical Fun!

monster rattlesMusic is a great way to share the lighter side of Halloween.

We recommend creative crafts and some of the classic kids songs and rhymes as ways to connect with the changing seasons and focus on a creative and whimsical celebration of Halloween.

Make A Silly Monster Rattle

Have any extra egg cartons?

It’s easy to make this kids rattle inspired by a real jawbone instrument from Peru.  In the actual instrument – called a quijada – teeth rattle in the sockets making the percussion sound and keeping a beat.  Spooky, huh?

In our version, one object goes into each egg space creating the same type of rattling effect.  Here are some suggestions that make great noise-makers for this Halloween craft:

monster rattles - innerds12 pebbles or stones
12 acorns
12 jingle bells
12 buttons
12 pieces of dried pasta
12 marbles

Once you’ve counted to 12 and sealed up your rattle, it’s time to give it a mask!  Pick a bright, colorful mask or get out crayons and markers and use the black and white versions to color your own.  Complete directions and masks are all on the free pdf at the link below.

5 Little Pumpkins And Five Little Turkeys

I love how kids enjoy these simple poems.  They are so proud to find they’ve mastered the skill of counting to five and can hear how the words work as a rhyme!  Here’s two of our favorite “5” rhymes:
5 little pumpkins
5 Little Pumpkins

Five little pumpkins sitting on a gate.

The first one said, “oh my it’s getting late.”

The second one said, “there are witches in the air.”

The third one said, “but we don’t care!”

The fourth one said, “let’s run and run and run.”

The fifth one said, “I’m ready for some fun!”

OOOhh OOOhh went the wind 
And out went the lights

And the five little pumpkins rolled out of sight.

5 Little Turkeys
The 5 Little Turkeys went out to hunt for food.

The 1st one said, “I’m in a THANKFUL mood!”

The 2nd one said, “Let’s go eat some corn!”

The 3rd one said, “It’s a beautiful autumn morn!”

The 4th one said, “I’m filled with GRATITUDE!”

The 5th one said, “I need to change my attitude!”

Then the 5 Little Turkeys ate the corn and sat to rest;

Counting harvest joys and how richly they are blessed!

Halloween Finger Play Fun!

And here’s two Halloween songs and rhymes that work perfectly as fingerplays, too!

Ten Little Witches

One little, two little, three little witches
Four little, five little, six little witches
Seven little, eight little, nine little witches
Ten witches in the sky

Ten little, nine little, eight little witches
Seven little, six little, five little witches
four little, three little, two little witches
One little witch, bye bye!

(Finger Play – Use fingers to count up to ten and then back to one.)

Gobbling Turkey Finger Play

The turkey is a funny bird
His head goes “wobble wobble”
And he knows just one word
Gobble, gobble, gobble!

(Finger Play – Pretend your hand is a turkey – with the thumb as the head and the fingers as the feathers.  Wobble the head for the second line. Use your hand to point make a “1” with the “just one word”, then use your hand to pretend to gobble for the last line of the rhyme! )

Make Your Own Silly Monster Rattle

http://www.dariamusic.com/docs/MONSTERInstructions.pdf

Simple Instruments from Africa For Children

Making music with young children is a great way of combining creativity and fun with learning about global cultures.  Whether you are quietly crafting, reading and researching or drumming and dancing, here are some simple instruments that can be a part of any study of the diverse and beautiful cultures of Africa.

this tongue rattle hereMake It Rattle!

Different types of rattles can be found throughout Africa and the world.  They are easy to hold and play for kids of all ages and almost all abilities.   Here are three very different rattles from Africa – one that even can be seen in hieroglyphics that date back to ancient Egypt!  All of these are perfect to be made and played by small hands!

Tongue Rattle

http://makingmulticulturalmusic.wordpress.com/2012/10/02/make-your-own-african-style-tongue-rattle/

Caxixi Rattle

http://tinytappingtoes.wordpress.com/2013/02/05/make-your-own-woven-caxixi-rattle/

Egyptian Sistrum Rattle – Make It From A Recycled Hanger

the Eco-Egyptian Sistrum

Egyptian Sistrum Rattle – Make It From A Tree Branch

the Natural Egyptian Sistrum

Egyptian Sistrum Coloring Page
the Egyptian Sistrum Coloring Page

South African drummer - farahHands On The Drum!

There are an astounding number of different drums and drumming traditions throughout Africa.  Crafting a simple hand drum from recycled materials is a great place to start an exploration of drumming for very young children.

http://www.dariamusic.com/docs/Make%20Your%20Own%20African%20Drum.pdf

Shake A Shekere

In this unique and beautiful percussion instrument, the rattle is on the outside of the gourd.  It can be shaken back and forth, tossed hand to hand or used like a ball in simple children’s musical games.  To hear or color a shekere or find crafting instructions and simple activities, check out the links below.

shekere iconHear A Shekere

http://www.dariamusic.com/shekere.php

Color A Shekere Online

http://www.dariamusic.com/color_Shekere.php

Make Your Own Shekere

http://www.dariamusic.com/make_Shekere.php

Easy Gourd Shekere For A Kid Or A Classroom

http://tinytappingtoes.wordpress.com/2013/08/05/easy-gourd-shekere-for-a-child-or-a-classroom/

Alphabet Shekere

http://www.trueaimeducation.com/2012/10/guest-post-learning-letters-with.html


Make A Whistle – From A Blade Of Grass!

Even the simplest things can be a part of creative, everyday musical fun with your child!

Have you ever shown your kids how to make a simple blade of grass into a whistle that sounds like a duck call?  If this wasn’t one of your childhood games, don’t worry.  It’s easy to learn and a great way to share creative play with your child.

What Do You Need?

Only three things! A blade of grass, preferably a longer thin one, two thumbs and a bit of patience.  And as you try this activity, you might want to notice that you’re actually making a simple version of the type of reed found in woodwind instruments such as saxophones, clarinets and oboes.

How To Do It!

Although this seems easy, it does take some time to get the right sound, so don’t give up if it doesn’t work the first few times!  Place your two thumbs together, leaving space between them like you see in the above picture.

Next choose a long, thin piece of grass, and stretch it between your thumbs, making it as tight as you can.  The grass should look as if it is dividing the space between your thumbs.

Then, put your mouth up to your thumbs and blow gently.  A loud, squawking sound should emerge that sounds like a duck.  If not, adjust the grass, try another blade of grass or change your mouth position until you get the whistling sound.

With a bit of practice, you can be a “duck call” pro in no time! Here’s what it might sound like:

Making Music From Natural Items

Love spending time outdoors or in nature?  Here are some related musical crafts that you might enjoy:

Take A Nature Walk – Make A Recycled Rattle
http://tinytappingtoes.wordpress.com/2012/03/26/take-a-nature-walkmake-a-recycled-rattle/

10 Earth Day Music Crafts From Recycled Materials https://www.teacherspayteachers.com/Product/Reduce-Reuse-Recycle-Rock-Out-E-Book-With-10-Musical-Activities-653502

Make Your Own Recycled Shaker Eggs

Everyone loves those bright colorful eggs that go chugga-chugga-chugga when you shake them.  They’re a wonderful addition to any classroom or children’s music area.  But, can you whip up your own version at home from recycled or on-hand materials?   Absolutely!

Supplies

Shakee egg suppliesSupplies for this craft are easy.  Any “child-proof” medicine bottle.  A small amount of any type of filling such as dried beans, beads, rice, bird seed, grain (such as quinoa), sand, salt or tiny pasta like pastina.  You’ll also need a sturdy tape – colorful electric tape works wonderfully and doesn’t unravel after hours of play.

What if you don’t use that kind of bottle?  Ask around.  Often friends, colleagues, neighbors or family can save an item like this for you and you can save one more plastic product from making it’s way into the waste stream.

Make Your Own

This craft couldn’t be easier.  Simply fill and seal your bottle.  Before you add the tape, make sure you enjoy the sound. You might be surprised how having less filling in a bottle can create a nicer sound.  Is your rattle loud or soft enough?  If not, adjust what you’ve put inside.

Although I usually recommend that parents or caregivers make crafts with kids, this is one that may be best to make without the children present. Since the project uses aspirin or medicine bottles, it may not be a great idea to give the impression that these bottles; when filled with their original contents, are playthings.

To cover the bottle and turn into a shaker egg, wrap it in tape.  Feel free to be creative with striped patterns using different colored tape, if you like.

hands with shaker eggsShake Your Own

How complex can playing shaker eggs be?  You might be surprised at the many different ways you can play them.

Shake one quietly.
Shake one loudly.
Shake back and forth.
Shake up and down.
Swoosh the contents around inside (in a circular motion).
Shake two different eggs – one in each hand.
Shake two different eggs, alternating back and forth.

You get the idea – right?

Even this simple egg-style shaker can be great at building motor skills, listening skills or as a part of any musical activity.

All Eggs Are Not The Same

If you’ve made several eggs with different fillings, you’ve probably noticed that each sound a bit different.  Larger beads or dried beans will make a louder noise.  Tiny beads, grain or sand will make a very quiet sound. This can be a fun way of learning loud and soft or interacting with your child.  Ask them questions like:  “which egg shall we use for this song?  What sounds best to you?”.