Tag Archives: kids crafts

28 Kids Crafts To Reuse Plastic Straws

drying straws
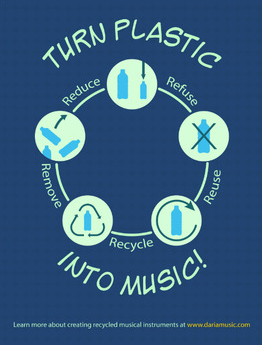
Are you trying to use less plastic?

I meet more and more parents who are striving to use less packaging and plastic products.  And it’s really encouraging to even see big companies – like Starbucks and the entire Marriott hotel chain – phasing out plastic straws altogether!  But even if you are the most recycling-conscious family, you’ve probably ended up with some of those pesky plastic straws and wondered what to do with them.

Instead of tossing them into the waste stream, here are a host of great activities that reuse these not-so-disposable items and are fun and productive kid’s crafts as well.

Clean Your Straws

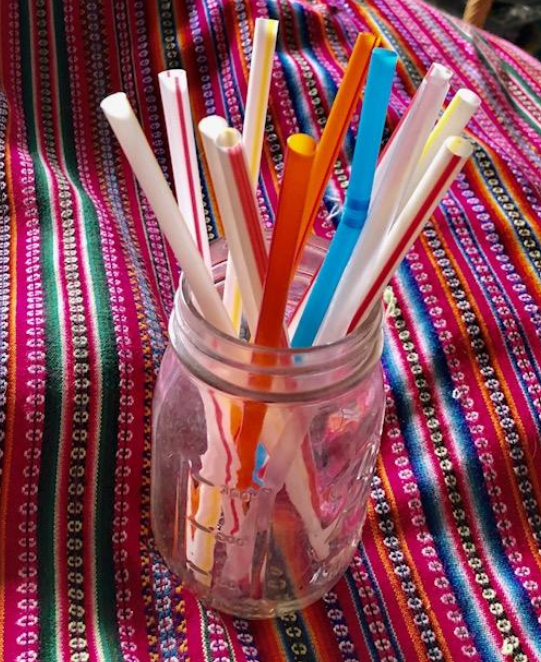
If you’ve ended up with straws from juice, smoothies or soft drinks you can easily clean them off before you craft with them.  Rinse them in soapy water and let them stand them in a jar or glass for a few minutes (as seen above).  In no time at all, they’ll be clean and ready to be used in any of the crafts below!
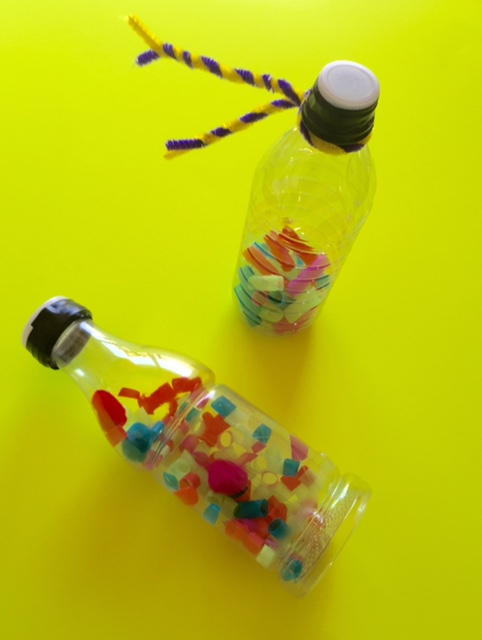
Straw Rattles Completed On YellowA Quiet Rattle

We love this craft!  It is fun to make, also reuses plastic bottles and creates a quiet rattle that is never too loud, even when playing with bunches of friends!  And if the straws you’ve used are colorful, they make wonderful patterns of colors as you shake them along to music.

What To Do

Cut the straws into small lengths, anything the size of a small bead to about an inch long.  Cut them all the same length or mix up the sizes.  And if you have straw pieces left, they are perfect for the sensory bins listed below or even the friendship bracelets!

To create the rattle, simply allow your child to drop any number of their favorite colors and sizes into the plastic bottle.  When it looks and sounds perfect to your little one, put on the cap and seal with a sturdy electrical tape.  This keeps the contents inside the rattle and makes the end-product child-safe.

Note: while creating any of these crafts, make sure the small pieces of straws don’t go in a child’s mouth.

More Musical Straw Crafts!

josef playing straw zamponas
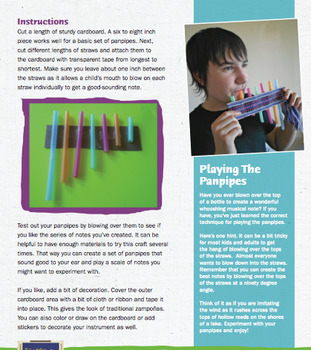
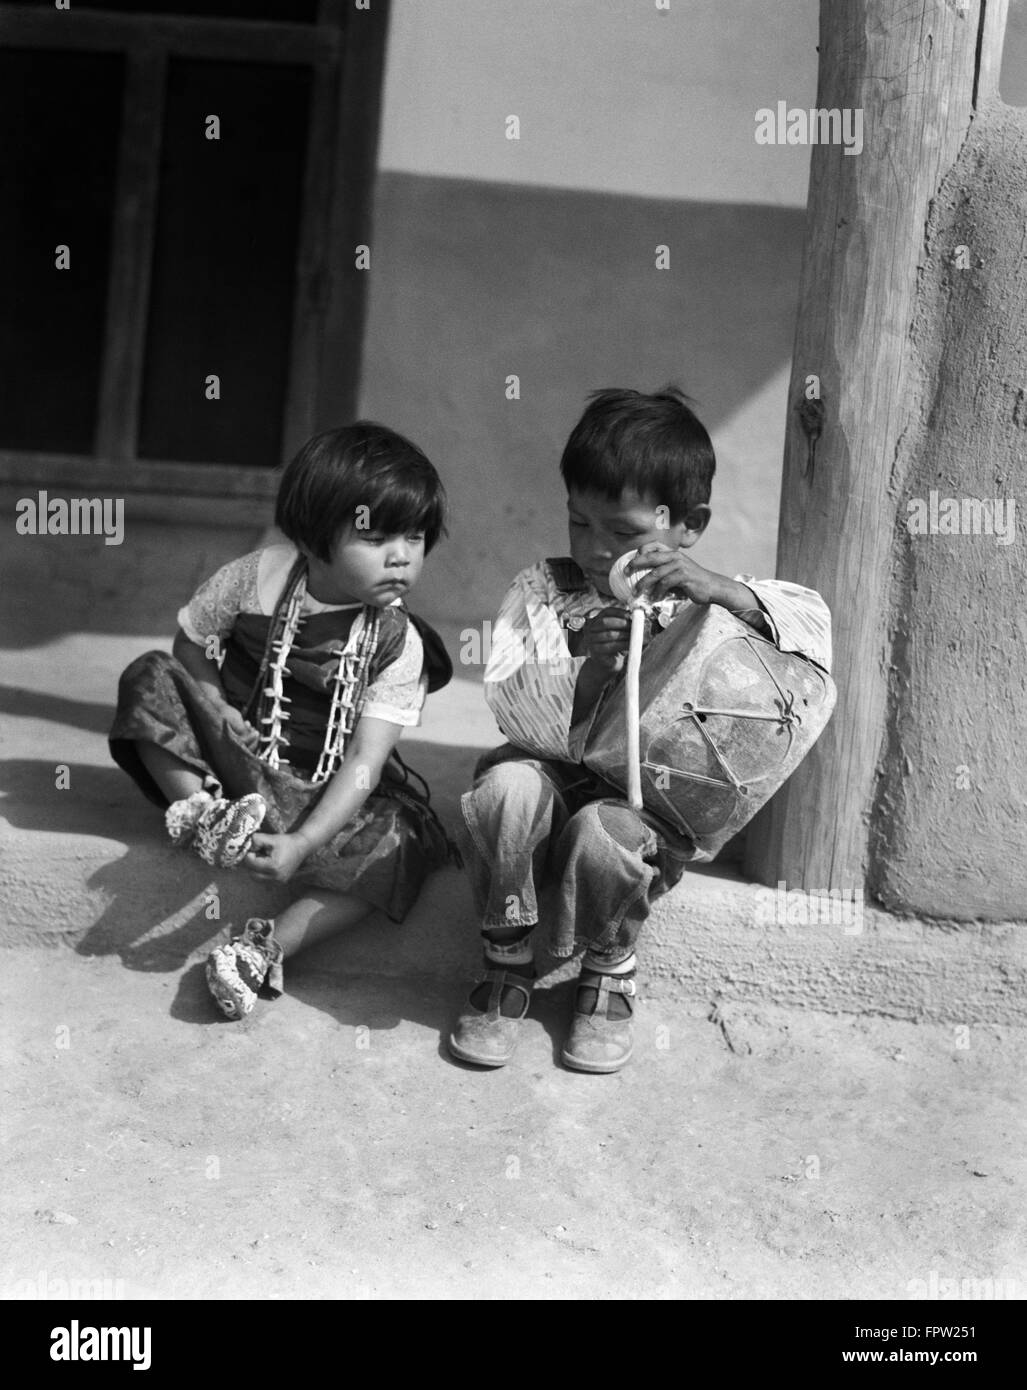
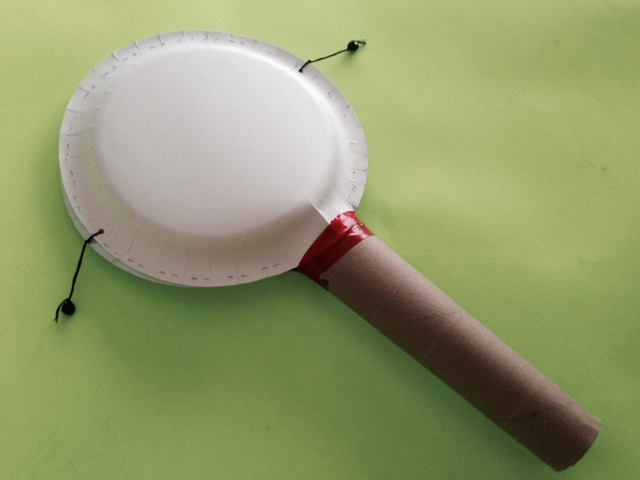
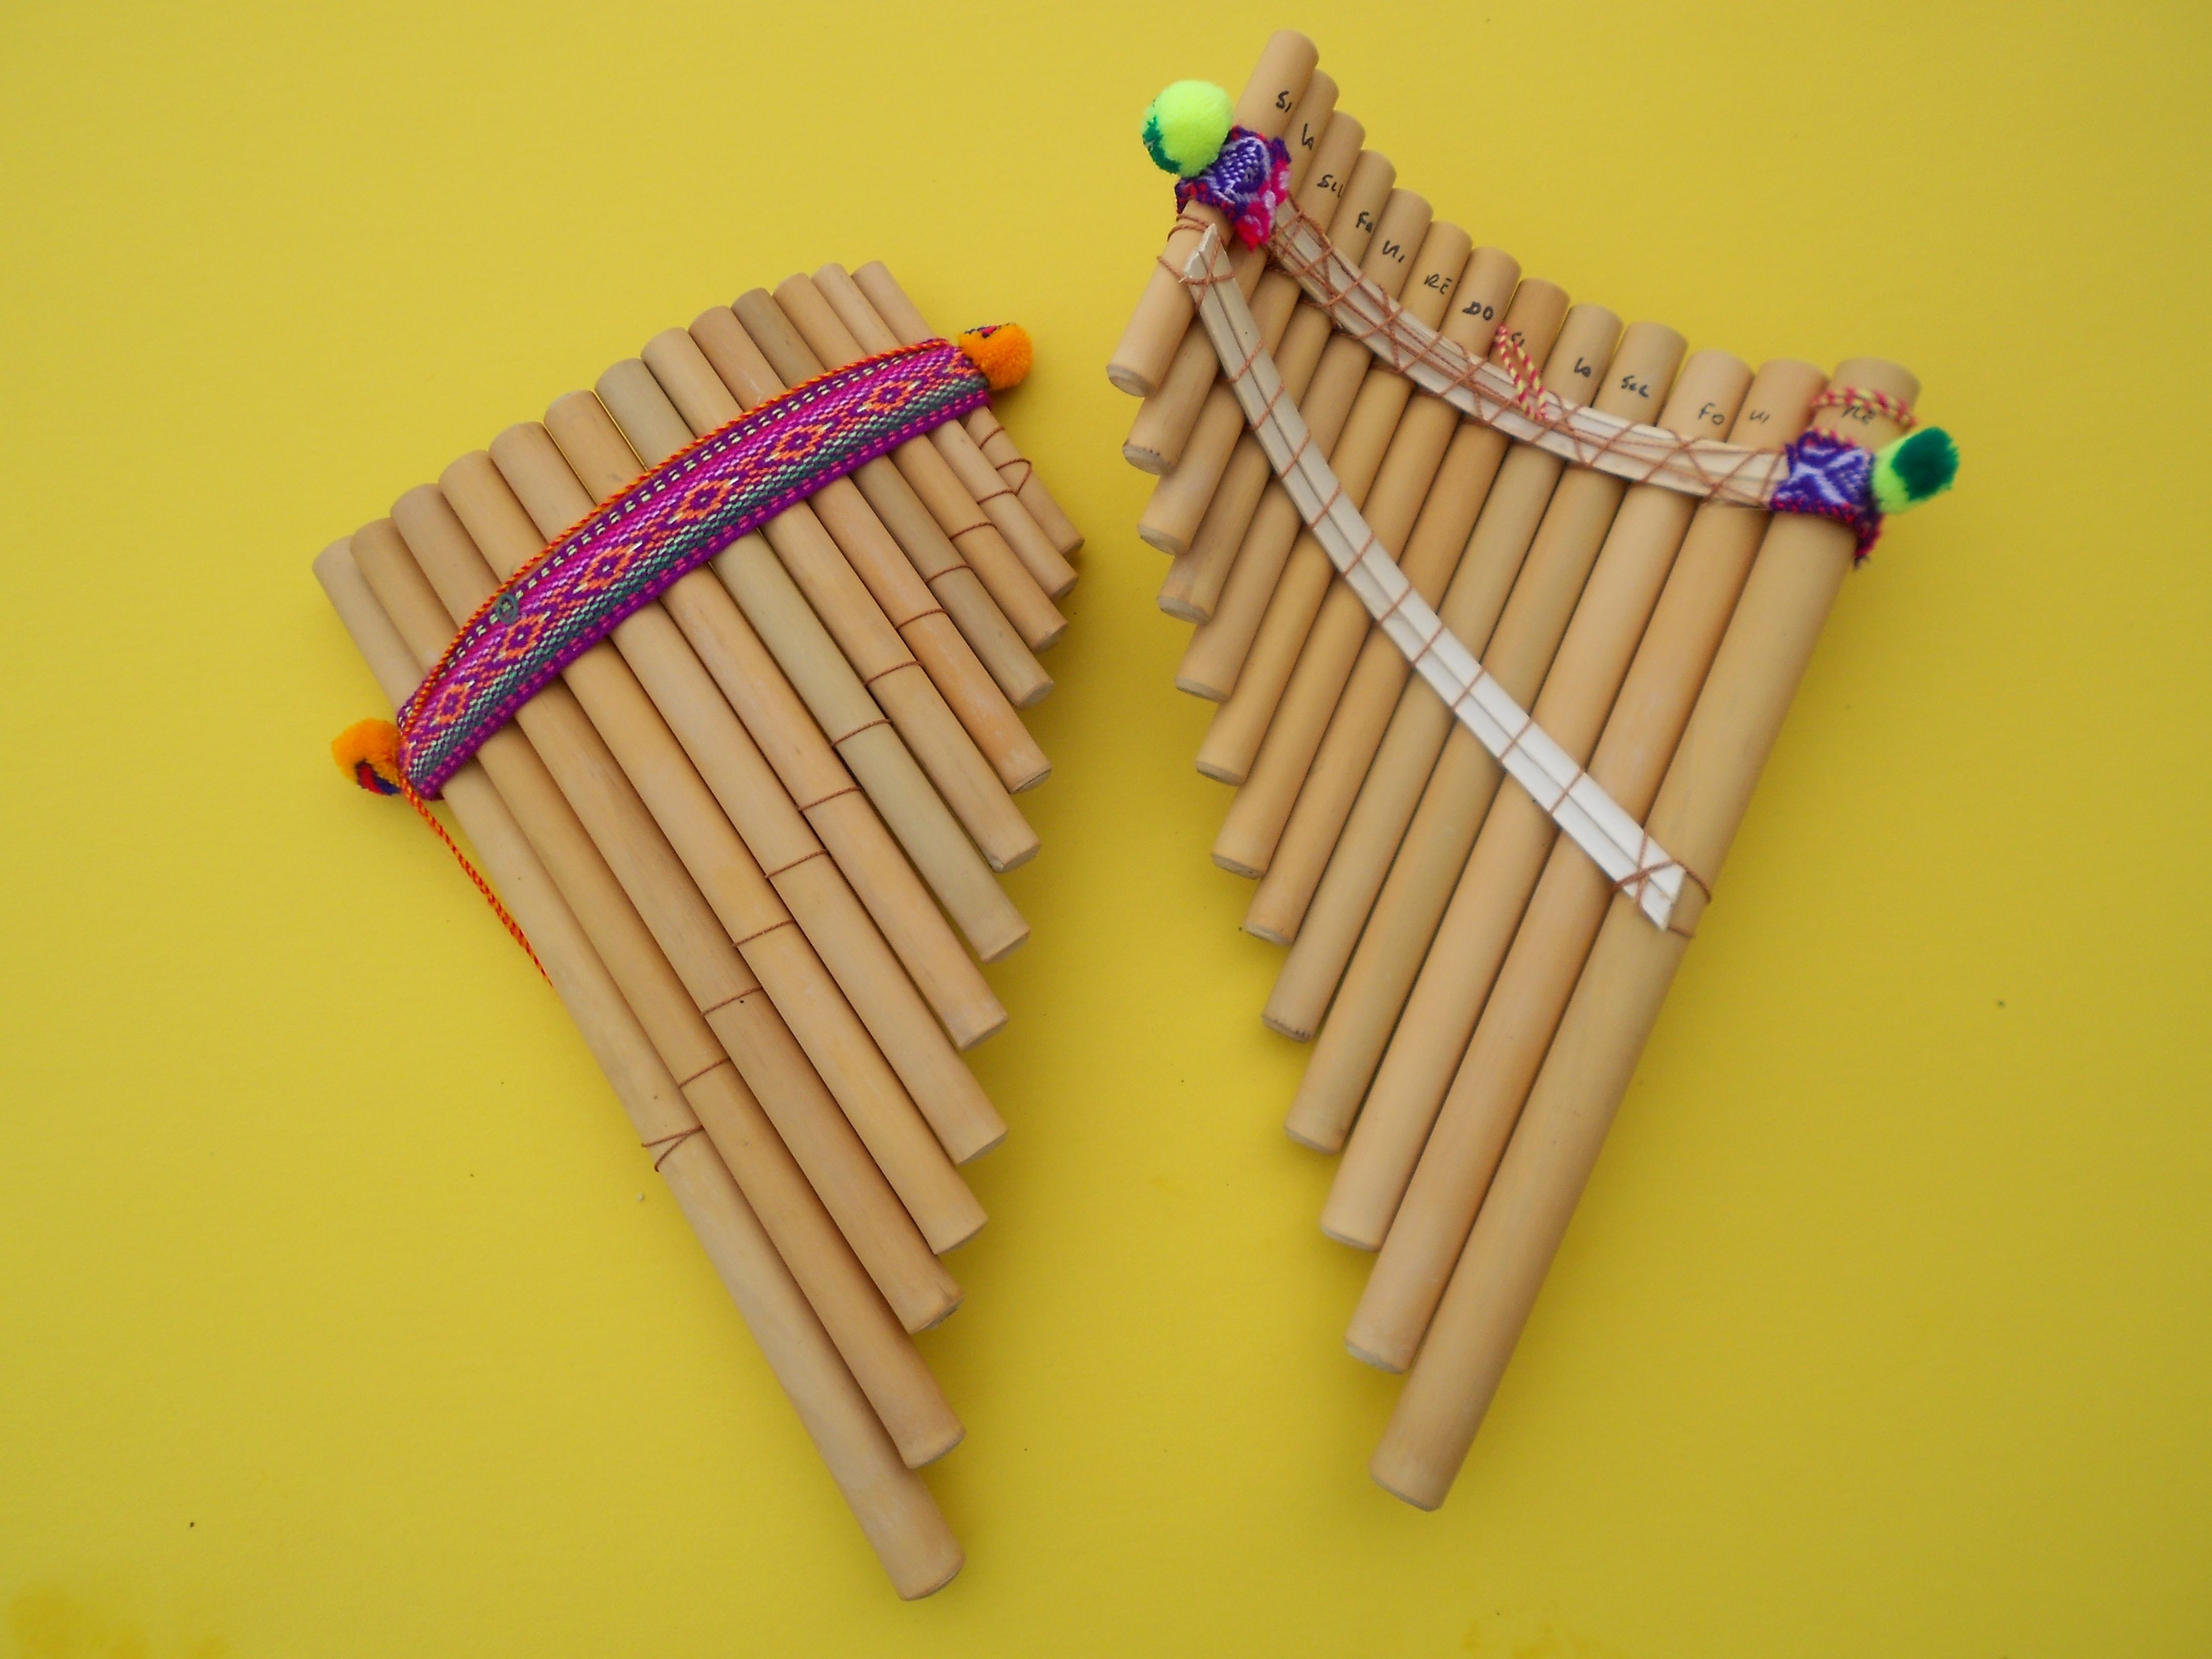
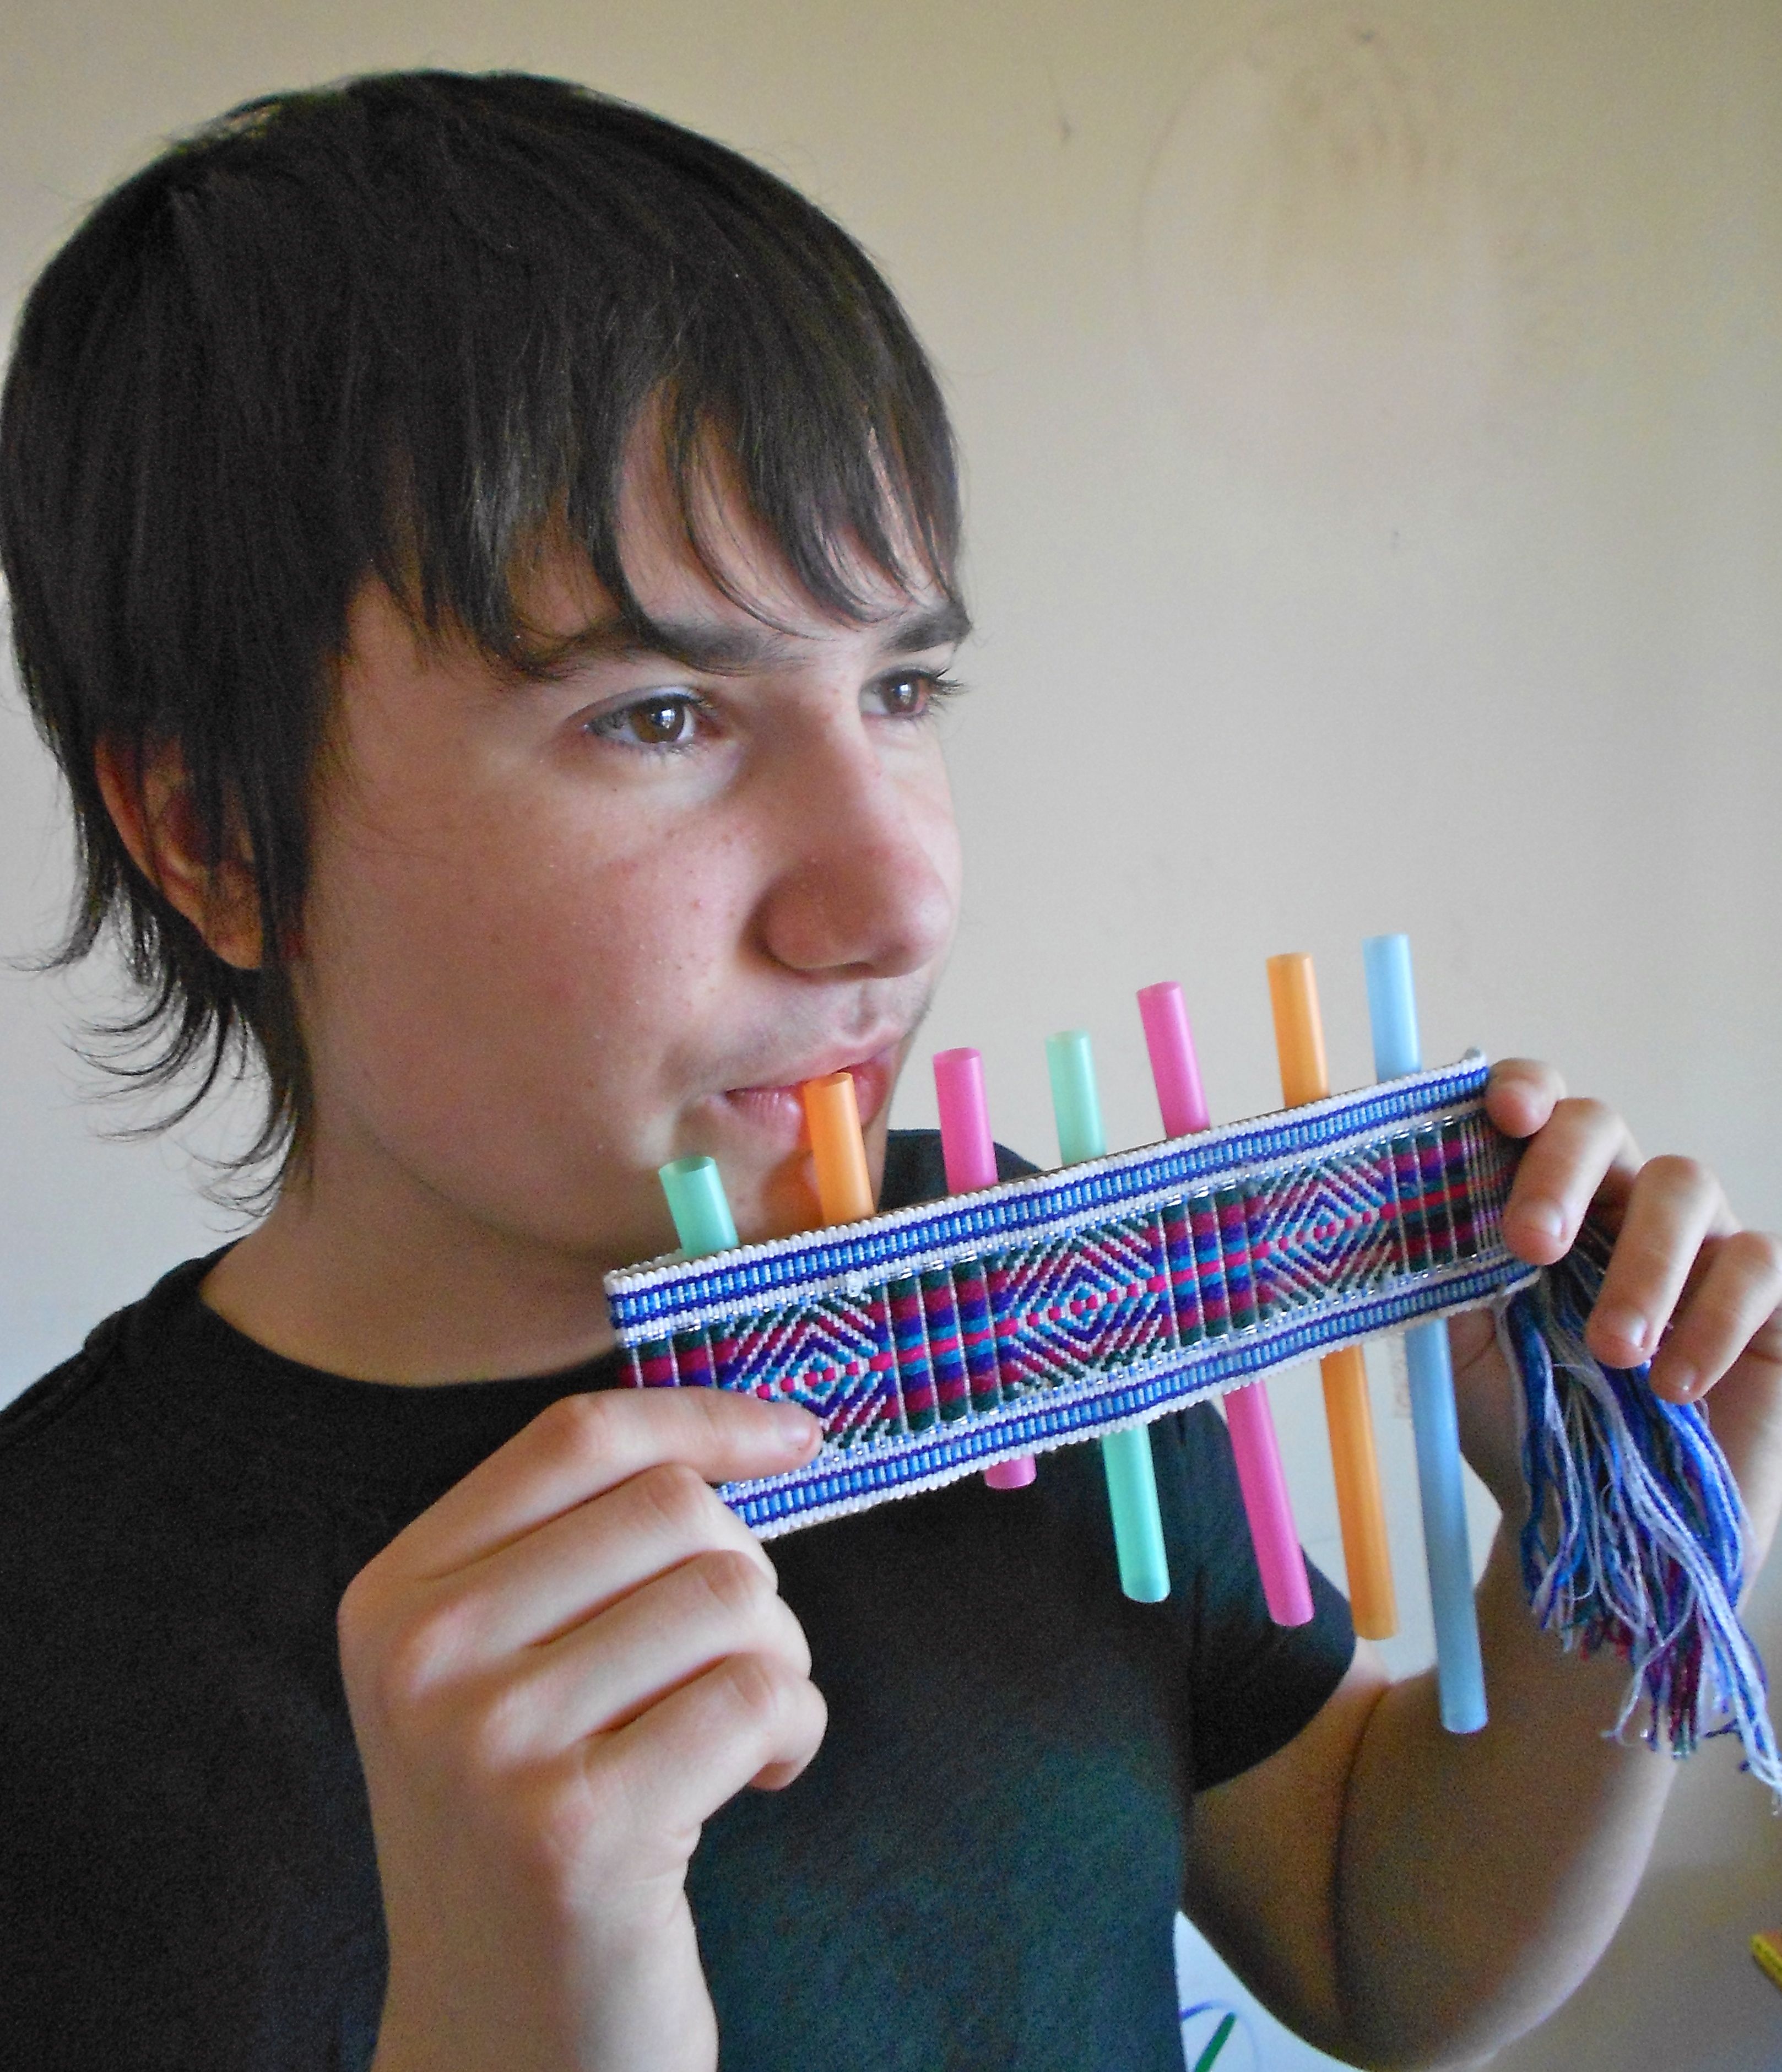
Panpipes Made From Straws
http://www.tinytappingtoes.com/early-learning-with-music/make-your-own-simple-panpipes/

Use straws as the contents to a “Roly Poly” Thing
http://www.tinytappingtoes.com/babies-and-music/make-a-roly-poly-musical-thing/

Use straws as the contents to an ocean drum
http://www.tinytappingtoes.com/babies-and-music/make-an-ocean-drum-for-world-oceans-day/

maracas - back to school
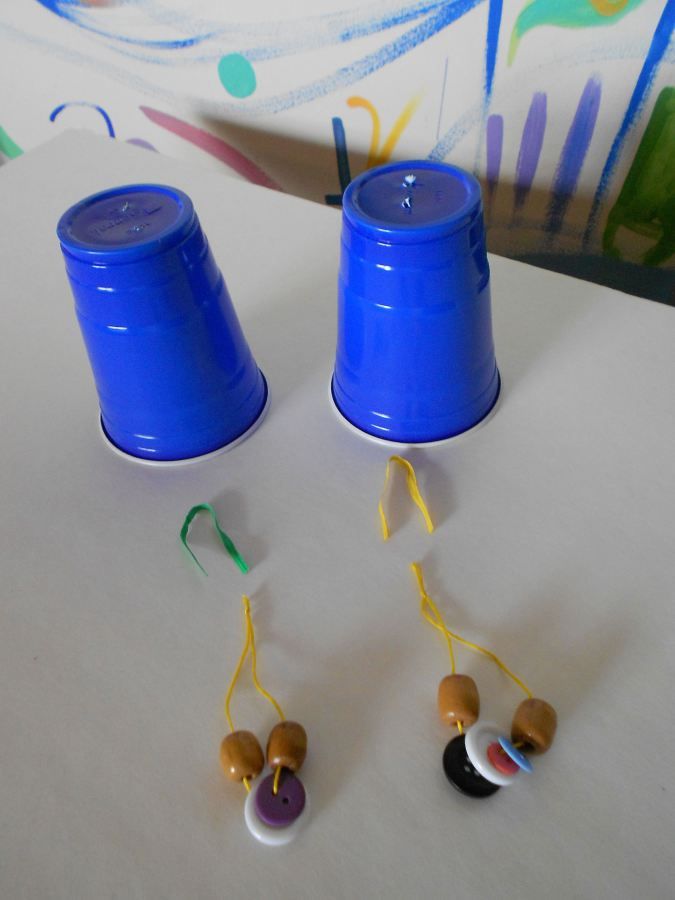
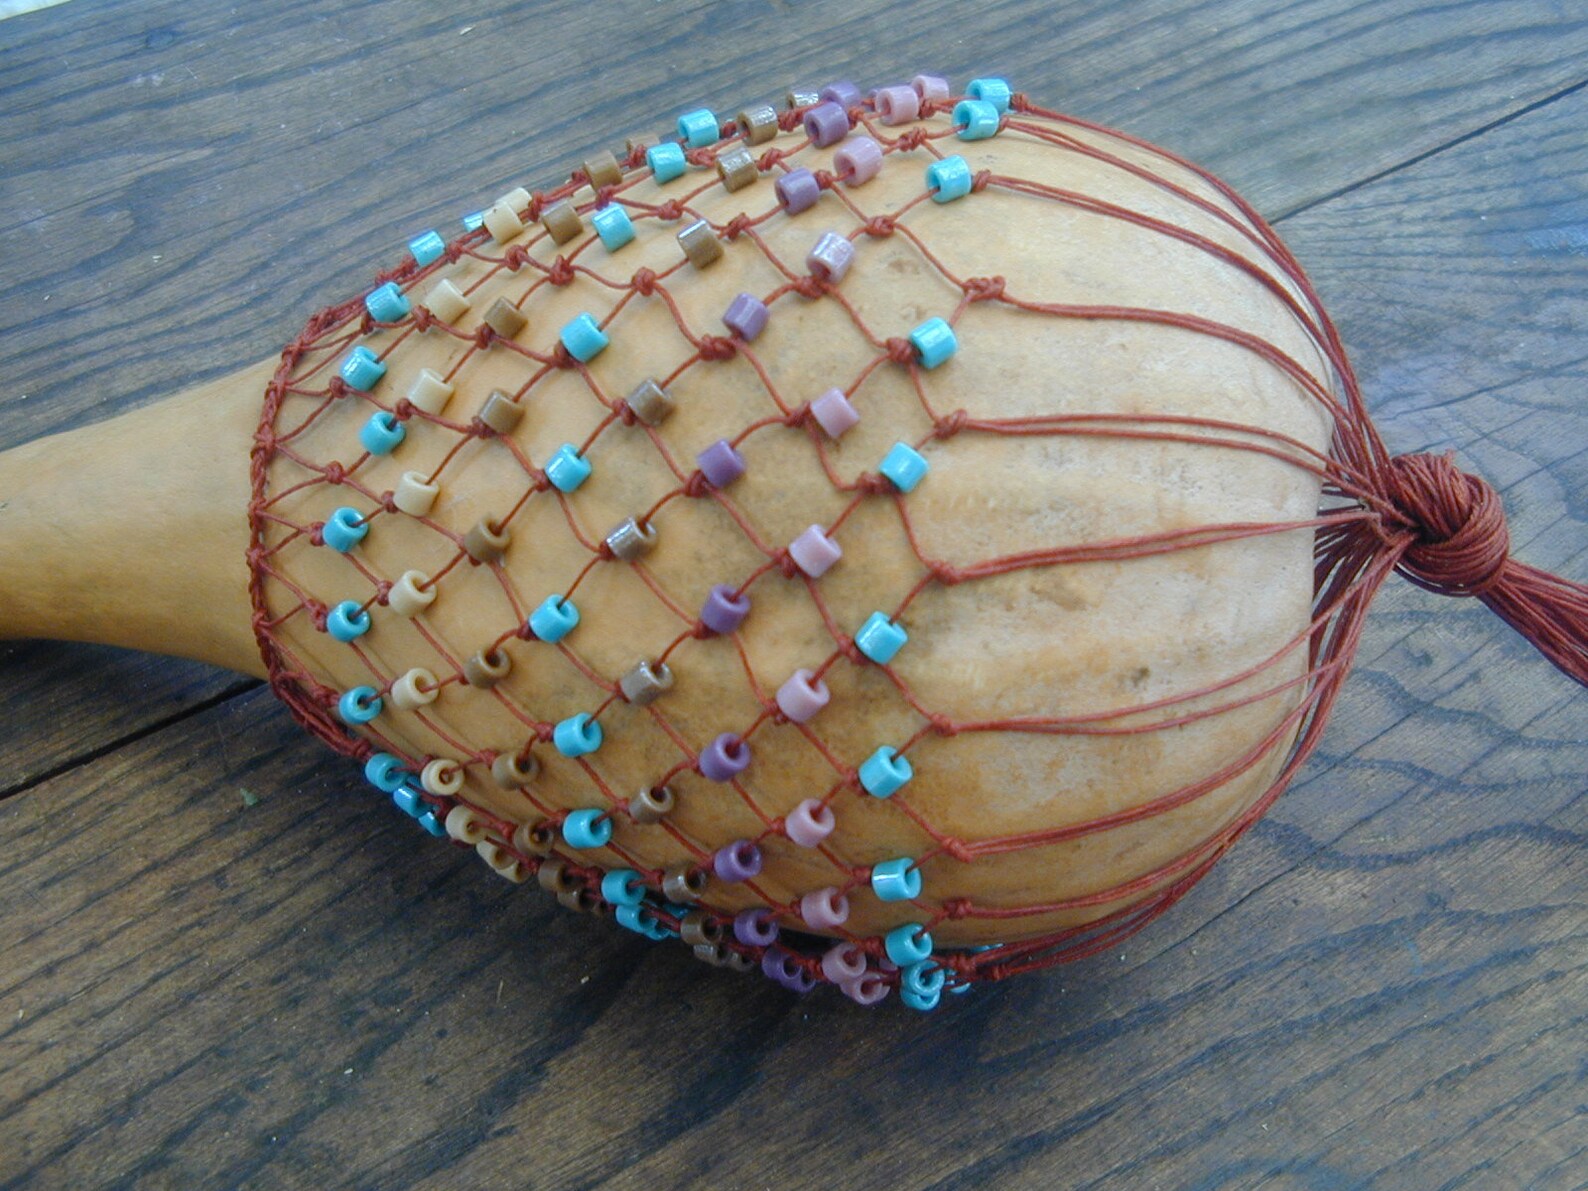
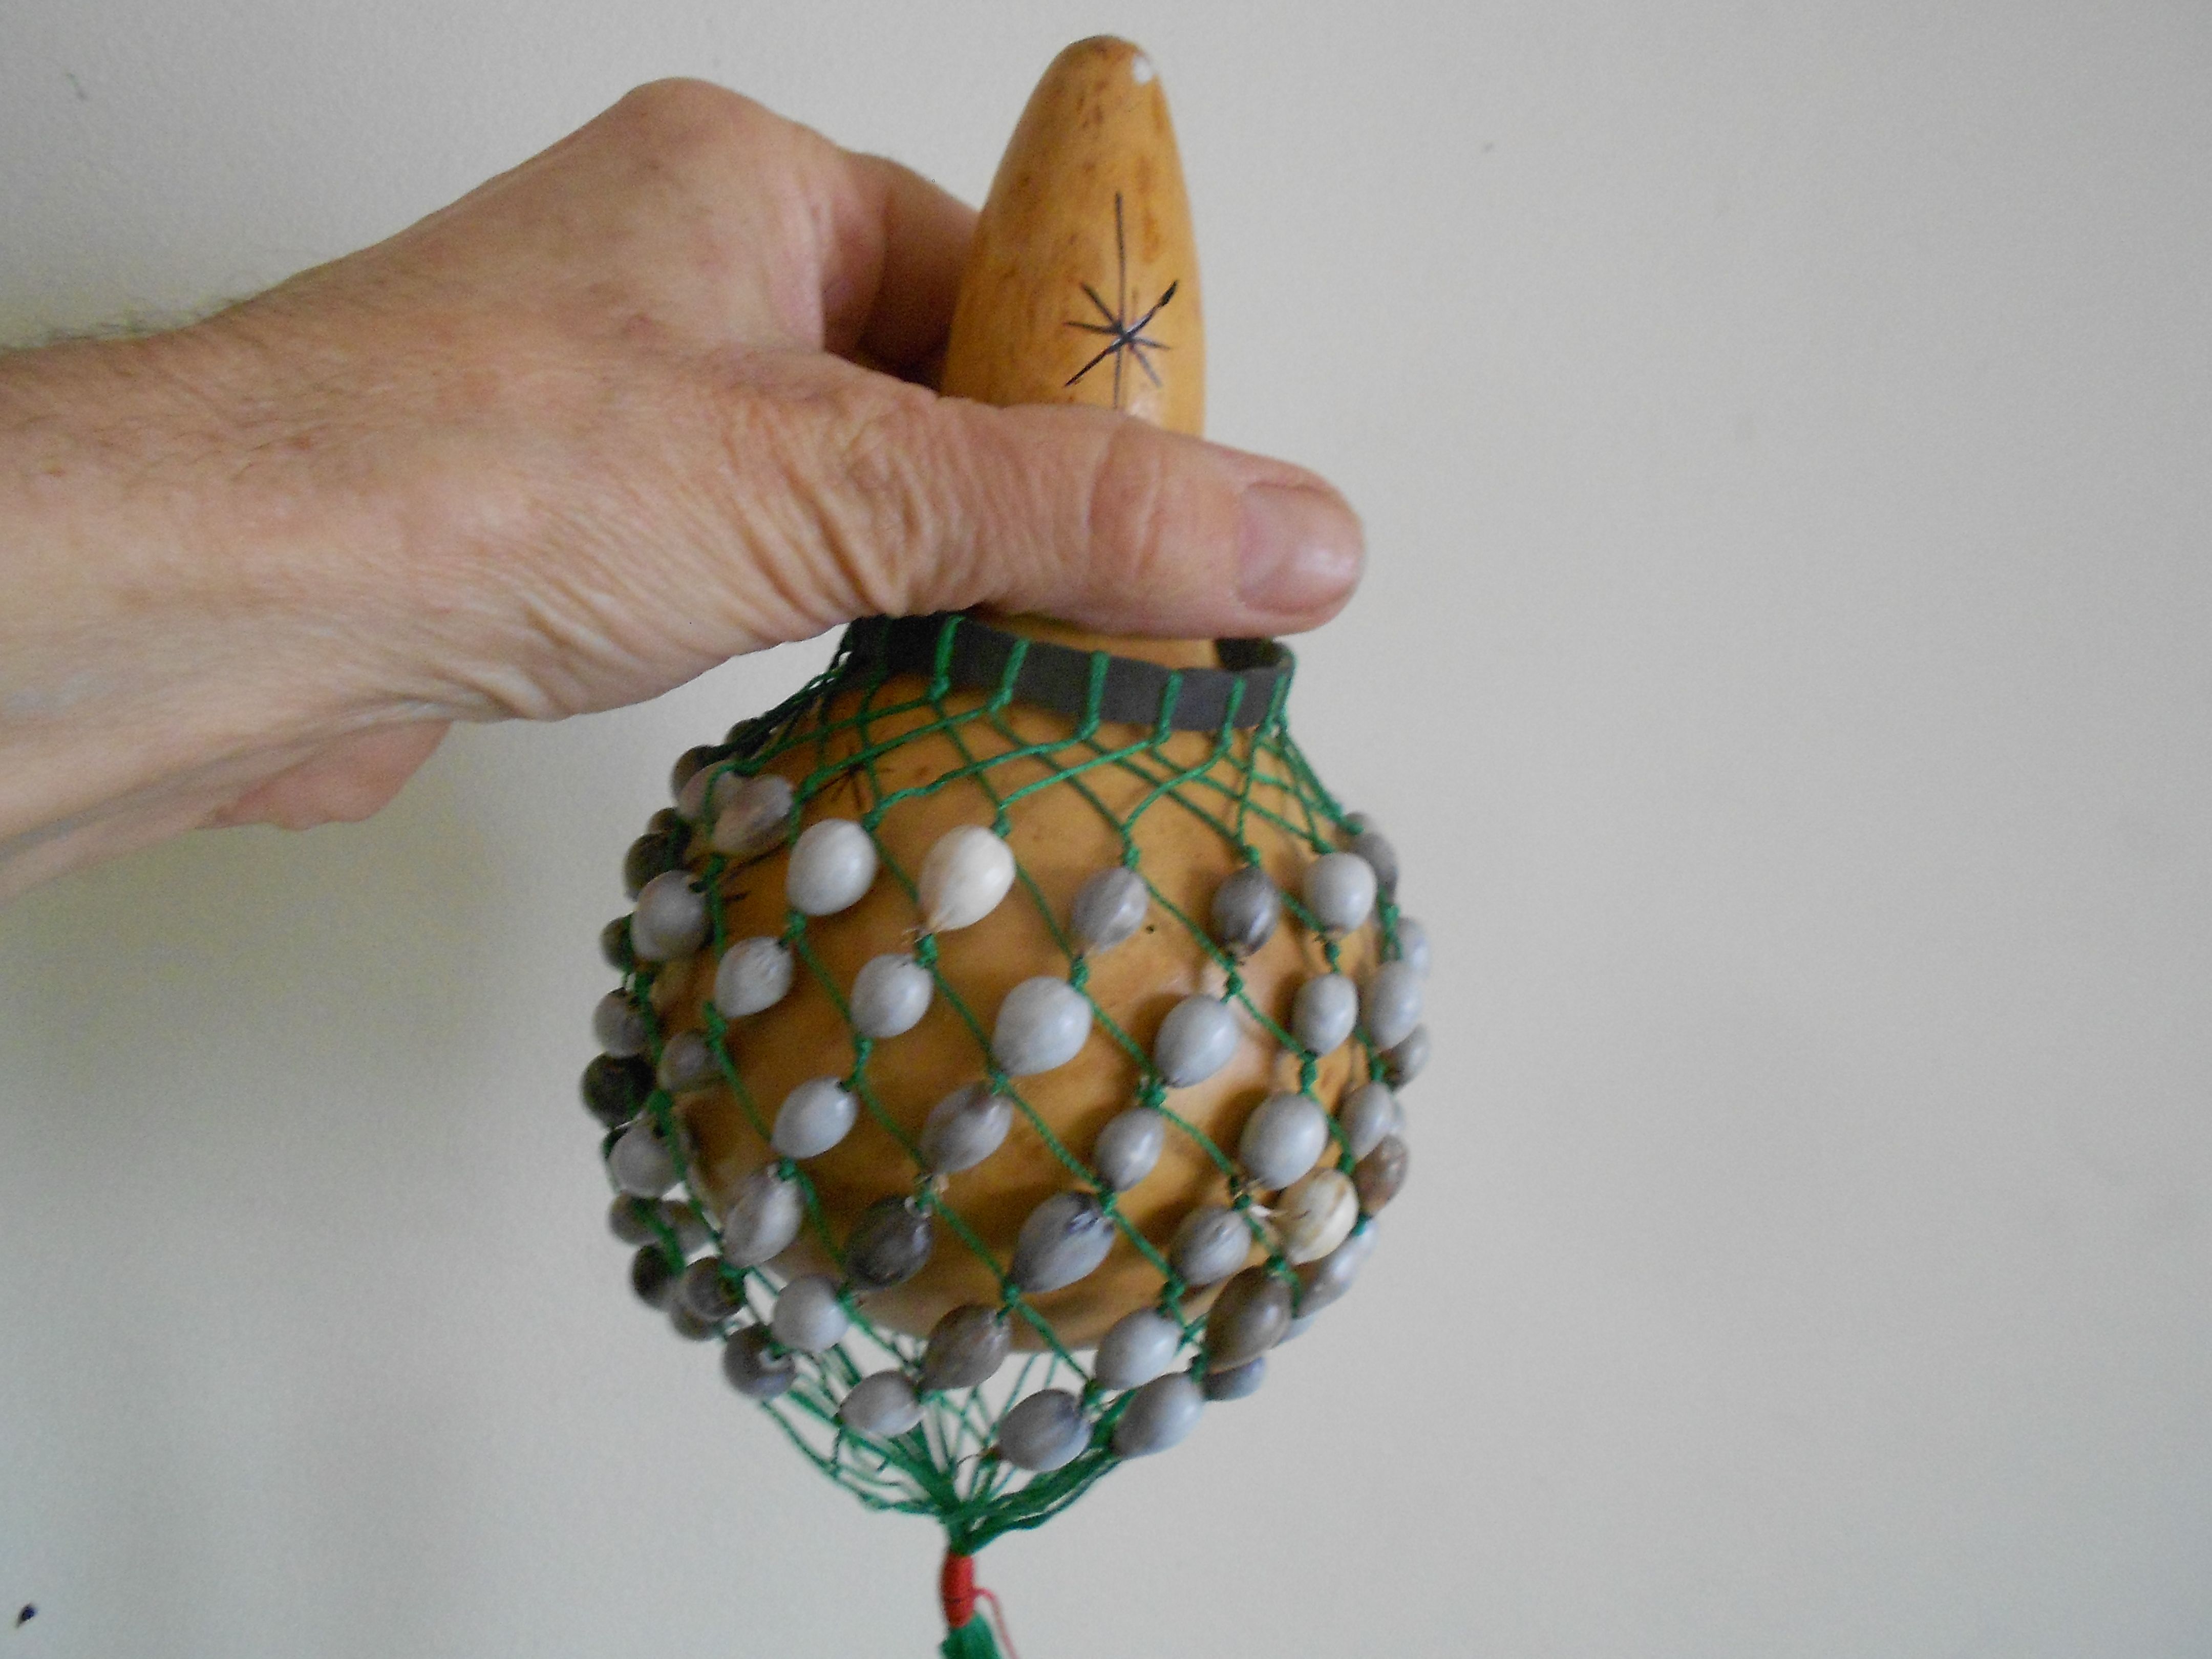
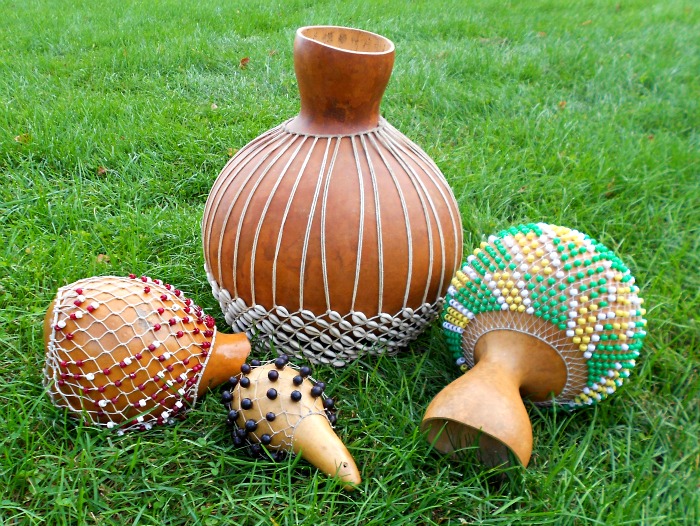
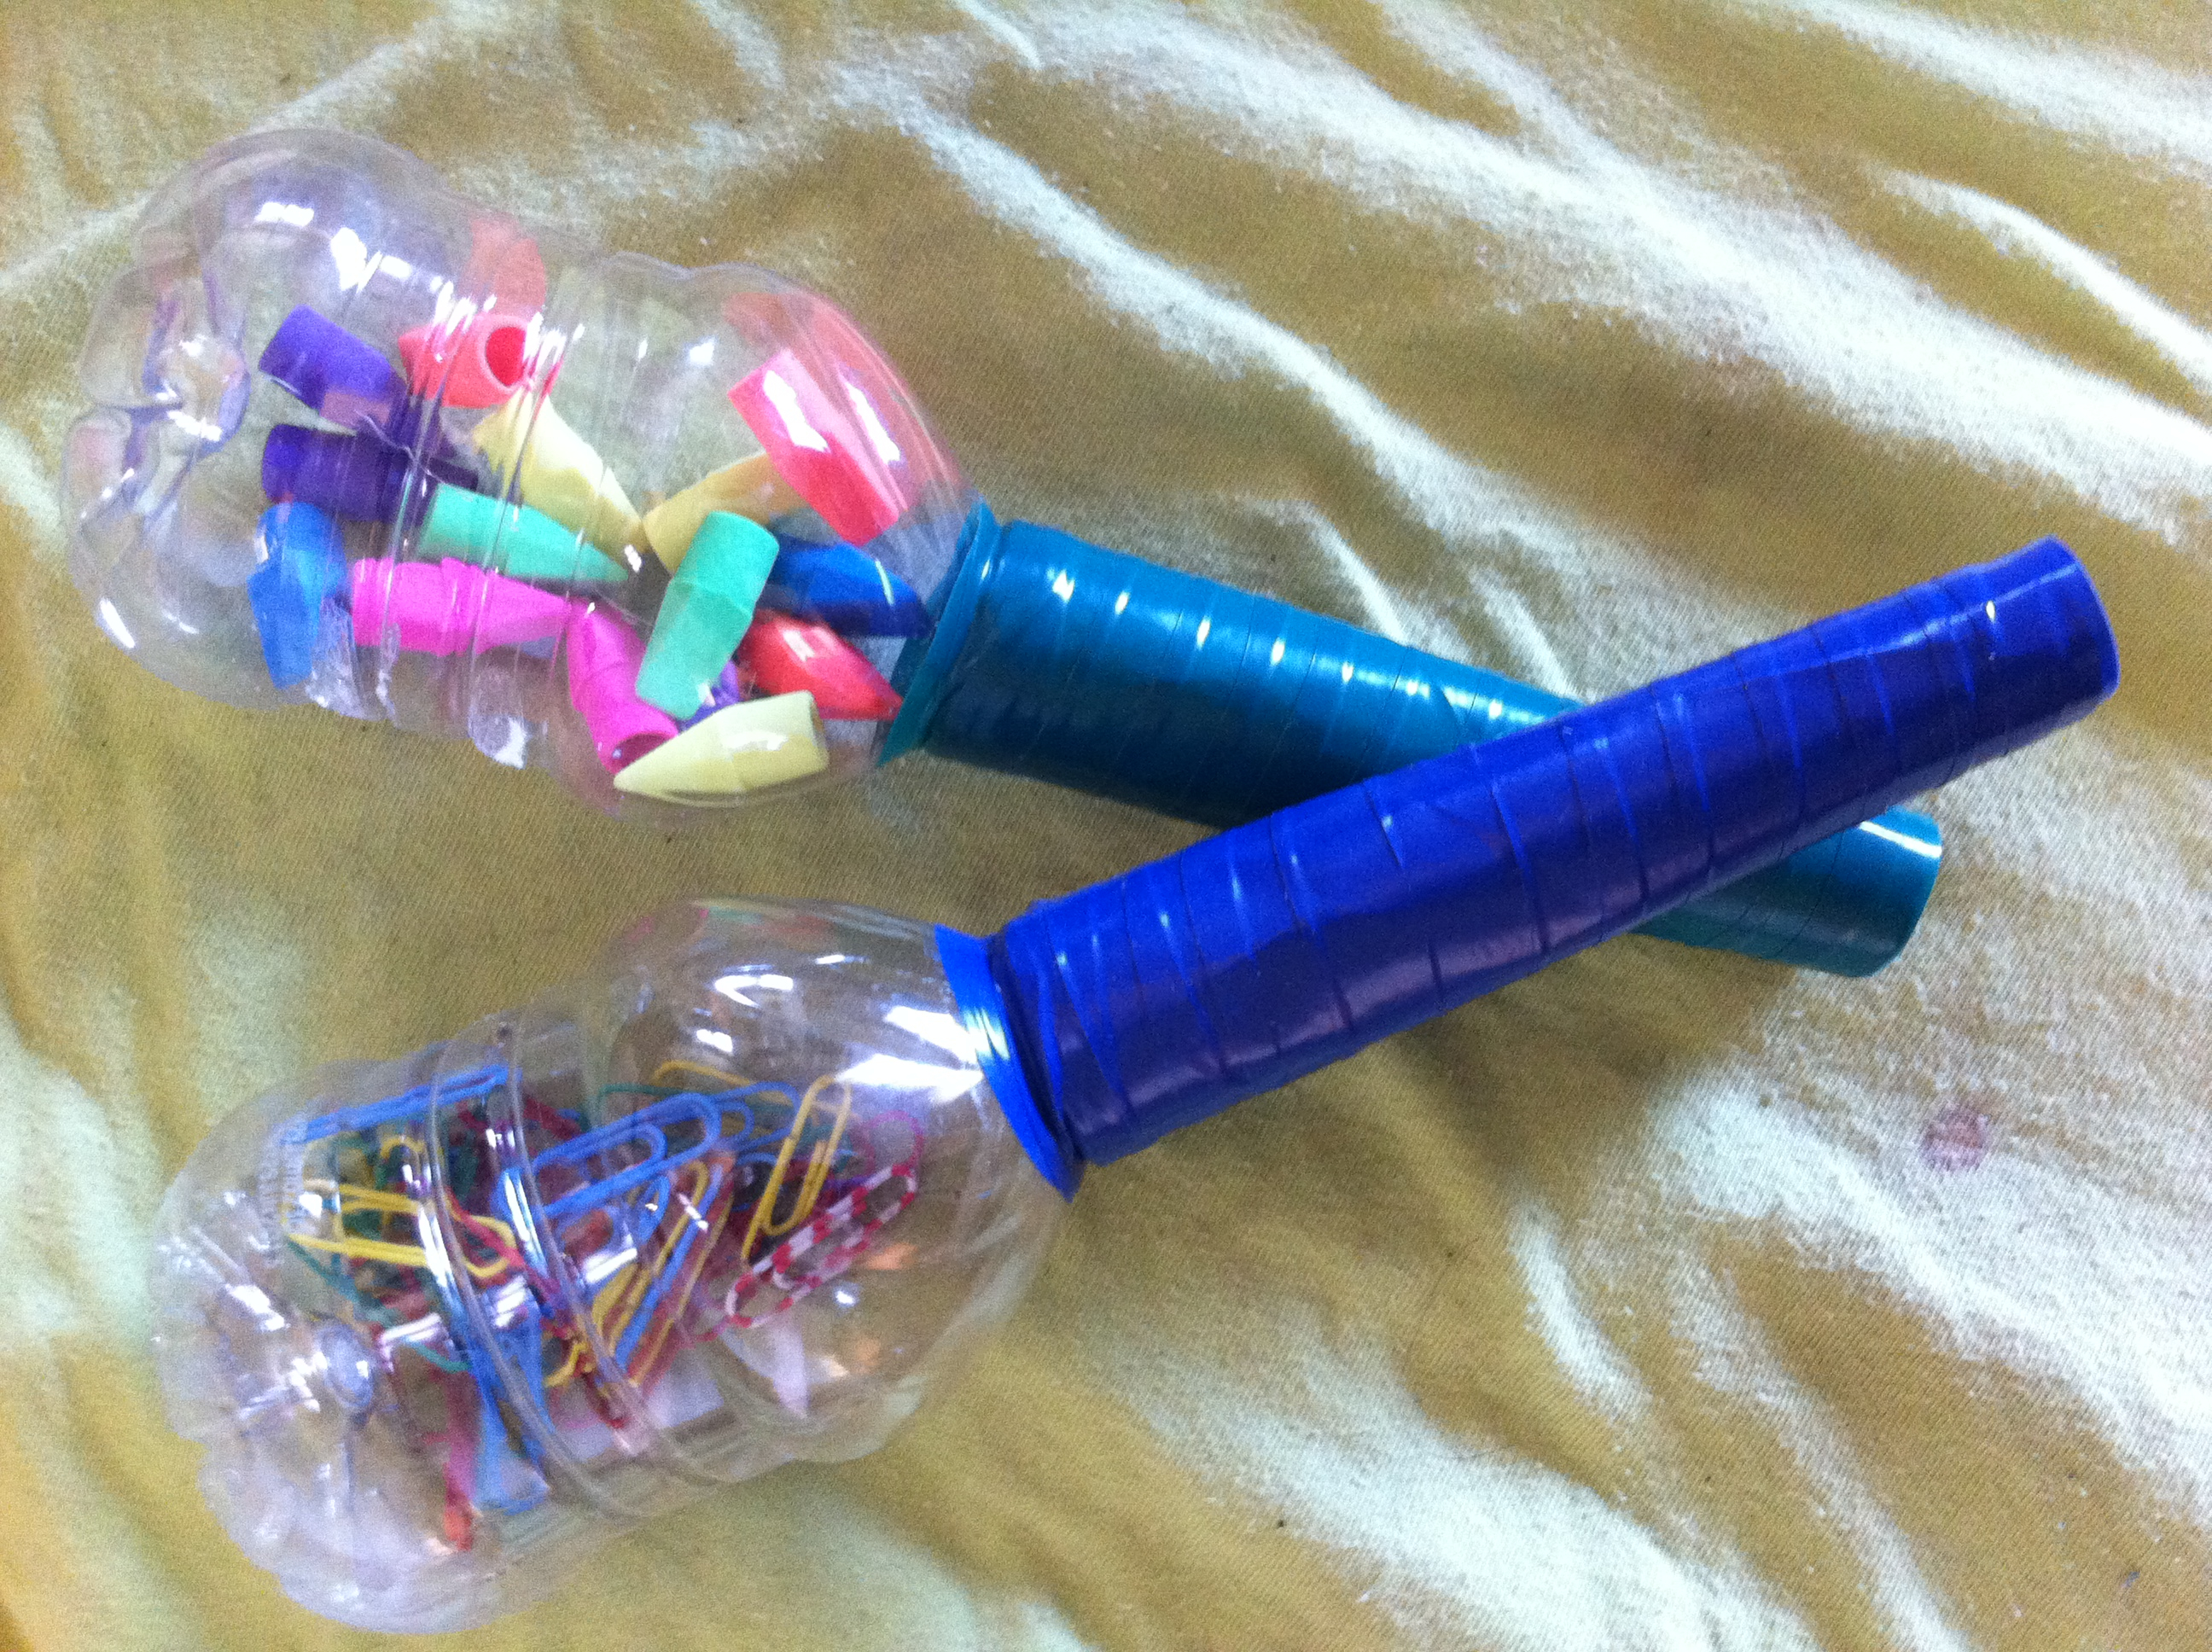
Use straws as the contents to a set of maracas
http://www.tinytappingtoes.com/uncategorized/an-easy-musical-craft-for-young-children-back-to-school-maracas/

Other Straw Crafts You’ll Love!

Sensory Bin With Straw Pieces – From Teaching Mama
https://teachingmama.org/plastic-straw-sensory-bin/

20 Assorted Drinking Straw Crafts For Kids- From Meraki Lane https://www.merakilane.com/20-drinking-straw-crafts-for-kids/

Simple Friendship Bracelets Made with Pipe cleaners and “Straw Beads” – From Kiwi Co – https://www.kiwico.com/diy/Arts-and-Crafts-Ideas/1/project/Straw-Bracelets/1169

More Crafty And Elegant Straw Bead Bracelets – Tutorial below and here’s hoping you reduce, reuse recycle and rock out with any of the crafts you’ve found here!

FacebookTwitterGoogle+Share

This Earth Day – Turn Plastic Into Something Fantastic!

Screen shot 2018-04-19 at 11.38.43 PMThis year’s Earth Day theme is End Plastic Waste! We hope you’ve been reading about this topic and moved to make changes in your own life. But, what about plastic you already have in your recycling bin? Creating fun recycling projects with kids will help them see plastic waste as more than just “use it and lose it” trash. As you practice the 5 R’s (Refuse, Reduce, Reuse, Recycle and Remove) you can upcycle out of the waste cycle into 5 great-sounding musical instruments.

This Earth Day, I’m offering my TURN PLASTIC INTO MUSIC E-book free, and you can download it at the link below. (If you are an educator with a limited budget and read this post after the E-book has returned to full price, you can always e-mail me at dariamusic at yahoo dot com for an educator’s copy.)Screen shot 2018-04-19 at 11.38.58 PM

The five projects in this book include amazing-sounding maracas from mini-sized water bottles, Latin American guiros and Aboriginal bullroarers from plastic bottles with various sizes of mouths. There’s also two crafts that use plastic straws – zampoñas or panpipes and a kaleidoscope straw rattle.

And really… wouldn’t you rather make music than contribute to something like this?  Below is a video taken in Cameroon, Africa several year ago.  This year school children in this region are committed to ending plastic waste and changing what you see here!

Links And Resources

TURN PLASTIC INTO MUSIC – E-book Free Until Earth Day 2018 https://www.teacherspayteachers.com/Product/Recycling-Projects-TURN-PLASTIC-INTO-MUSIC-5-Multicultural-Music-Activities-3747012

 Earth Day Organization – Tool kits for Individuals, Schools, Organizations, and More! https://www.earthday.org/

5 R's official posterFree 5 R’s poster - https://www.teacherspayteachers.com/Product/5-Rs-RESPECT-THE-EARTH-Earth-Day-Poster-Freebie-3743747

How Long Does It Take Garbage To Decompose https://www.thebalance.com/how-long-does-it-take-garbage-to-decompose-2878033

Meet The Zero Waste Pioneers https://us-mg5.mail.yahoo.com/neo/launch?.rand=0fm9p2d7jlhgu#4735222175

Scientists Discover Enzyme That Eats Plastic https://www.goodnewsnetwork.org/scientists-accidentally-create-super-enzyme-that-can-devour-plastic-pollution/

Make Your Own Egyptian Sistrum!

sistrum color image

We’re proud to be part of the Middle Eastern North Africa blog hop. Naturally our post is about music, but make sure you check out all the other related posts (listed below) to learn more about this beautiful and culturally rich part of the world.

Crafting is a great hands-on way for kids to learn about world cultures, so our post shows you how to make a sistrum, a unique rattle that was used in the courts of the Pharoahs of ancient Egypt.

What is a Sistrum?

You can see images of sistrums in hieroglyphics found in the pyramids. A bit of study of the courts of the Pharoahs reveals that the sistrum was played mainly by women or priestesses and that it was played by moving it back and forth from side to side so that the metal bangles create a unique sound and distinctive rhythms.  It was often part of ceremonial or the sacred/religious music of the time.

TTF SistrumMake Your Own Sistrum From a Tree Branch

If you take a walk in a wooded area, it’s easy to find a tree branch that is shaped like the letter “Y”. You can use the branch “as is” or cut and sand it down, if you like.

Next, you’ll need a bit of floral wire or craft wire. Wrap it around one side of the Y, then add whatever bangles you may have. Below we have a post showing how to safely make bangles from bottlecaps, which is a fun recycling project. Instead – or in addition to bangles – you can also use things like beads, making sistrums peace valleyjingle bells or bits of jewelry to add to the bling of your sistrum. Be as creative as you like!

Playing A Sistrum

Although the traditional way to play a sistrum is to move it back and forth only, it’s a rattle so feel free to use it as a percussion instrument any way you like.

Links and Resources

Free Egyptian Sistrum Coloring Page- https://www.teacherspayteachers.com/Product/Color-An-Ancient-Egyptian-Rattle-The-Sistrum-2166721

Make Your Own Bangles From Bottlecaps Post – http://www.tinytappingtoes.com/ecologynature/how-to-make-bottle-cap-bangles-for-recycled-musical-instruments/
Middle Eastern and North African Heritage Month | Multicultural Kid Blogs

Welcome to the third annual Middle Eastern and North African Heritage Month series from Multicultural Kid Blogs! Follow along all month long for great resources on teaching children about the heritage of this region, and link up your own posts below. Don’t miss our series from last year and from 2015!

You can also find even more resources on our North Africa and the Middle East Pinterest board:


August 4 Sand In My Toes on Multicultural Kid Blogs: 10 Fun Facts About the United Arab Emirates
August 8 A Crafty Arab: Jordan Craft Stick Flag Tutorial
August 15 Sand In My Toes: Wind Tower Craft (UAE)
August 17 All Done Monkey: MENA Countries Worksheets
August 18 Tiny Tapping Toes
August 21 Biracial Bookworms on Multicultural Kid Blogs
August 23 Jeddah Mom
August 28 Crafty Moms Share
August 30 Creative World of Varya


Link Up Your Posts!


Make A Little Drum Beater For A Big Drum!

kids playing pueblo drumNovember is Native American Heritage month and it’s a great time to step right up and play a big drum!

Whether it’s a pow-wow drum, a pueblo drum (as seen here) or another drum you have, you’ll need a special stick to play that drum. And here’s how you can make an easy version, perfect for small hands with big hearts!

Pencil Mini-Drum Beaters -Materials Needed

One pencil per child

Colorful electrical or washi tape

Pipe cleaners (optional)

Feathers (optional)

pencil drum beatersStart with colorful (unsharpened) pencils. Wrap the pencil side with the electrical or washi tape and add feathers with pipe cleaners if desired.

These smaller beaters are the perfect size for young children to hold and will make it easier for them to tap or play a drum.

Playing Any Drum

Use your drum beater to play a frameless pow-wow drum (instructions below) or tap out a beat on any drum you might have around the classroom or house.

Don’t have a drum handy? No problem, I suggest you find a round container, like a sturdy laundry hamper or large plastic container and improvise a drum. Overturned pots and pans will work as well, but can be really loud and possibly have an adverse effect on young children’s hearing.

Playing A Pow-Wow Drum

pencil beater on drumTo play a Native American pow-wow drum, each drummer will need one beater.  The goal is to play in unison, with everyone’s beater hitting the drum head at the same time.  This can be a wonderful way to teach cooperation and listening skills as the sound of the drum is amazing and powerful when everyone strikes together!

Want to hear a real pow-wow drum and a pow-wow drum song.  Check out the Starfeather Group who you can hear in the links below.

Can you play along to those powerful songs?

Links and Resources

pow wow drumHear a Pow-wow Drum  http://www.dariamusic.com/drum.php

Make a (Frameless) Pow-Wow Drum  http://www.dariamusic.com/make_Drum.php

Color a Pow-wow Drum – Printable and Online http://www.dariamusic.com/drum.php

You are welcome At A Native American Pow-Wow (Post on Pow-Wow Etiquette) http://multiculturalkidblogs.com/2014/11/02/native-american-pow-wow/

Make A Native American Turtle Rattle From Recycled Materials https://www.teacherspayteachers.com/Product/Native-American-Turtle-Shell-Rattle-Craft-Using-Recycled-Materials-600715

Make Your Own Bolang Gu – Chinese Pellet Drum!

doggy bolang gu

The Chinese Lunar New Year is quickly approaching!   Here’s a fun musical craft for one of the most popular noise-makers played by children at this time of year.

The Bolang Gu (波浪鼓;pinyin: bo lang gu) is a simple instrument also called a monkey drum, a pellet drum or a rattle drum.  It’s  a two-sided drum with small beads or pellets attached to it’s sides. When the drum is played the pellets bounce off both sides and create a really unique sound.  Although these clever little instruments are often used by street vendors and seen as children’s toys, they also date back to ceremonies held in the Song Dynasty of China and are part of religious rituals in Tibet, Mongolia, India, and Taiwan.

Make Your Own Bolang Gu

Bolang gu suppliesMaking your own version of this creative little craft is easy.  The supplies you need for one drum are: 2 paper plates, 1 cardboard paper towel roll, stapler, tape, a bit of string or twine, 2 beads and any materials you like for decoration.

Decorate Your Drum

If you’re going to decorate your plates, it helps to do this first. In fact, it can be a good idea to have many plates and try lots of designs, then select your favorites for the two faces of your drum.

What themes to use for your decorations? Choose any of the Chinese zodiac animals, Chinese calligraphy, Chinese New Year printables or whatever else inspires you! Once your plates are created, move on to the next step.

Assemble Your Drum

Place your two paper plates “back-to-back”. Apply a few staples to hold them in place. Press the top part of your cardboard tube together slightly and insert about 1 – 2 inches inside the paper plates, where you want the handle to be. Bolang Gu halfway craftContinue stapling around the plates until you reach the other side and staple right up to the handle. This should hold it firmly in place, but you can also add decorative tape to make it even more sturdy and to add a design element.

Add the Pellets

Now it’s time to add the beads. Start my making two holes on the right and left side of the drum halfway up the paper plates. Use a hole punch to make your 2 holes or have an adult help by poking the holes in the paper plates with the tip of a nail or an awl. Knot a bead onto a small piece of string, twine or embroidery thread and tie onto each side, leaving about 2 – 3 inches of string. The length of string allows the beads to bounce back and forth to create the signature sound of the drum.

Play Your Drum

Although this little drum looks so simple, there are actually quite a few ways to play it. Place the handle between two hands and “rub” back and forth for the classic sound effect of a monkey drum. Or hold in one hand and rotate the drum back and forth while you move your arm like a dancer. In fact, if you take a look at the video below, the three dancers are using bolang gu as part of a wonderful and energetic dance routine.

Feel free to get just as creative and make up your own moves and inventive ways to make music with your new drum!

Links And Resources

Make a Bolang Gu -  Activity PDF:  https://www.teacherspayteachers.com/Product/Monkey-Drum-Chinese-New-Year-Drum-Craft-1748044

colorful brown dog screensnapMake Your Own Chinese Gong – https://www.teacherspayteachers.com/Product/Make-Your-Own-Chinese-Gong-From-Recycled-Materials-486935

Year of the Dog Artwork https://www.teacherspayteachers.com/Product/Chinese-New-Year-Brown-Dog-Art-Work-for-2-Musical-Crafts-3644746

Color an Erhu – A Two-Stringed Chinese Violin https://www.teacherspayteachers.com/Product/The-Erhu-Chinese-Violin-Instruments-From-Around-The-World-1037355

Gong Xi Gong Xi- About The Song Plus Lyrics https://www.teacherspayteachers.com/Product/A-Chinese-New-year-Song-Gong-Xi-Gong-Xi-3629545

Jingle Marching Sticks

making jingle sticksOne of the most wonderful things about making music with young children is that it easily becomes part of an active day.  Who can resist making a parade or dancing around the house or the classroom when they are carrying a marching jingle stick?  Best of all, the materials needed for this craft are often trashed (extra ribbon, tape, cardboard wrapping tubes, stray jingle bells) so this craft encourages you to upcycle, exercise and make music all at the same time.  What a great way to begin the holiday fun!

Make Your Own Jingle Stick

Here are the supplies to assemble:

A jingle stick – look for a cardboard tube from wrapping paper, 3 foot ruler or large stick

1 (or more) pipecleaners

6 – 10 jingles per pipecleaner

Colorful electrical tape or duct tape

Optional: Paint, stickers, yarn or duct tape, for decoration.

Screen shot 2013-11-15 at 3.05.34 PMBegin by stringing any number of jingles onto a pipecleaner.  Use electrical tape to fasten the pipecleaner into place on the stick.  It helps to fasten the pipecleaners to the stick between the jingles as well.  If you like, make several pipecleaners strung with bells to add to different parts of your stick.

Once the jingles are in place, decorate the rest of the marching stick.  Use paint, more tape, colorful ribbon, yarn or stickers to make it unique and wonderful.

Time To Play!

Other then using the jingle stick to lead a parade, there are lots of ways to get creative with your new instrument.

Sing any of your favorite holiday songs along to a beat created by your marching jingle stick.

Try tapping the stick on the floor while marching and use that sound as part of the rhythm being created.

Use marching jingle sticks as part of a holiday music presentation.

Try playing the jingle stick at a particular part of the song (like the chorus) or when you hear a particular word in a holiday song.  For instance, a class can jingle the bells only when you hear the word “jingle” in the song “jingle bells”.

If you like, try it along to this version of Jingle Bells which shares lots of different ways to say “Happy Holidays” in different countries around the globe.

Resources

Jingle Anklets –  http://www.dariamusic.com/docs/jinglebells.pdf

4 Easy Jingle Bells Instruments For Holiday Fun  – Craft Booklet from TeachersPayTeachers http://www.teacherspayteachers.com/Product/4-JINGLE-BELLS-CRAFT-ACTIVITIES-940926

4 Easy Jingle Bells Instruments For Holiday Fun  – Craft Booklet from DARIA’s Little Village Store http://dariasvillagestore.storenvy.com/collections/34585-all-products/products/3498803-4-jingle-bell-craft-activities-booklet

Simple Instruments from Africa For Children

Making music with young children is a great way of combining creativity and fun with learning about global cultures.  Whether you are quietly crafting, reading and researching or drumming and dancing, here are some simple instruments that can be a part of any study of the diverse and beautiful cultures of Africa.

this tongue rattle hereMake It Rattle!

Different types of rattles can be found throughout Africa and the world.  They are easy to hold and play for kids of all ages and almost all abilities.   Here are three very different rattles from Africa – one that even can be seen in hieroglyphics that date back to ancient Egypt!  All of these are perfect to be made and played by small hands!

Tongue Rattle

http://makingmulticulturalmusic.wordpress.com/2012/10/02/make-your-own-african-style-tongue-rattle/

Caxixi Rattle

http://tinytappingtoes.wordpress.com/2013/02/05/make-your-own-woven-caxixi-rattle/

Egyptian Sistrum Rattle – Make It From A Recycled Hanger

the Eco-Egyptian Sistrum

Egyptian Sistrum Rattle – Make It From A Tree Branch

the Natural Egyptian Sistrum

Egyptian Sistrum Coloring Page
the Egyptian Sistrum Coloring Page

South African drummer - farahHands On The Drum!

There are an astounding number of different drums and drumming traditions throughout Africa.  Crafting a simple hand drum from recycled materials is a great place to start an exploration of drumming for very young children.

http://www.dariamusic.com/docs/Make%20Your%20Own%20African%20Drum.pdf

Shake A Shekere

In this unique and beautiful percussion instrument, the rattle is on the outside of the gourd.  It can be shaken back and forth, tossed hand to hand or used like a ball in simple children’s musical games.  To hear or color a shekere or find crafting instructions and simple activities, check out the links below.

shekere iconHear A Shekere

http://www.dariamusic.com/shekere.php

Color A Shekere Online

http://www.dariamusic.com/color_Shekere.php

Make Your Own Shekere

http://www.dariamusic.com/make_Shekere.php

Easy Gourd Shekere For A Kid Or A Classroom

http://tinytappingtoes.wordpress.com/2013/08/05/easy-gourd-shekere-for-a-child-or-a-classroom/

Alphabet Shekere

http://www.trueaimeducation.com/2012/10/guest-post-learning-letters-with.html


Easy Gourd Shekere For A Child – Or A Classroom

Peru_Preschool_Shakure

A shekere is a wonderful, versatile instrument from Africa.  Made from dried gourds of various sizes, the instrument has a netting over its rounded area that is beaded or woven with shells, seeds, nuts or other objects that rattle.  Since making the knots for the netting can be hard for smaller hands, we’re sharing a simplified version perfect for making with a child, a group of siblings or a classroom of kids.

Start With A Gourd

Shekeres are made from dried birdhouse gourds.  After they are harvested and stored for about a year in a dry location, they become sturdy and have a hardened outer shell.  As the gourds dry, the shell may not look perfect so some craftspeople sand the shell, bleach the shell or even paint and decorate it to make it more appealing before they begin the beading process.  You can try any of those approaches as well or use them “au natural”.

white gourd + necklace - shekere being madeMake A Gourd Necklace

The formal beadwork on a shekere is called a skirt.  For this project, our gourds will only have a necklace instead of a full “skirt”.

Take a piece of string, twine or embroidery thread and twist it around the top of the gourd, marking where it will overlap.  Measure it tight enough to stay on the gourd, but loose enough to rattle.  Don’t tie the string but instead lay it flat on a work surface.  It can be helpful to tape it into place.  Looking at the length of the string, you can get a good idea of how many strands of beads you can create to put onto it.

little gourd shekereJingles, Jangles and Bangles

Collect your bangles!  Look for any type of beads, buttons, jingle bells or similar objects you can use to create the sound of your instrument.  Here are some ideas for making several different types of creative shekeres.

Parent/Child Shekere

Parent and child create strands of noise-makers and they are strung alternately on the gourd.

Sibling – Friendship Shekere

Sister and brothers or friends create strands of noise-makers and they are strung on the gourd.

Classroom or Group Shekere

Each student or participant makes one string of noise-makers to add to the classroom instrument.

After you’ve finished creating your strands, add them to the necklace and tie it into place on the gourd.

mini shekere for storePlaying A Simple Shekere

Although these easy shekeres may not seem as versatile as their bigger cousins, you can hold them from the top and create several different types of rhythms. And if dried gourds are not readily available in your area, we’re also sharing a link below for making a recycled version out of plastic milk jugs.

Experiment with what you’ve created and have a blast!

shekere iconShekere Resources And Links

Hear A Shekere

http://www.dariamusic.com/shekere.php

Color A Shekere Online

http://www.dariamusic.com/color_Shekere.php

Make Your Own Shekere From Plastic Milk Jugs

http://www.dariamusic.com/make_Shekere.php

alphabet shekere 2Use A Shekere To Learn The Alphabet!

http://www.trueaimeducation.com/2012/10/guest-post-learning-letters-with.html

Shekere Kits And Step-By-Step Tutorial Available from DARIA’s Little Village store

http://dariasvillagestore.storenvy.com/


Make Your Own Simple Panpipes!

zampoñasHave you ever blown over the top of a bottle to create a wonderful whooshing musical note?

If you have, you’ve just learned the technique for playing the panpipes or the pan flute.

Although you can find this type of instrument in many countries around the world, it is most often associated with the music from the Andes mountains of South America.  The wonderful, breathy notes of the panpipes – known as zampoñas – play some of the most beautiful melodies of songs from that region.

zamponas front and backReal panpipes are made from hollow reeds that are similar to bamboo.  These long, straight reeds grow near the lakes in the mountains and are harvested and cut into individual lengths.  Single reeds turn into simple flutes called quenas.  Multiple reeds are bound together in different lengths to create the type of panpipes seen at the top of this page.

Can you create your own version of panpipes at home?  Definitely.  Here are the supplies you need:

Supplies

Straws – find the largest ones you can!

Small piece of sturdy cardboard

Transparent tape

Scissors

A small length of ribbon for decoration (optional)

This is a wonderfully easy craft!

Cut a length of sturdy cardboard. A six to eight inch piece works well for a basic set of panpipes.  Next, cut different lengths of straws and attach them to the cardboard with transparent tape from longest to shortest.  Make sure you leave about one inch between the straws as it allows a child’s mouth to blow on each straw individually to get a good-sounding note.

josef playing straw zamponasTest out your panpipes by blowing over them to see if you like the series of notes you’ve created.  It can be helpful to have enough materials to try this craft several times in order to create a set of panpipes that sound great and are the perfect size for your child.

Last, you can add a bit of decoration, if you want.  Cover the outer cardboard area with a bit of cloth or ribbon to give it a more festive look and tape it into place.

Here’s a quick suggestion about playing the panpipes.  It can be tricky for most kids and adults to get the hang of blowing over the tops of the straws.  Almost everyone wants to blow down into the straws.  Remember that you can create the best notes by blowing over the tops of the straws at a ninety degree angle.  You can also think of it as imitating the way the wind might rush across the tops of these reeds as they are found in nature.

Experiment with your panpipes and enjoy!

Links And Resources

Free Zampoñas Coloring Page - https://www.teacherspayteachers.com/Product/Color-the-Zamponas-Panpipes-From-The-Andes-650601

You can hear several different types of panpipes on DARIA’s new cd – Cancioncitas De Los Andes/Little Songs of the Andes.

CancioncitasCover-V4On Itunes:  https://itunes.apple.com/us/album/cancioncitas-los-andes-little/id602798167

On Amazon Mp3

http://amzn.com/B00BG9ABEE

Go Ahead – Play With The Box!

rattle box supplies
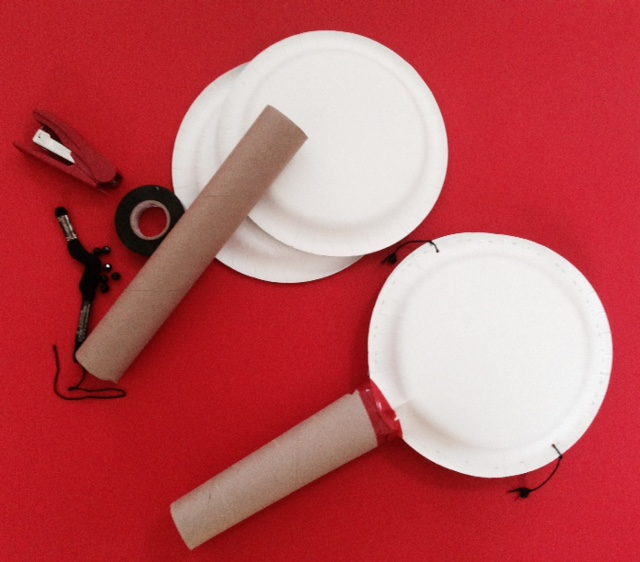
Almost every parent has had the experience of giving their child a special present and finding that they were more excited about playing with the box. So, why fight it? With the holidays bringing so many different size and shape packages to your doorstep, it’s a great time to have a little musical fun by creating instruments called rattle boxes. If you add textured fabric or paper as you decorate them, it becomes a musical and sensory experience as well!

This flexible craft is also a great way to recycle bits and pieces of other craft projects that you might have on hand. Take a look at these basic supplies: any size cardboard container or mailing tube, any variety of paper, fabric or bric-brac, plain glue, hot glue or any type of tape. For the inside, you can use anything from extra jingle bells to pebbles, dried macaroni, bird seed or even Q-tips or paper clips. The list below offers some ideas for quiet, medium and loud rattling boxes.

maraca contentsMake Your Box Rattle!

Before you seal the box or tube and decorate the outside, choose a filling. Try it out and see if you like the sound it makes when you shake it around. Some things like Q-tips make a wonderful quiet sound and objects such as buttons, beads or pebbles made for louder noise when played.

Seal it Up!

Although you’ll be decorating the outside of the container, it’s a good idea to take packing tape and seal up the edges or other places where the contents might escape to contain any objects that might present a choking hazard.

Decorate The Outside

Here’s where you can get creative. Wrap the box in fabric or different papers. Create a simple design or go crazy with a patchwork effect. Some fabrics you might use are wonderful to touch such as felt, velvet, velour, suede or gauze. Scrapbooking papers often have nice textures that can add to the sensory experience of this project as well. Add fabric swatches or trim and glue or hot glue in place.

Shake, Rattle and Roll Away!

Now it’s time to play. Put on some of your favorite music and rock out! You can shake back and forth, up and down, fast or slow. You can play quietly or loudly. I encourage parents to make a few of these and play along with their child or make some for siblings to hear how the sound is different as you play. Although this is a simple and fun activity, it also is a great way of developing listening skills and for exploring the world through touch. As you’re having fun with your child you might say: “Let’s play the quiet soft box with this song”, “Let’s switch to the loud fuzzy box for this one!” or “What sounds good to you? “Which one would you pick?”

You Can Make Your Box Rattle With:

A Quiet Rattle Box:

sand, salt, sugar, confetti, cotton balls, craft puff balls, paper bits, Q-tips, tiny pasta (such as pastina or acine de pepe).

A Medium Rattle Box:

paper clips, small pebbles, birdseed, small beads, small dried beans, rice, smaller buttons.

A Loud Rattle Box:

dried macaroni/pasta, large pebbles, large beads, coins, large dried beans, larger buttons.

———————————————–

Find more easy and fun musical crafts at:

http://www.dariamusic.com/crafts.php