Tag Archives: green crafts for kids

Make Your Own Egyptian Sistrum!

sistrum color image

We’re proud to be part of the Middle Eastern North Africa blog hop. Naturally our post is about music, but make sure you check out all the other related posts (listed below) to learn more about this beautiful and culturally rich part of the world.

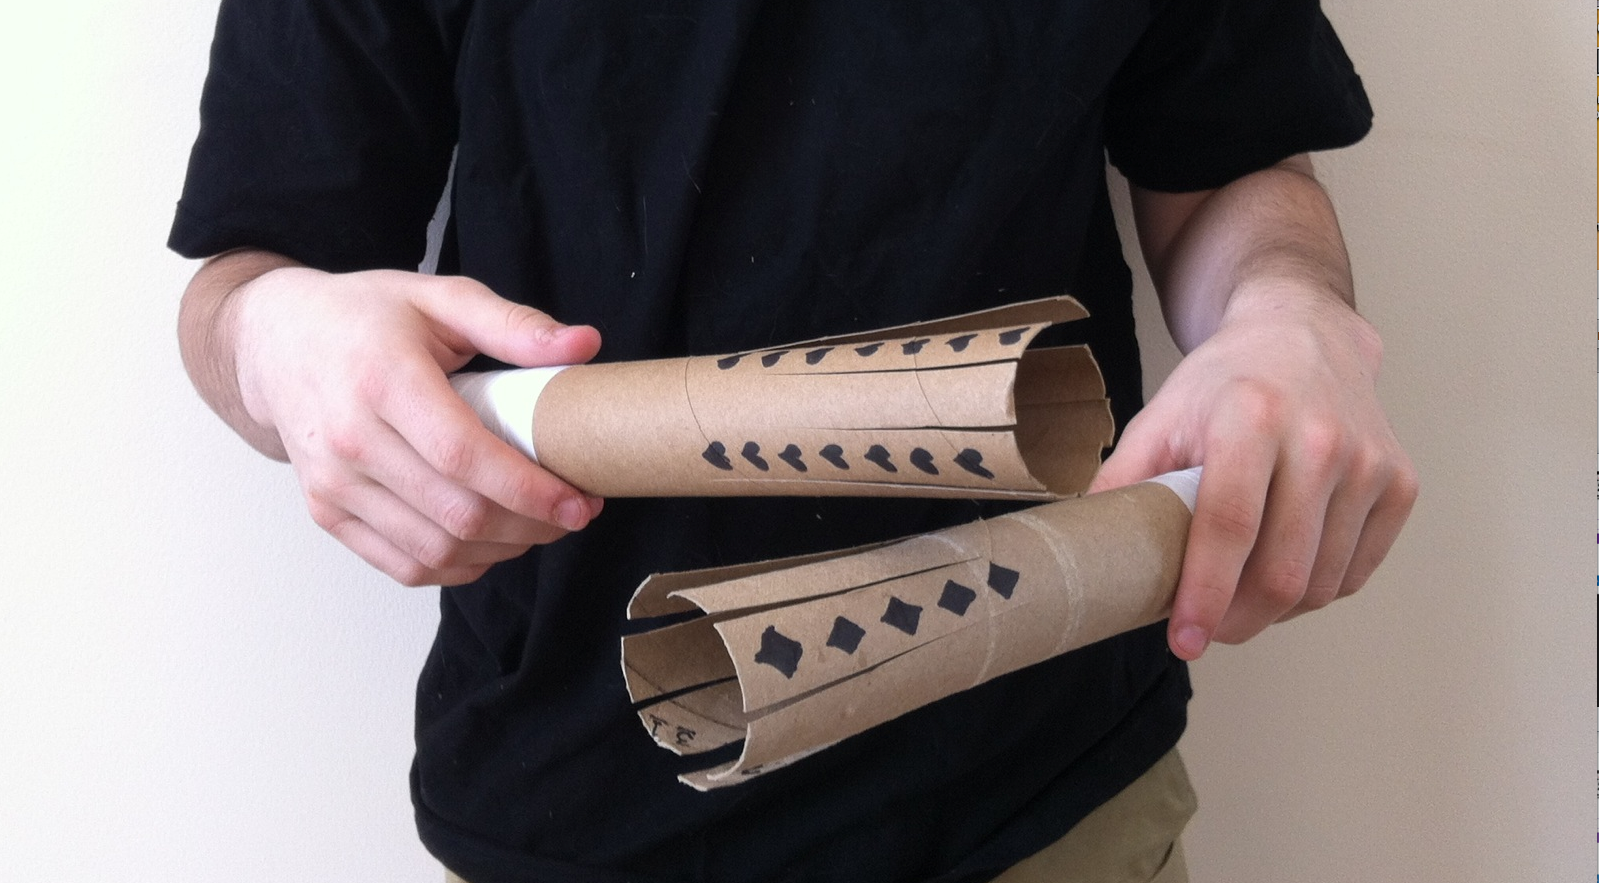
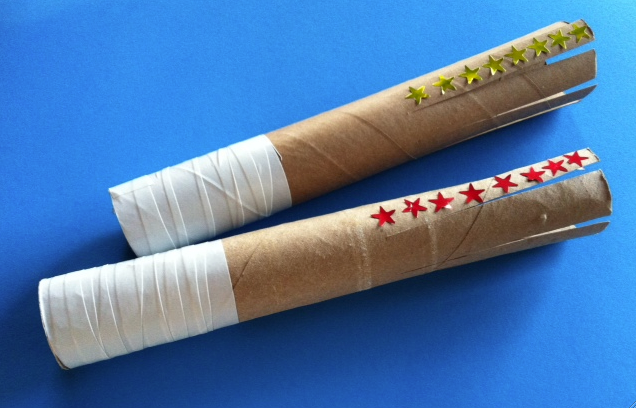
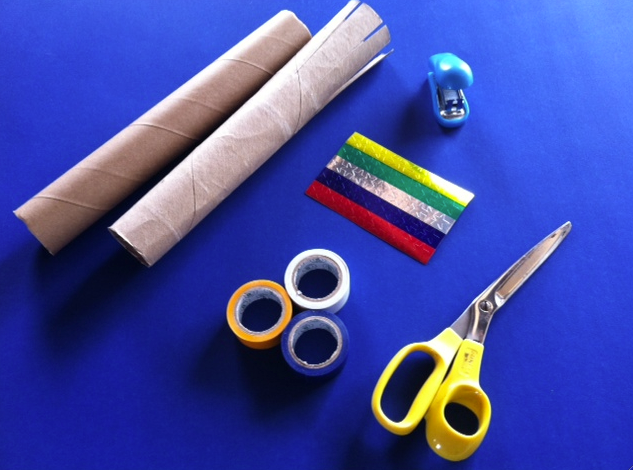
Crafting is a great hands-on way for kids to learn about world cultures, so our post shows you how to make a sistrum, a unique rattle that was used in the courts of the Pharoahs of ancient Egypt.
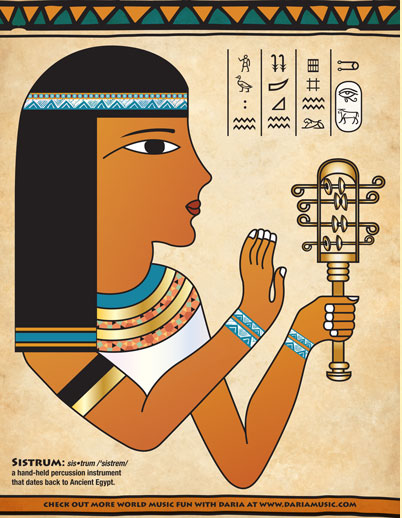
What is a Sistrum?

You can see images of sistrums in hieroglyphics found in the pyramids. A bit of study of the courts of the Pharoahs reveals that the sistrum was played mainly by women or priestesses and that it was played by moving it back and forth from side to side so that the metal bangles create a unique sound and distinctive rhythms.  It was often part of ceremonial or the sacred/religious music of the time.

TTF Sistrum
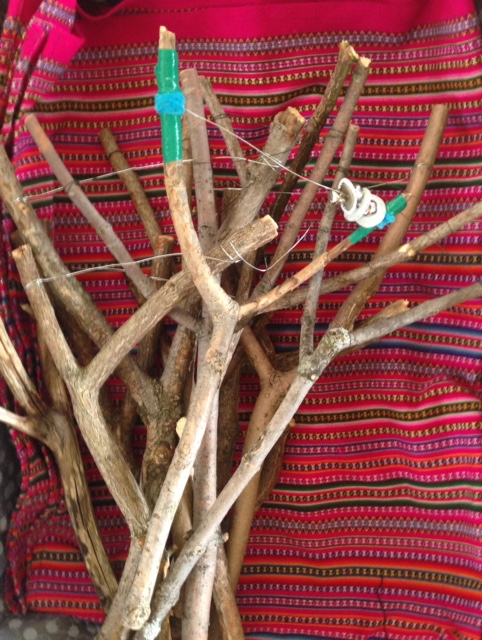
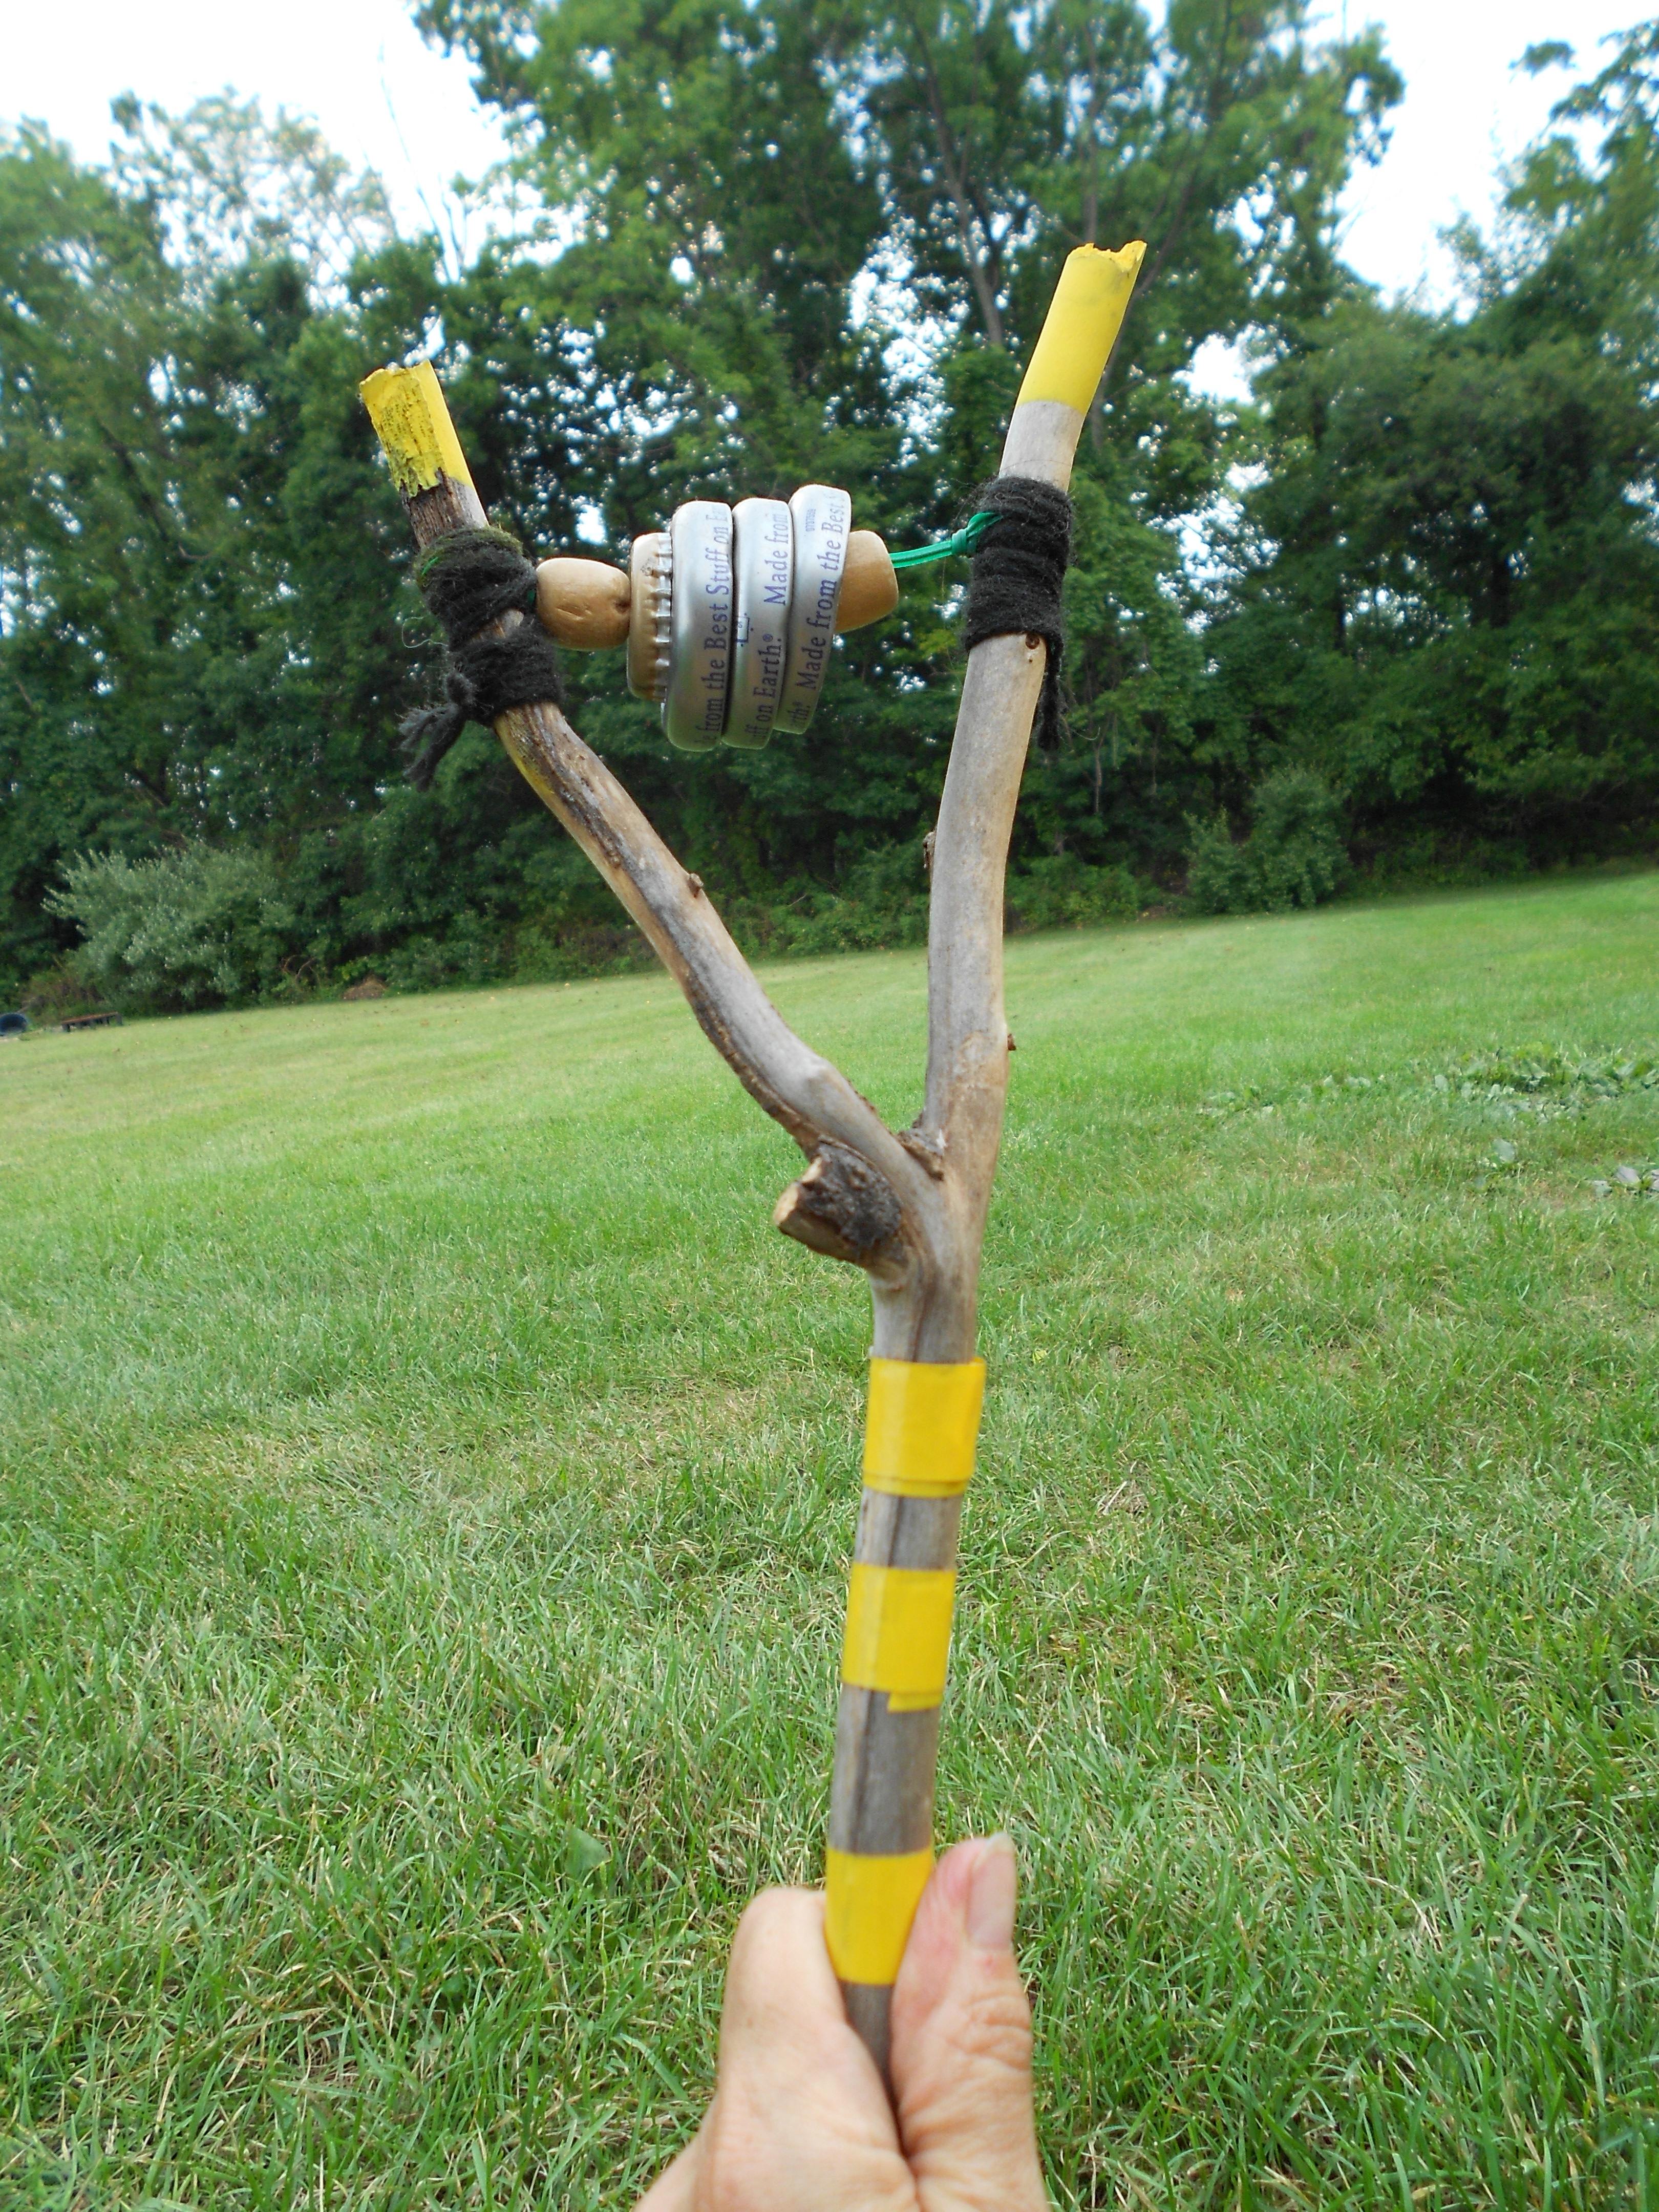
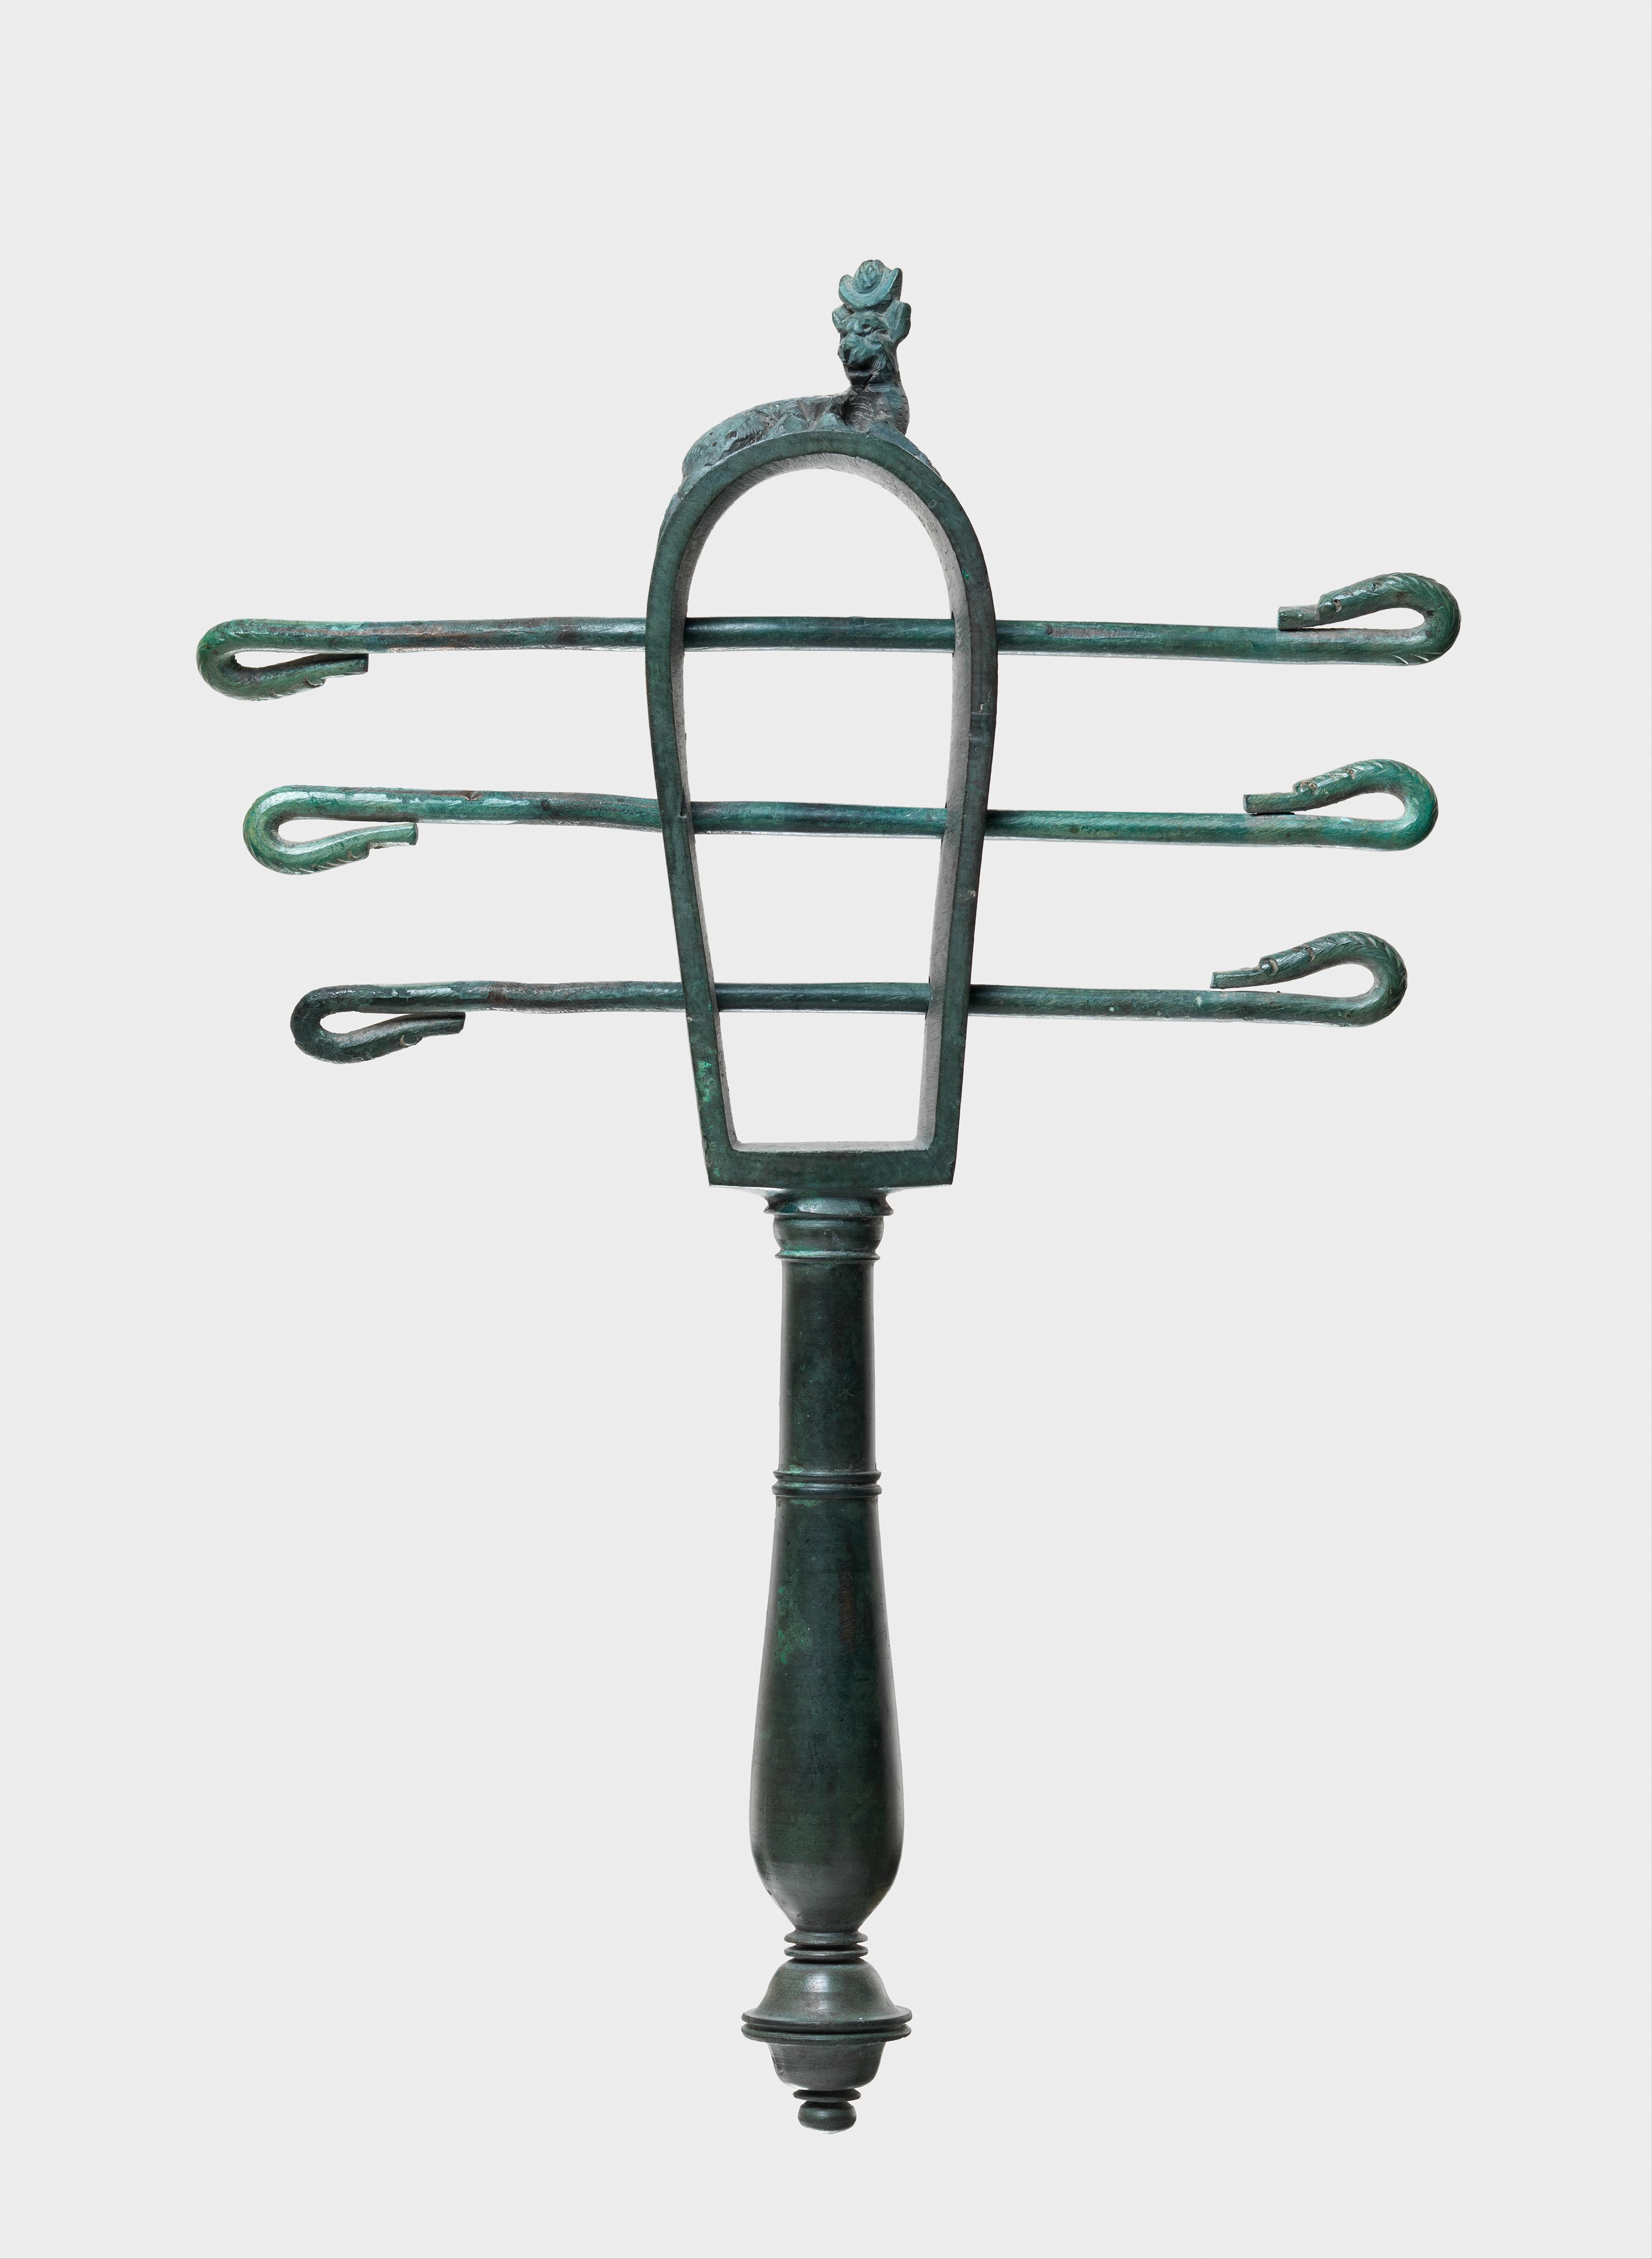
Make Your Own Sistrum From a Tree Branch

If you take a walk in a wooded area, it’s easy to find a tree branch that is shaped like the letter “Y”. You can use the branch “as is” or cut and sand it down, if you like.

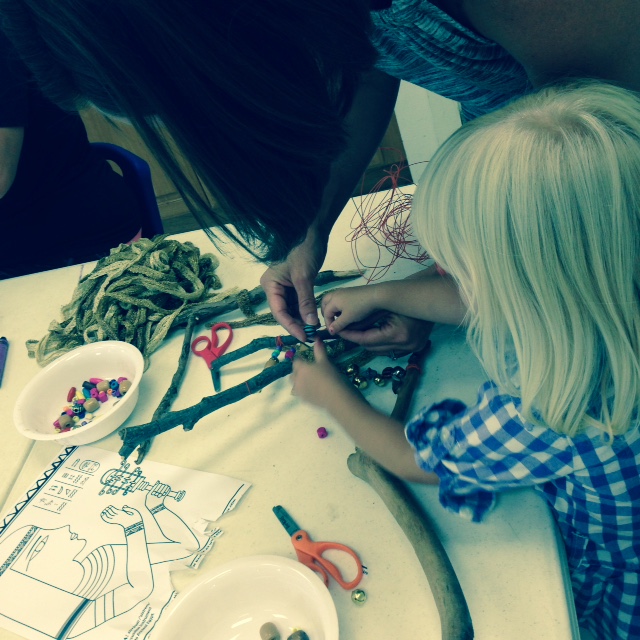
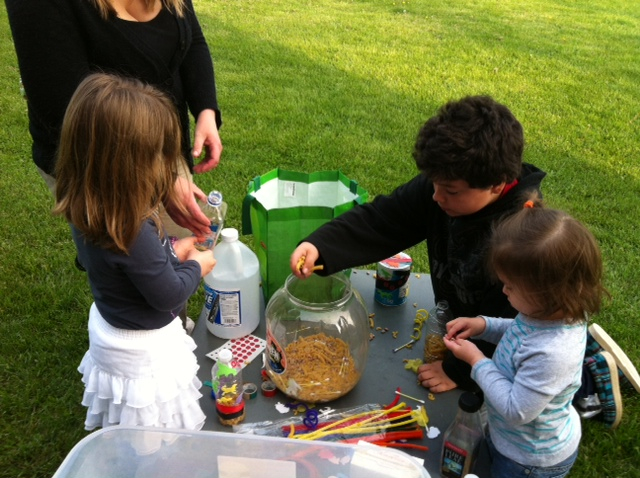
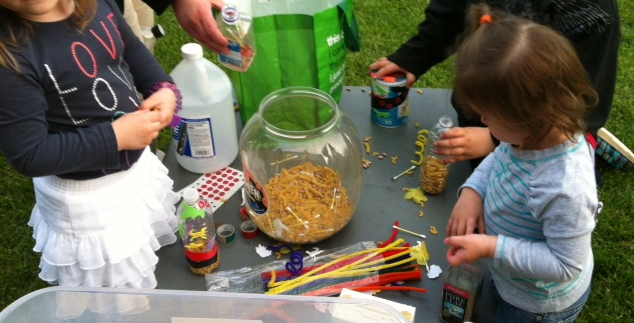
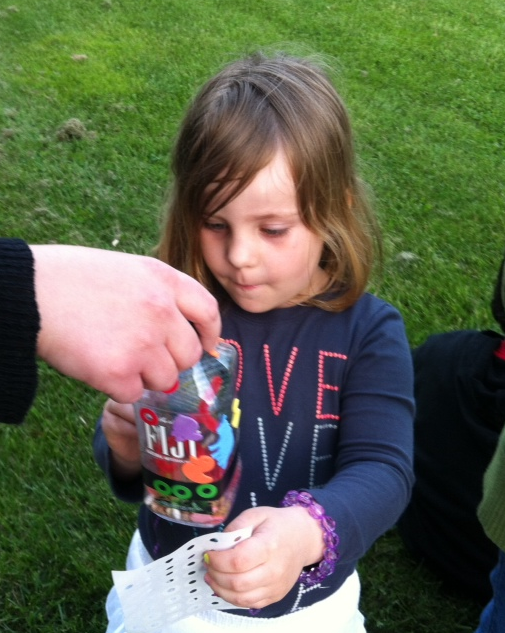
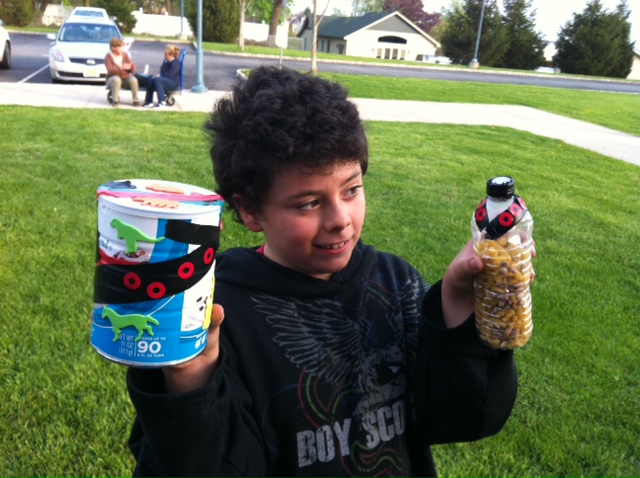
Next, you’ll need a bit of floral wire or craft wire. Wrap it around one side of the Y, then add whatever bangles you may have. Below we have a post showing how to safely make bangles from bottlecaps, which is a fun recycling project. Instead – or in addition to bangles – you can also use things like beads, making sistrums peace valley
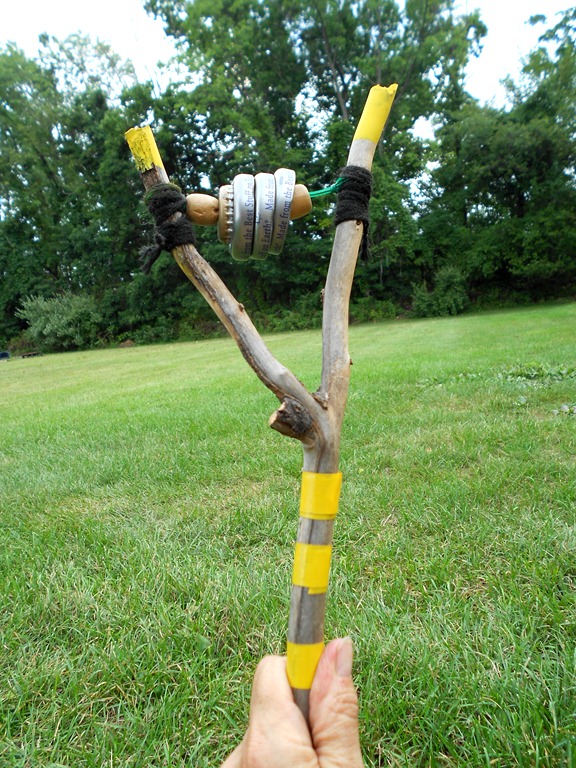
jingle bells or bits of jewelry to add to the bling of your sistrum. Be as creative as you like!
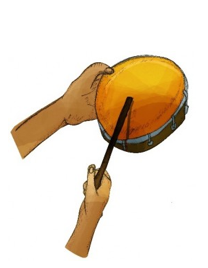
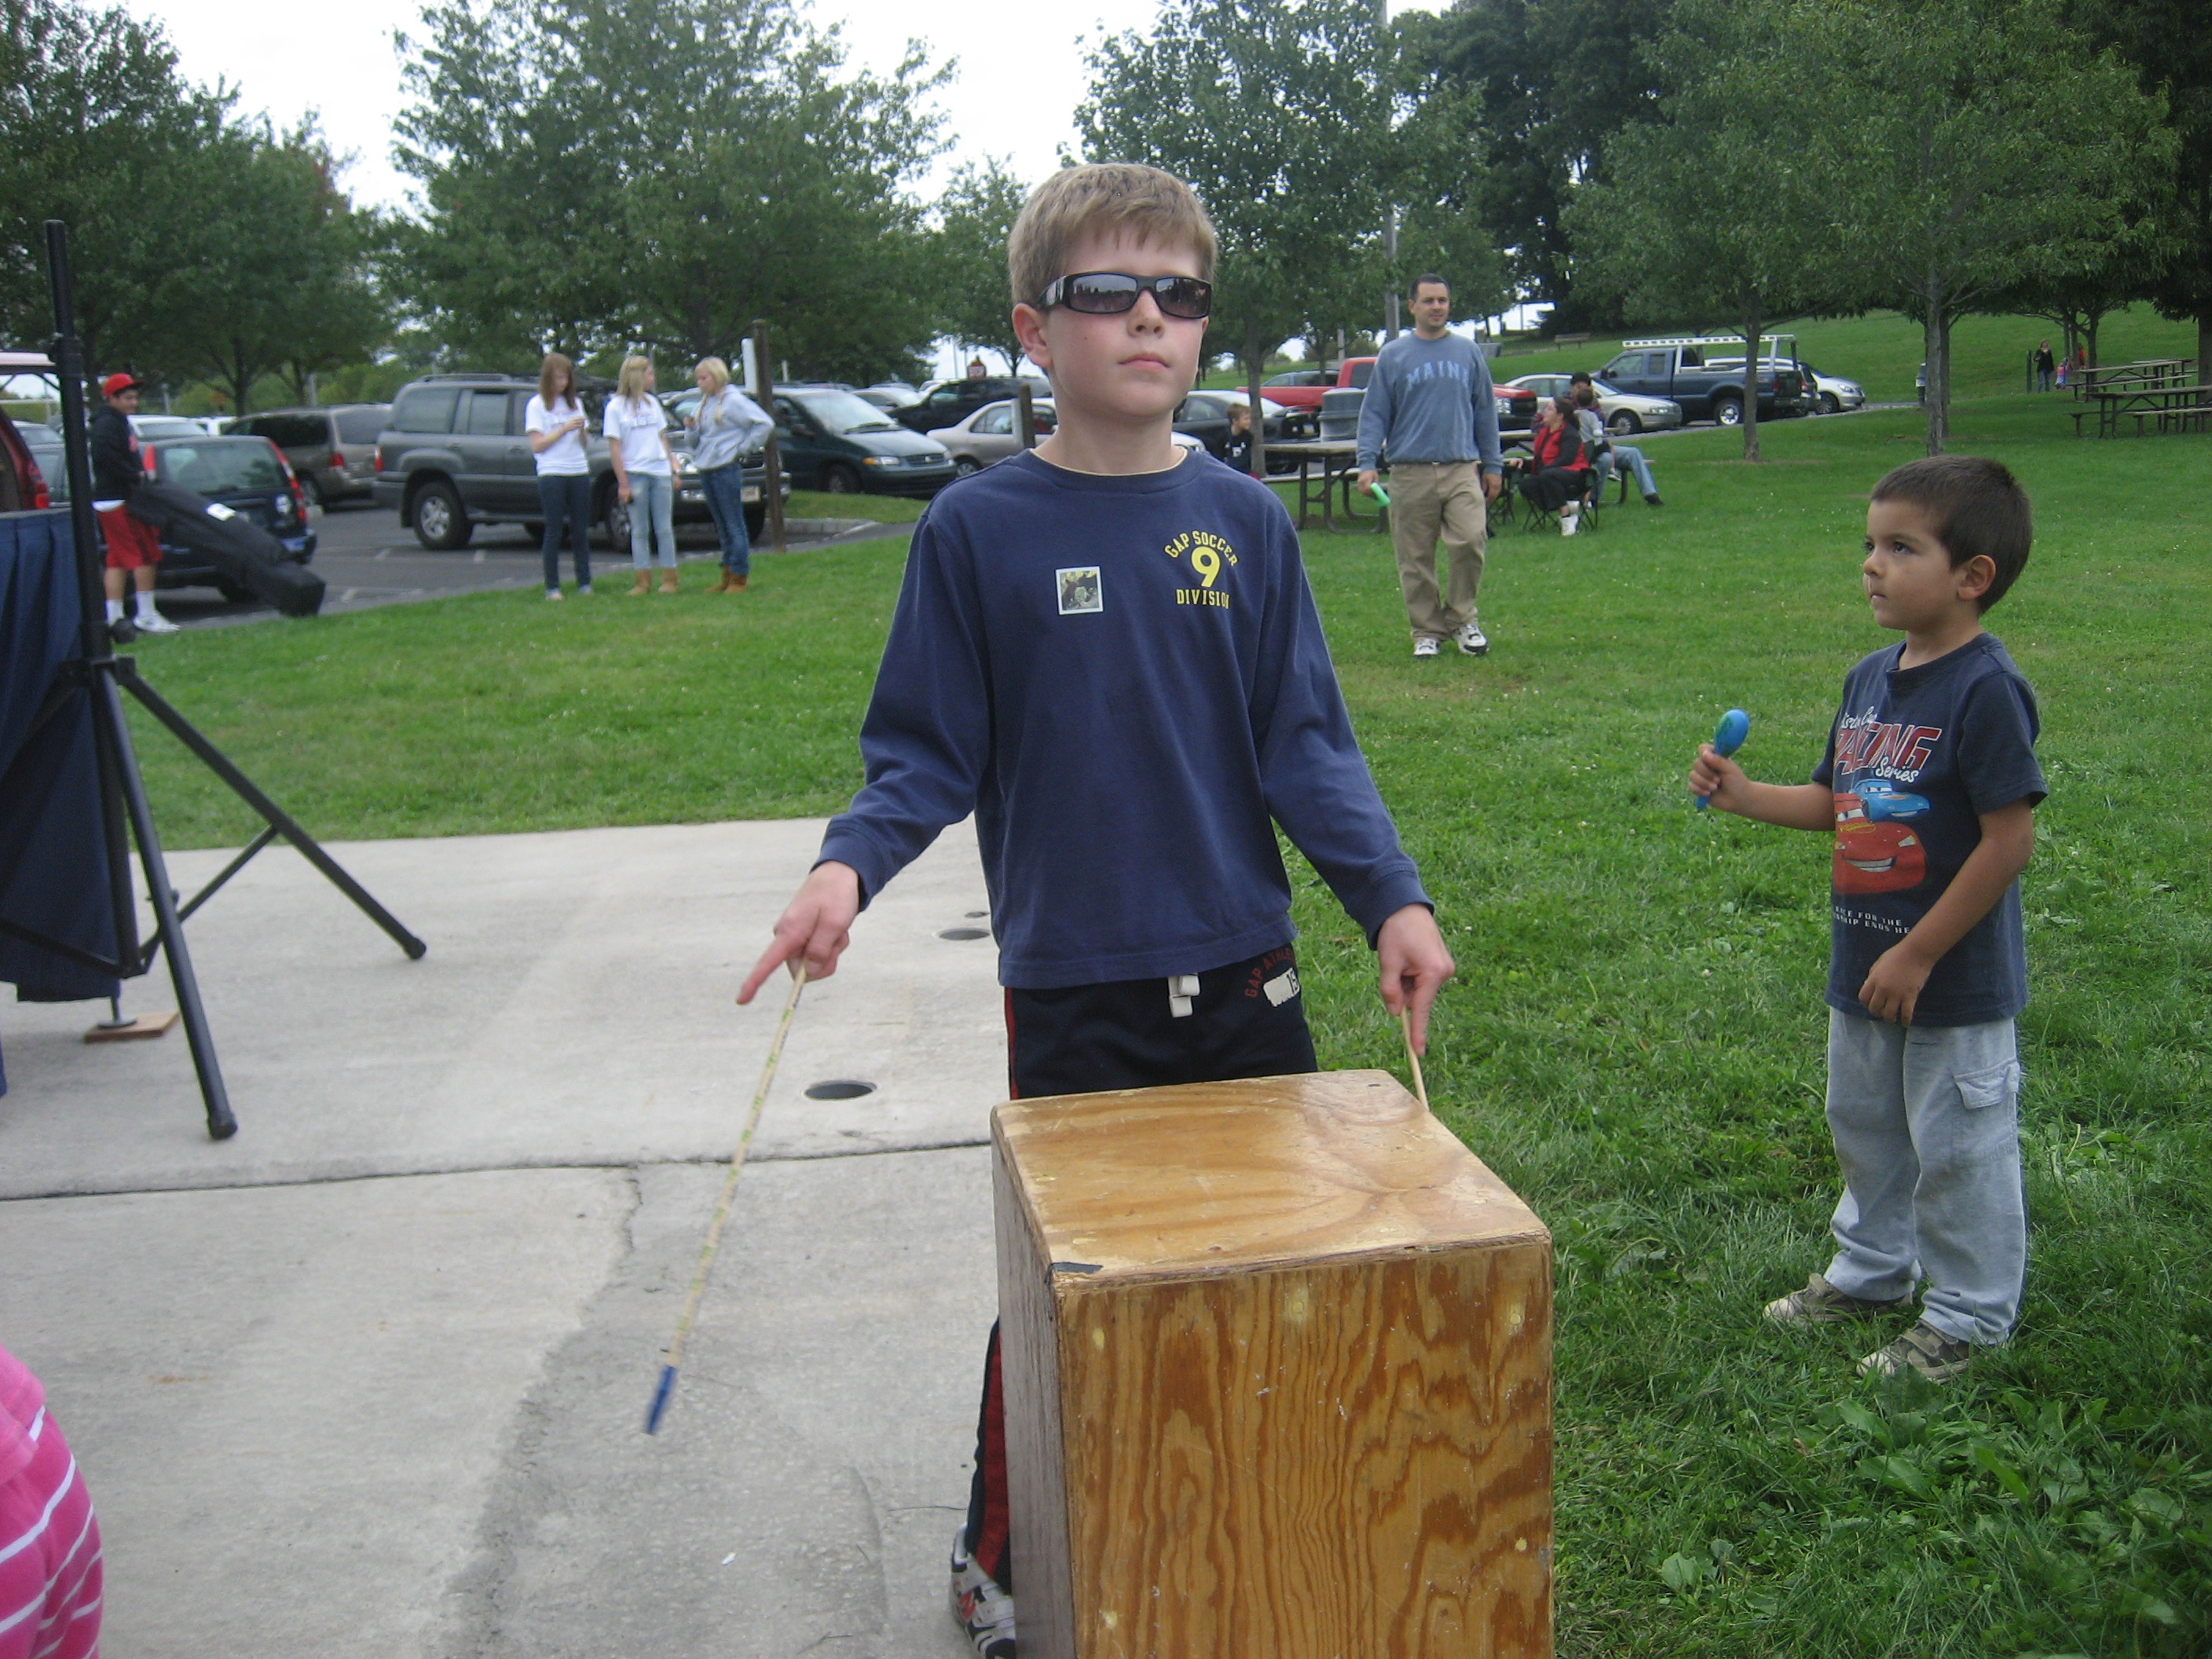
Playing A Sistrum

Although the traditional way to play a sistrum is to move it back and forth only, it’s a rattle so feel free to use it as a percussion instrument any way you like.

Links and Resources

Free Egyptian Sistrum Coloring Page- https://www.teacherspayteachers.com/Product/Color-An-Ancient-Egyptian-Rattle-The-Sistrum-2166721

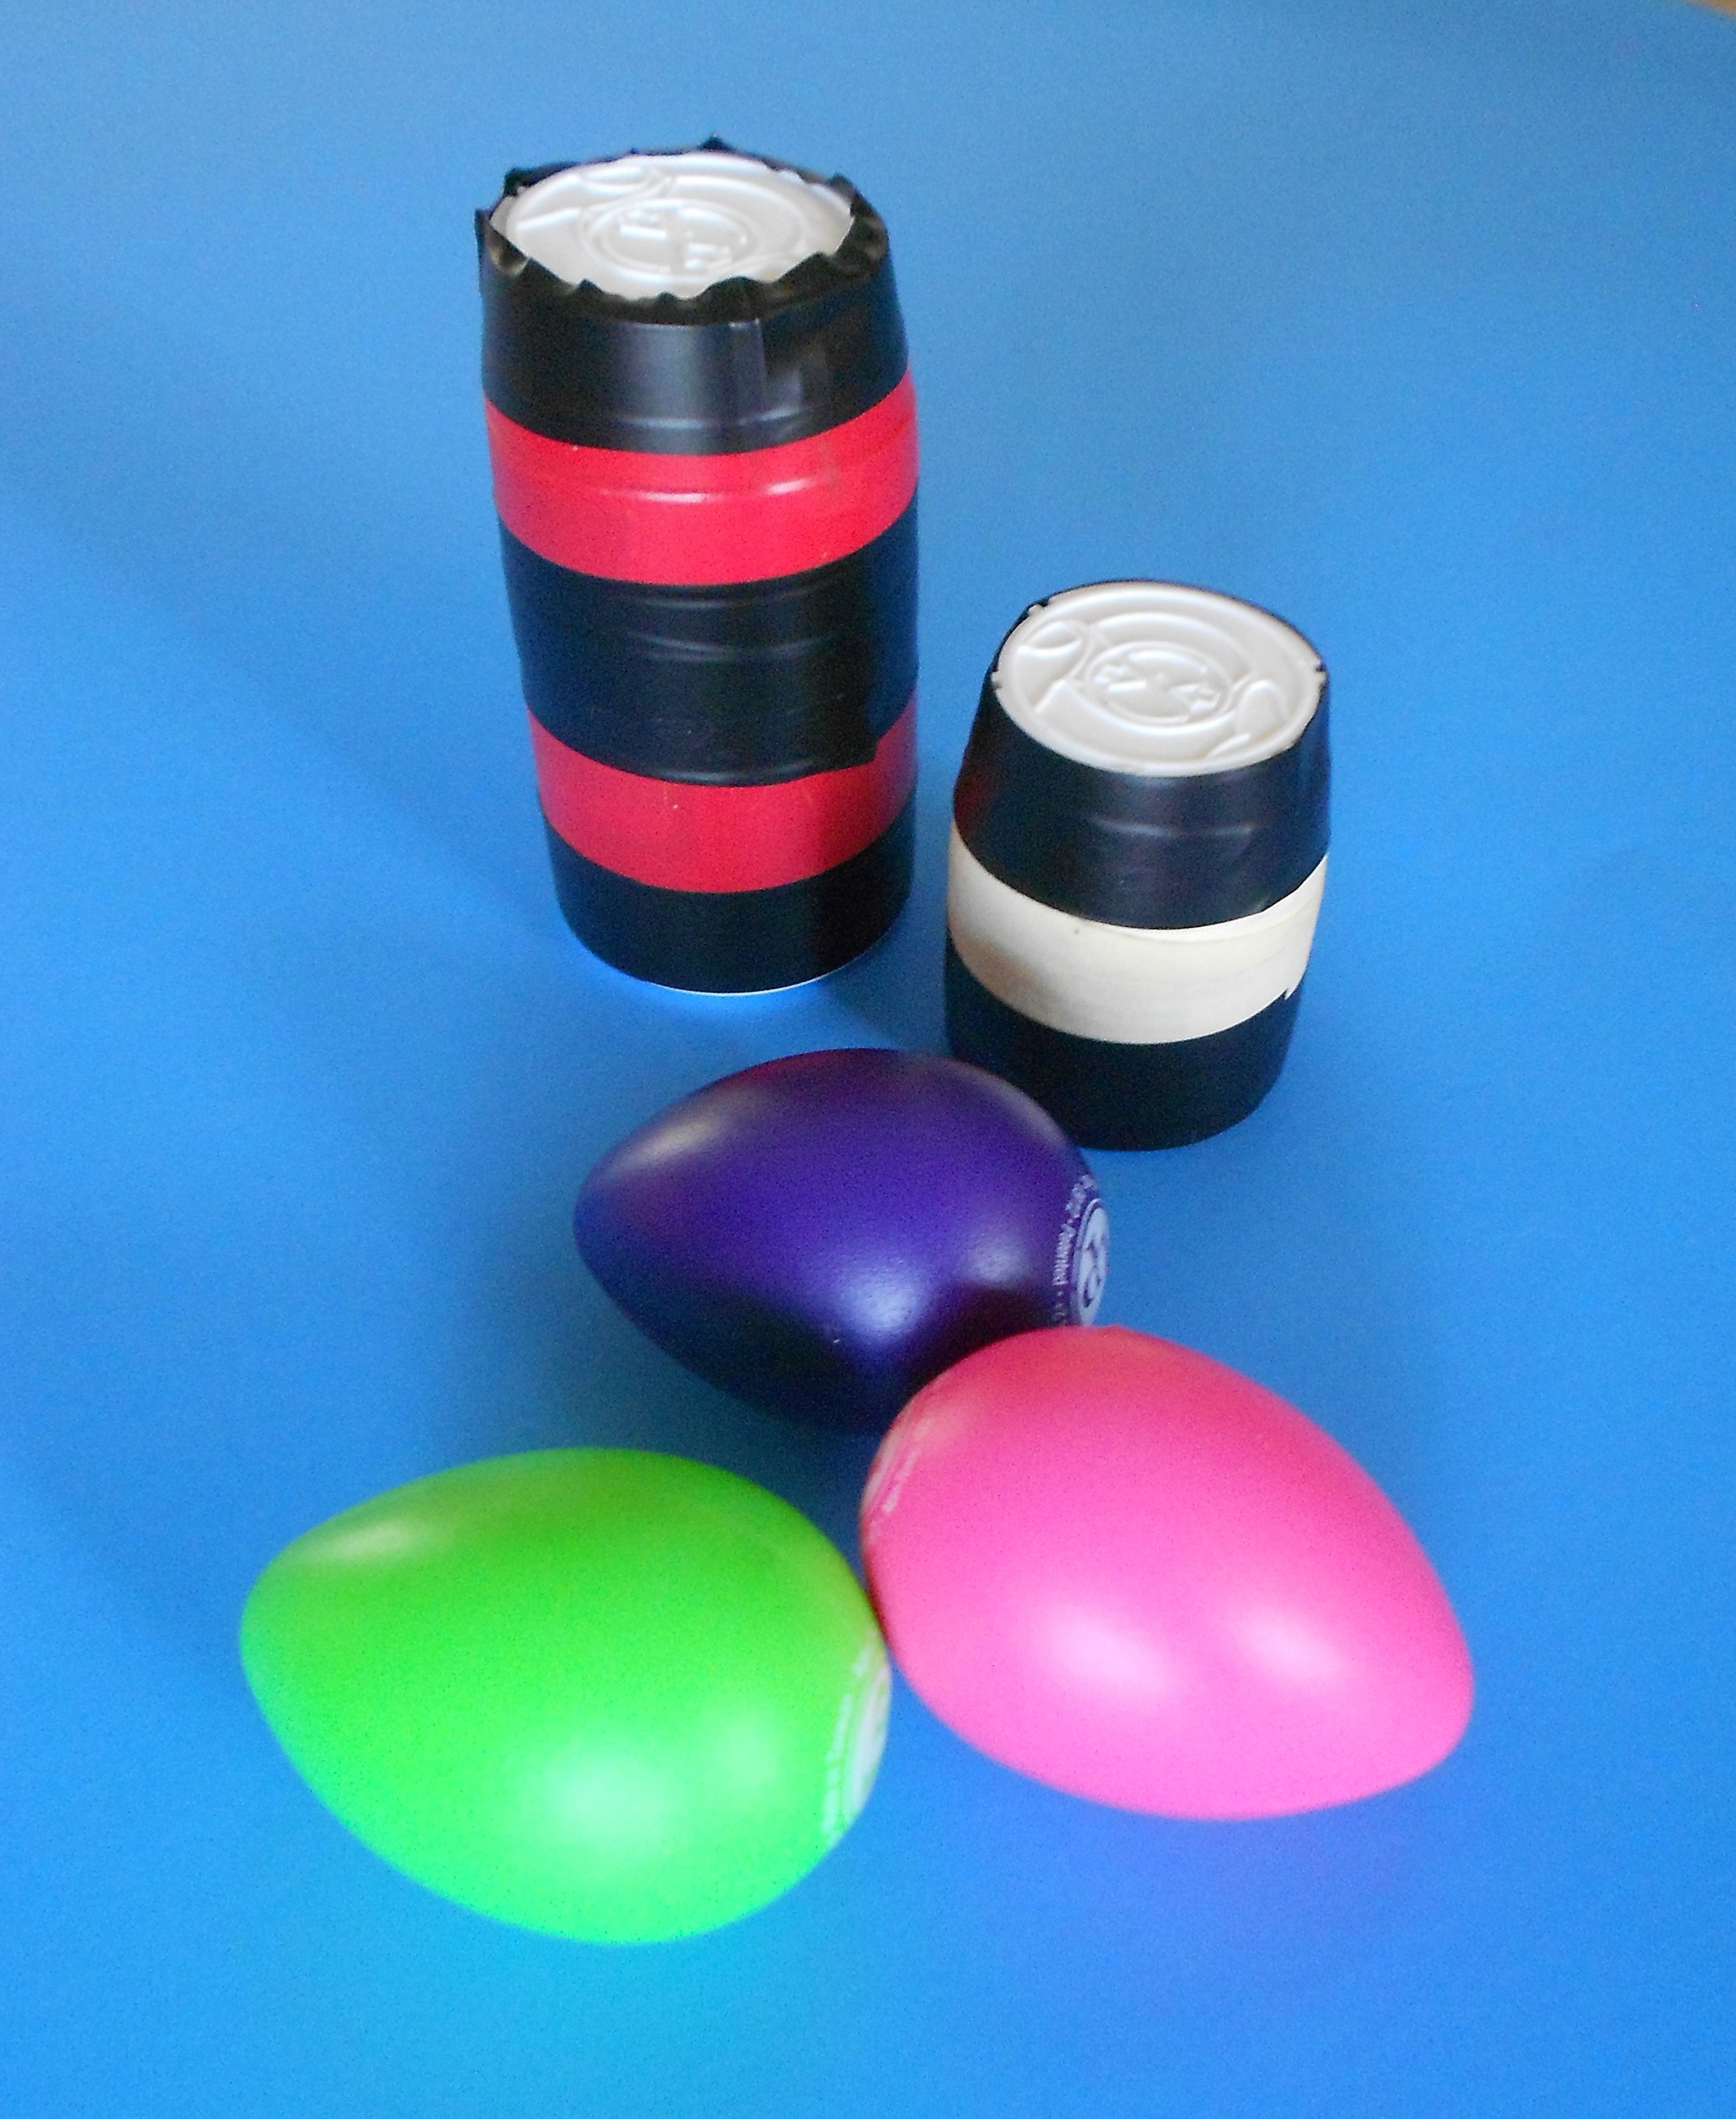
Make Your Own Bangles From Bottlecaps Post – http://www.tinytappingtoes.com/ecologynature/how-to-make-bottle-cap-bangles-for-recycled-musical-instruments/
Middle Eastern and North African Heritage Month | Multicultural Kid Blogs

Welcome to the third annual Middle Eastern and North African Heritage Month series from Multicultural Kid Blogs! Follow along all month long for great resources on teaching children about the heritage of this region, and link up your own posts below. Don’t miss our series from last year and from 2015!

You can also find even more resources on our North Africa and the Middle East Pinterest board:


August 4 Sand In My Toes on Multicultural Kid Blogs: 10 Fun Facts About the United Arab Emirates
August 8 A Crafty Arab: Jordan Craft Stick Flag Tutorial
August 15 Sand In My Toes: Wind Tower Craft (UAE)
August 17 All Done Monkey: MENA Countries Worksheets
August 18 Tiny Tapping Toes
August 21 Biracial Bookworms on Multicultural Kid Blogs
August 23 Jeddah Mom
August 28 Crafty Moms Share
August 30 Creative World of Varya


Link Up Your Posts!


FacebookTwitterGoogle+Share

Make An Ocean Drum for World Oceans Day

me and the dolphinHave you heard of World Oceans Day? Celebrated annually on June 8th, it’s an internationally recognized and celebrated day to learn, share, preserve and promote one of our most magnificent resources, the oceans and seas.

The World Oceans Days website (link below) is a wealth of information – including research on pollution, posters in 15 languages, and a variety of action steps that anyone can take to make a difference. Visit the site to learn how oceans regulate our climate, generate most of the oxygen we breathe, clean the water that we drink and so much more.

Want to combine your learning with a fun recycled music craft?  Here’s a way you can reduce, reuse, recycle and make a great homemade drum that sounds remarkably like the sea!

What Is An Ocean Drum?

If you live near the sea or have visited an ocean, you know the wonderful, traditional ocean drumrelaxing sound of waves coming and going along the seashore. An ocean drum is a 2 sided hand drum that – when played – sounds just like the surf. In fact, if you close your eyes, you can imagine you are right there on the beach, hearing the waves as they come and go.

Above is a picture of a traditional ocean drum.

Make Your Own Recycled Ocean Drum

blue ocean drum kimbertonCheck your recycling bin.  Do you have a sturdy pizza box or a mailing box with dimensions somewhat like the one seen here?  If you do, you can fill the bottom of the box with sand, salt, seed beads or any tiny pasta (like acini de pepe). There’s also some great ways to create a window to the drum, decorate the outside and seal the box so the contents don’t escape and you can use it for weeks to come.

Ocean Drum Tutorial Free

Want a step-by-step tutorial plus other great info on this drum and world music instruments? Until June 16th, we’ve reduced the price of this great kids music resource to – free!  (Note: If you read this post after June 16, 2017 and need a free educator’s copy, just contact daria at dariamusic at yahoo dot com for more info).

Links And Resources

ocean drum pdfFree Tutorial – MYO Ocean Drum – https://www.teacherspayteachers.com/Product/Ocean-Drum-Craft-1567951

World Oceans Day – Main Sitehttp://www.worldoceansday.org/

Find An Oceans Day Event Near You – http://www.worldoceansday.org/events_list

Take A Nature Walk – Make An Instrument!

sistrums-sticksAutumn is such a great time to take a nature walk with your child!  Maybe you have a wooded backyard or a park nearby?  Or perhaps there is a natural area near your home where you can enjoy the changing seasons.

As you take a walk in nature, look for any stick or small branch that’s formed in the shape of a “Y”.   If you find one, you can take it home and make a wonderful little musical instrument that actually dates back to ancient Egypt.

What Is A Sistrum

sistrum-posterSistrums are rattles that are found all over the world.  This clever little percussion instrument starts with some sort of forked object and then has a string or wire running between the two forks. On the strings or wires are objects that rattle and clank, making a lovely noise when shook back and forth.  In ancient Egypt, sistrums was used as part of the Pharaoh’s court and can even be seen pictured in hieroglyphics!

Supplies

Small stick or branch
Sand paper (optional)
Sturdy twine or floral wire
Colorful yarn
Noise-making Objects – buttons, beads, jingles, paper clips,
Recycled noise-making objects – soda tabs, bottle caps, compressed bottle tops (our next post will show you how to make and use these safely to avoid sharp edges).

Start with the Stick!

Once you’ve found a sturdy stick or branch that’s shaped like the letter “Y”, you making-sistrums-peace-valleymight want to take a bit of sandpaper and sand down any rough edges.  Then take the sturdy twine or floral wire and secure it to one side of the “Y”.  Now add any of rattling objects and hold the wire in place without wrapping it on the other side.  Check to see if you like the sound it creates.  If you do, then wrap the wire or twine securely in place.  If not, experiment with adding or removing objects to get the sound you like.

Here’s a hint, less objects often make a more pleasing sound!

Add extra strings of noise-makers if you like.

wooden-sistrumMaking It Unique

After creating the noise-making part of the rattle, you may wish to decorate the handle or the sides with colorful yarn, woven bands, electrical tape or even painting or adding other decorations. This is a very open-ended project and you can be very creative with it!

Learn About The History Of The Sistrum

If you want to tie this project into a study of world cultures, you can check out the Ancient Instruments of the Middle East kids music mini-course.  Or simply have fun with the Egyptian coloring page.  Links and other resources are below.  Happy crafting and music-making!

Links and Resources

Free Coloring Page – Egyptian Sistrum  https://www.teacherspayteachers.com/Product/Color-An-Ancient-Egyptian-Rattle-The-Sistrum-2166721

Ancient Instruments of the Middle East  kids music mini-course https://www.teacherspayteachers.com/Product/Ancient-Instruments-From-The-Middle-East-Mini-Lesson-2127995

Free Doumbek (Middle Eastern Drum) Poster and Coloring Page https://www.teacherspayteachers.com/Product/Middle-Eastern-Drums-Doumbek-Background-Coloring-Page-2049118

Turn a Milk Jug Into a Recycled Shekere

recycled shekeres in classDo you know the three R’s? Reduce, Reuse and Recycle.

How about the four “R’s”?   Reduce, Reuse, Recycle… and Rock Out! While you’re going greener and thinking about reducing or reusing plastic, here’s a fun way to turn large containers into child-size versions of African shekeres.

What’s a Shekere?

I wonder if shekeres were “original recycling projects”. Perhaps someone looked at dried gourds and decided they could be made into musical instruments. To do this, a netting of beads (called a skirt) was crafted around the gourd and small beads, seeds or shells were strung in the fiber to create the sound of the instrument. Most music historians believe the shekere began in West Africa but can now be found with variations in size, beadwork, shape and manner of playing throughout the African continent and around the world.

A Milk Jug Shekere

Since you probably have more plastic containers than cleaned and dried gourds, start by finding an empty milk jug, large water bottle or similar item from your recycling bin. Before you begin, make sure it fits nicely into your child’s hands.

Recycled shekere plus paper to beadBeading With Stickers or Markers

Doing intricate crafts like beading is great fun but takes practice and patience, plus motor skills that can be a difficult for small children. Here’s an easy alternative.

If your container is clear and clean, you can place stickers directly onto the plastic bottle or draw “beads” with markers, making colorful patterns or shapes. If there’s a label on the container, you can cut out a piece of poster board or construction paper to fit the container and lay the paper flat. This makes for easy “sticker beading” and a fun way to explore patterns, shapes and colors with your young child.

If you’re working with a classroom of kids or have a limited time to do this project, you can skip the aspect of trying to “bead” the shekere and allow the kids to simply decorate the outside of the container.

Sounding Good!

mini shekere for storeIn traditional shekeres, the sound comes from the beads or seeds rattling on the outside of the gourd. In our recycled version, we’ll need to add something inside the container to create the sound.   Here are some suggestions for a quieter recycled shekere: sand, salt, sugar, tiny pasta (like acini de pepi), seed beads, Q-tips and paper clips. Here are some fillings you can use to create a louder instrument: pebbles, dried pasta, dried beans, popcorn kernels, marbles or pennies.

Once you’ve filled your shekere and you like the sound it makes. Put the cap on and seal it into place with heavy duty tape to keep this project child-safe.

plastic shekereTime to Play

Although a shekere is a rattle, there’s a lot of different ways you can play it. Here are some playing suggestions:

Hold the handle and shake.

Hold both sides and rattle the contents back and forth.

Hold both sides and toss it gently while twisting it.

Hold it vertically and toss it gently from hand to hand.

Peru_Preschool_ShakureSit a short distance from a friend and toss it back and forth.

With a group of children, sit in a circle and toss it from child to child around the circle.

Try any of the above ideas while singing or while music is playing. Try to shake along to the beat.

Links and Resources

Hear A Shekere

http://www.dariamusic.com/shekere.php

Color a Shekere Online

http://www.dariamusic.com/color_Shekere.php

Bead an African Shekere

https://makingmulticulturalmusic.wordpress.com/2013/12/04/bead-your-own-african-shekere/

2 recycled smilk jug shekeresMake a Classroom Shekere (From A Gourd)

http://tinytappingtoes.wordpress.com/2013/08/05/easy-gourd-shekere-for-a-child-or-a-classroom/

An Alphabet Shekere Game

http://www.trueaimeducation.com/2012/10/guest-post-learning-letters-with-an-alphabet-shekere.html

Sekere.com – Beaded Sekeres from Master Craftswoman, Sara Fabunmi

http://www.sekere.com

Cultural Value of the Shekere, Article By Sara Fabunmi

https://makingmulticulturalmusic.wordpress.com/2011/10/25/the-cultural-value-of-the-sekere/

Outdoor Musical Play – Make Your Own Bullroarer!

bullroarers - plastic

You may not recognize the word “bullroarer”, but you probably recognize the sound it makes. Used by both Native Americans and Aboriginal Australians, this simple instrument spins around and produces a whirring sound that is truly unique.

Since it’s really hard to describe, take a minute to watch “Jungle Jay” demonstrate his homemade bullroarer here:

What Is A Bullroarer?

Made from a simple piece of wood attached to a string, the bullroarer is spun with one hand then swung around in a circle with the other. As it spins, a remarkable whirring, buzzing noise is produced that can be heard quite a distance away.

bullroarer - realIt’s easy to see how this was used originally to signal other people or to communicate in times before telephones or modern devices.

Make Your Own Version

This activity could not be easier. All you need are recycled water bottles of various sizes and sturdy string or twine. Start by tying the string around the neck of the plastic water bottle, securing it tightly with several sturdy knots.   If you like, add a stick to the other end of the twine or tie the string into a loop to make it easier to hold while spinning.  A good length for the string is about 3 feet, but feel free to adjust this length for the size and shape of any player.

Although this technically isn’t a bullroarer, your plastic bottles will make odd, eerie noises when swung around in a circle just like the authentic aboriginal instrument. One hint: pick plastic bottles with smaller openings as they seem to make the best sounds when used in this project.

Safety First

Although spinning a plastic water bottle is much safer than spinning a piece of wood, it helps to consider safety when playing this instrument. Anyone playing a bullroarer should be outside in an open area, away from people or things that things that could be hit accidentally.

How To Play A Plastic Bullroarer

Once you’re positioned safely away from any people or objects, simply hold the one end of the string and swing it around. Swing it either in a circle in front of you, to the side or over your head. As you vary the speed, the sound will shift both in volume and in tone. Play with your one plastic bottle or different bottles to find the type of sound you like the most.

A Bullroarer Orchestra

If playing with a group, you can position kids or people in different areas with plenty of space between them. For instance, if you’re on a playground, you can position kids within large chalk circles with ample distances between them. Participants can all play together or someone can call out names so each player can add their instrument or stop playing. This is a fun way of creating a sonic landscape, especially if different size and shape water bottles are used.

Be safe – and have fun!

Celebrate International “Make Your Own Instrument Day” – June 21, 2014

MAID graphicRecently a friend of mine came up with an exciting idea – to create a holiday to focus on making your own musical instrument. It’s part learning, part creativity and part crossing cultures to share our common desire to have a blast, blast a horn, strum a stringed instrument or bang a gong!  With the first celebration scheduled for June 21, 2014, you can find out all about International Make Your Own Instrument Day at the link below.

Who created this new holiday that is more fun than donut day or national overalls appreciation week?  It was dreamed up by Jay Sand, guitarist and children’s music teacher as well as the active dad of three beautiful young girls, ages 4-9.  Along with this holiday, Jay also created the All Around This World music curriculum as a way to introduce children to the countries he’s already visited and the many more he hopes to visit with them.  Jay uses his music to really connect kids with a wide world of cultures and creativity.

And – you’re gonna love this!  Every time Jay plays music he starts his show with a song he learned in Uganda called “We Are Happy”.   It’s a song that was originally used to greet special guests who came to visit the tribe in Africa, but  Jay’s changed a few things and now it’s a great way to begin any activity or put a smile on any child (or adults) face.   You can read about the “We Are Happy” song at the post below.

So – on June 21st or any day -  be happy, create an instrument and make some joyful noise!

Resources And Links

International Make Your Own Instrument Day
http://www.allaroundthisworld.com/international-make-your-own-instrument-day/

All Around This World Music Programs
http://www.allaroundthisworld.com/

We Are Happy – A Song Of the Abayudya of Uganda
http://makingmulticulturalmusic.wordpress.com/2014/06/15/we-are-happy-a-song-of-the-abayudya-of-uganda/

Community Musical Fun – A Make-Your-Own Recycled Rattle Table!

NORWESCAP the table

When music is playing, everyone wants to be part of the fun -  especially young children.  A few years ago I designed an easy activity for the Nick Jr. Worldwide Day of Play that was a cross between a salad bar and a make-you-own-sundae toppings bar, only we were making musical instruments that the kids could keep and play.  Since that time, I’ve had a lot of fun doing this craft activity at Earth Day celebrations, school presentations and in community parks.

Here’s how it’s done, but feel free to be creative and add your own ideas and twists to this fun way of recycling, upcycling and rocking out with the kids!

Screen shot 2014-05-10 at 11.21.52 AMSet Up A Table

It helps to make a location, such as table, where kids can form a line and follow a few steps to make their own rattle.  At the beginning of the line, have a variety of clean, recycled containers such as empty water bottles or plastic juice containers.  Next have several dishes of small items that the kids can choose to use to fill their container.  Birdseed, dried beans, rice or pasta make great choices.

Two Hints: A longer list of possible contents is below.  Also, its a good idea to stay away from nut or peanut products because of allergy issues.

Screen shot 2014-05-10 at 11.21.17 AMAnother approach to filling the rattles is having one large container used to collect a variety of these materials.  Kids can reach in and grab a handful of items and place them in the funnel that will fill their rattle.

Decorate The Inside

Who doesn’t love glitter? Or confetti?  Have a few choices that the kids can use to add some crafty “bling” to their rattles.  For this part of the craft, funnels really help in getting the glitter or confetti inside the rattles.

Seal the Rattle

Once the child is done with the rattle “insides”, seal up each rattle with electrical tape.  Even if you are working with older children, these rattles will sometime get into the hands of smaller children and having them sealed with sturdy tape keeps the project much more child-safe!

NORWESCAP boy w:coffee can + bottle rattleDecorate the Outside

Once the rattle is sealed, you can add stickers, tape or use yarn or pipecleaners to make colorful streamers or handles for the rattles.  Look at some of these artistic rattles!

Stone Soup Rattles?

Have you ever heard the Stone Soup story?  It’s a tale where everyone brings one item that makes for a tasty dish for all to share.  If you want to do this craft as a group or gathering activity, you can ask each person to take one item from the list and bring it to the event.  That way everyone participates in the making and playing of the new instruments!

Here’s a list of supplies for this activity.

Supplies

A supply of clean, dry recycled plastic bottles and containers.

Funnels – (wider-mouthed ones work best!)

Rattle “contents” such as dried beans, rice, birdseed, dried popcorn, lentils, pebbles or different shapes and sizes of dried pasta.

Electrical Tape

Glitter

Confetti

Stickers

Yarn, ribbon or pipecleaners.

Anything else?


wwdop - playing recycled rattlesShake It Up!

When you’ve made your musical instruments – go ahead and make some music!  Invite someone who plays a guitar or musical instrument and they will have a perfect percussion section!  Or bring along some recorded music and let the kids and adults play along.

wwdop - too cool!Making music together brings the whole community together.

Isn’t that a great way to spend the day!


Make Your Own Pu’ili – Hawaiian Rhythm Sticks

Rhythm sticks are great additions to almost any type of musical play with children.  Found all around the world, most rhythm sticks are about 6 to 8” long and made of solid wood.  Hawaiian rhythm sticks, however, take a really unique puili sticks on a leafapproach to this age-old instrument.  Called pu’ili; they are made from longer sticks of bamboo, solid on one end and slit on the other to make a rattling noise when struck together.  And they are tapped in many different ways, often as part of the hula tradition so making and playing your own pu’ili sticks can be a fun way to enjoy movement and music at the same time.

Want to see how they are played as part of the Hawaiian tradition?  Watch this short video and you will be amazed at the coordination of the dancers and the many different ways two sticks can be used to create rhythm and become part of the graceful moves in this dance.


Crafty Pu’ili Sticks

Actual pu’ili sticks are made from lengths of bamboo, generally around 12 – 18” long.  They are left solid at one end and then cut into numerous slats on the other end.  Our craft version uses the cardboard roll from paper towels and adds a few elements for decoration and durability.  Supplies you need are:

Screen shot 2014-02-01 at 12.38.21 PM2 cardboard tubes from paper towels

Scissors

(Optional)  Electrical or duct tape

Stickers, markers or other materials for decoration

This is such an easy craft.  Simply cut slits in one side of the cardboard rolls and use the electrical tape or duct tape to wrap the other (uncut) end.  This will indicate which side to hold and help the sticks last longer.

Although it’s not traditional, you can decorate the cut side, using markers or stickers, paint, glitter and glue or whatever inspires your imagination.  Once you’re done – it’s time to play!

One quick note here, since they are made of cardboard, these pu’ili sticks may not last a long time.  If you enjoy this musical craft, it may be a good idea to save these paper towel rolls and make several pairs.

Playing Your Pu’ili

There are lots of basic moves for playing these rhythm sticks that any child or adult can master right away.  Try some of these easy suggestions:

Hold one stick in your right hand in front of you. Tap with the left stick.

Hold one stick in your left hand in front of you. Tap with the right stick.

Hold one stick in your right hand by your right shoulder. Tap with the left stick.

Hold one stick in your left hand by your left shoulder. Tap with the right stick.

Screen shot 2014-02-01 at 12.38.34 PMTap the two wrapped ends together in front of you.

(If seated at a desk or table) Tap the two wrapped ends on the desk or table in front of you.

(If seated on the ground) Tap the two wrapped ends on the ground in front of you.

Screen shot 2014-02-02 at 8.33.56 AMIf standing, tap both sticks on the ground by your right toe.

If standing, tap both sticks on the ground by your left toe.

Mix and match these moves.

Mix and match these moves in time with Hawaiian music.

Mix and match these moves in time with any of your favorite types of music.

Rhythm Games

Once you’ve mastered the basic moves, you can also play with an adult, partner, friend or even a group.  In the video above, you probably noticed how the dancers tapped each other’s sticks.  You can try something similar.  If you sit across from a partner, pick out what moves you want to do (such as – let’s tap right, then left sticks in the middle) and give them a try.   Make up your own patterns with or without music.

If you’re seated in a circle with a group, you can try patterns such as this one:

Everyone taps both wrapped ends on the ground twice, then taps both sticks together in front of themselves.

Everyone taps both wrapped ends on the ground twice, then reaches out to tap the sticks of their neighbors, both right and left.

Repeat the pattern while keeping a beat.  Try it without music, while singing or while playing recorded music.

—————–

Photograph of pu’ili sticks on a tropical leaf, used by permission from NaKani O Hula Farms.  Their farm grows and creates many traditional Hawaiian instruments and crafts.  Find them at:

http://www.nakaniohula.com/about-us/


Make A Whistle – From A Blade Of Grass!

Even the simplest things can be a part of creative, everyday musical fun with your child!

Have you ever shown your kids how to make a simple blade of grass into a whistle that sounds like a duck call?  If this wasn’t one of your childhood games, don’t worry.  It’s easy to learn and a great way to share creative play with your child.

What Do You Need?

Only three things! A blade of grass, preferably a longer thin one, two thumbs and a bit of patience.  And as you try this activity, you might want to notice that you’re actually making a simple version of the type of reed found in woodwind instruments such as saxophones, clarinets and oboes.

How To Do It!

Although this seems easy, it does take some time to get the right sound, so don’t give up if it doesn’t work the first few times!  Place your two thumbs together, leaving space between them like you see in the above picture.

Next choose a long, thin piece of grass, and stretch it between your thumbs, making it as tight as you can.  The grass should look as if it is dividing the space between your thumbs.

Then, put your mouth up to your thumbs and blow gently.  A loud, squawking sound should emerge that sounds like a duck.  If not, adjust the grass, try another blade of grass or change your mouth position until you get the whistling sound.

With a bit of practice, you can be a “duck call” pro in no time! Here’s what it might sound like:

Making Music From Natural Items

Love spending time outdoors or in nature?  Here are some related musical crafts that you might enjoy:

Take A Nature Walk – Make A Recycled Rattle
http://tinytappingtoes.wordpress.com/2012/03/26/take-a-nature-walkmake-a-recycled-rattle/

10 Earth Day Music Crafts From Recycled Materials https://www.teacherspayteachers.com/Product/Reduce-Reuse-Recycle-Rock-Out-E-Book-With-10-Musical-Activities-653502

Make Your Own Recycled Shaker Eggs

Everyone loves those bright colorful eggs that go chugga-chugga-chugga when you shake them.  They’re a wonderful addition to any classroom or children’s music area.  But, can you whip up your own version at home from recycled or on-hand materials?   Absolutely!

Supplies

Shakee egg suppliesSupplies for this craft are easy.  Any “child-proof” medicine bottle.  A small amount of any type of filling such as dried beans, beads, rice, bird seed, grain (such as quinoa), sand, salt or tiny pasta like pastina.  You’ll also need a sturdy tape – colorful electric tape works wonderfully and doesn’t unravel after hours of play.

What if you don’t use that kind of bottle?  Ask around.  Often friends, colleagues, neighbors or family can save an item like this for you and you can save one more plastic product from making it’s way into the waste stream.

Make Your Own

This craft couldn’t be easier.  Simply fill and seal your bottle.  Before you add the tape, make sure you enjoy the sound. You might be surprised how having less filling in a bottle can create a nicer sound.  Is your rattle loud or soft enough?  If not, adjust what you’ve put inside.

Although I usually recommend that parents or caregivers make crafts with kids, this is one that may be best to make without the children present. Since the project uses aspirin or medicine bottles, it may not be a great idea to give the impression that these bottles; when filled with their original contents, are playthings.

To cover the bottle and turn into a shaker egg, wrap it in tape.  Feel free to be creative with striped patterns using different colored tape, if you like.

hands with shaker eggsShake Your Own

How complex can playing shaker eggs be?  You might be surprised at the many different ways you can play them.

Shake one quietly.
Shake one loudly.
Shake back and forth.
Shake up and down.
Swoosh the contents around inside (in a circular motion).
Shake two different eggs – one in each hand.
Shake two different eggs, alternating back and forth.

You get the idea – right?

Even this simple egg-style shaker can be great at building motor skills, listening skills or as a part of any musical activity.

All Eggs Are Not The Same

If you’ve made several eggs with different fillings, you’ve probably noticed that each sound a bit different.  Larger beads or dried beans will make a louder noise.  Tiny beads, grain or sand will make a very quiet sound. This can be a fun way of learning loud and soft or interacting with your child.  Ask them questions like:  “which egg shall we use for this song?  What sounds best to you?”.