Tag Archives: musical crafts

A Vuvuzela – This Horn’s For You!

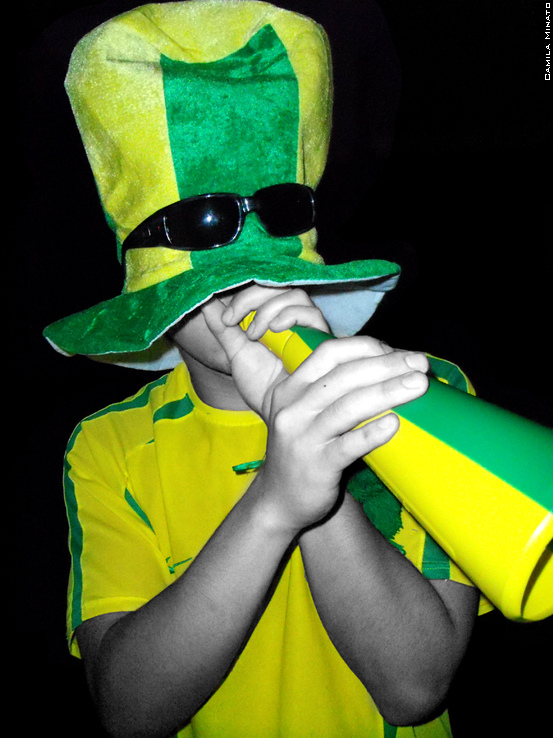
The world cup is coming up and who doesn’t love to cheer on their favorite sports team with a mighty blast of a honking horn? Whether you’re a soccer fan or just want to make some joyful noise, it’s easy to create your own homemade horn that looks a lot like the vuvuzelas used in soccer matches around the world!

What’s a Vuvuzela?

Although it’s now a common site at soccer matches all over the globe, it’s hard to tell exactly how the vuvuzela was invented. One South African soccer fan claims stadium workers vuvuhe invented the vuvuzela by reshaping a bicycle horn into a mightier instrument and there are pictures from the 1950’s and 1960’s that prove it. Later, the vuvuzela was used as part of worship in South African churches but this type of stadium horn clearly took center stage when the world cup came to South Africa. Dozens of reporter from around the globe declared their love (or hatred) of this new musical fad!

A Real Vuvuzela Is Loud!

vuvu south korea
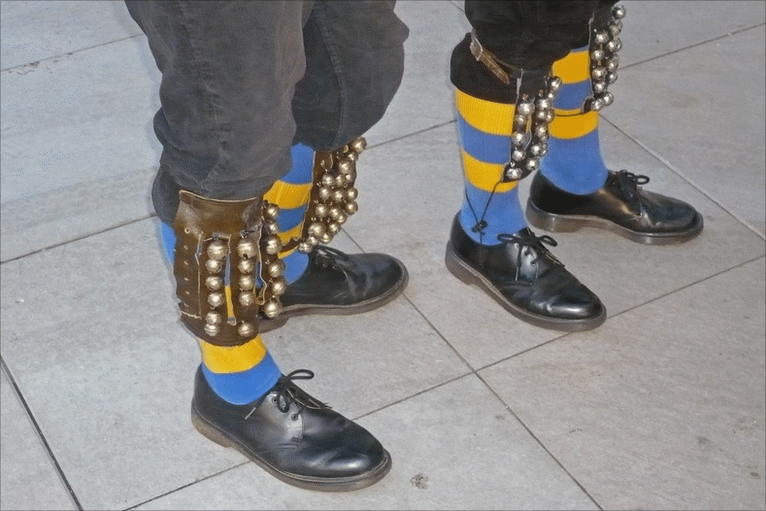
Real vuvuzelas are incredibly loud and are actually banned from some public areas in South Africa for that reason. They are also rather big – some more than 18 or 24 inches long! Thankfully, kids versions are smaller, quieter and some even come as plastic, collapsible horns that can be easily taken to a local game or sports events.

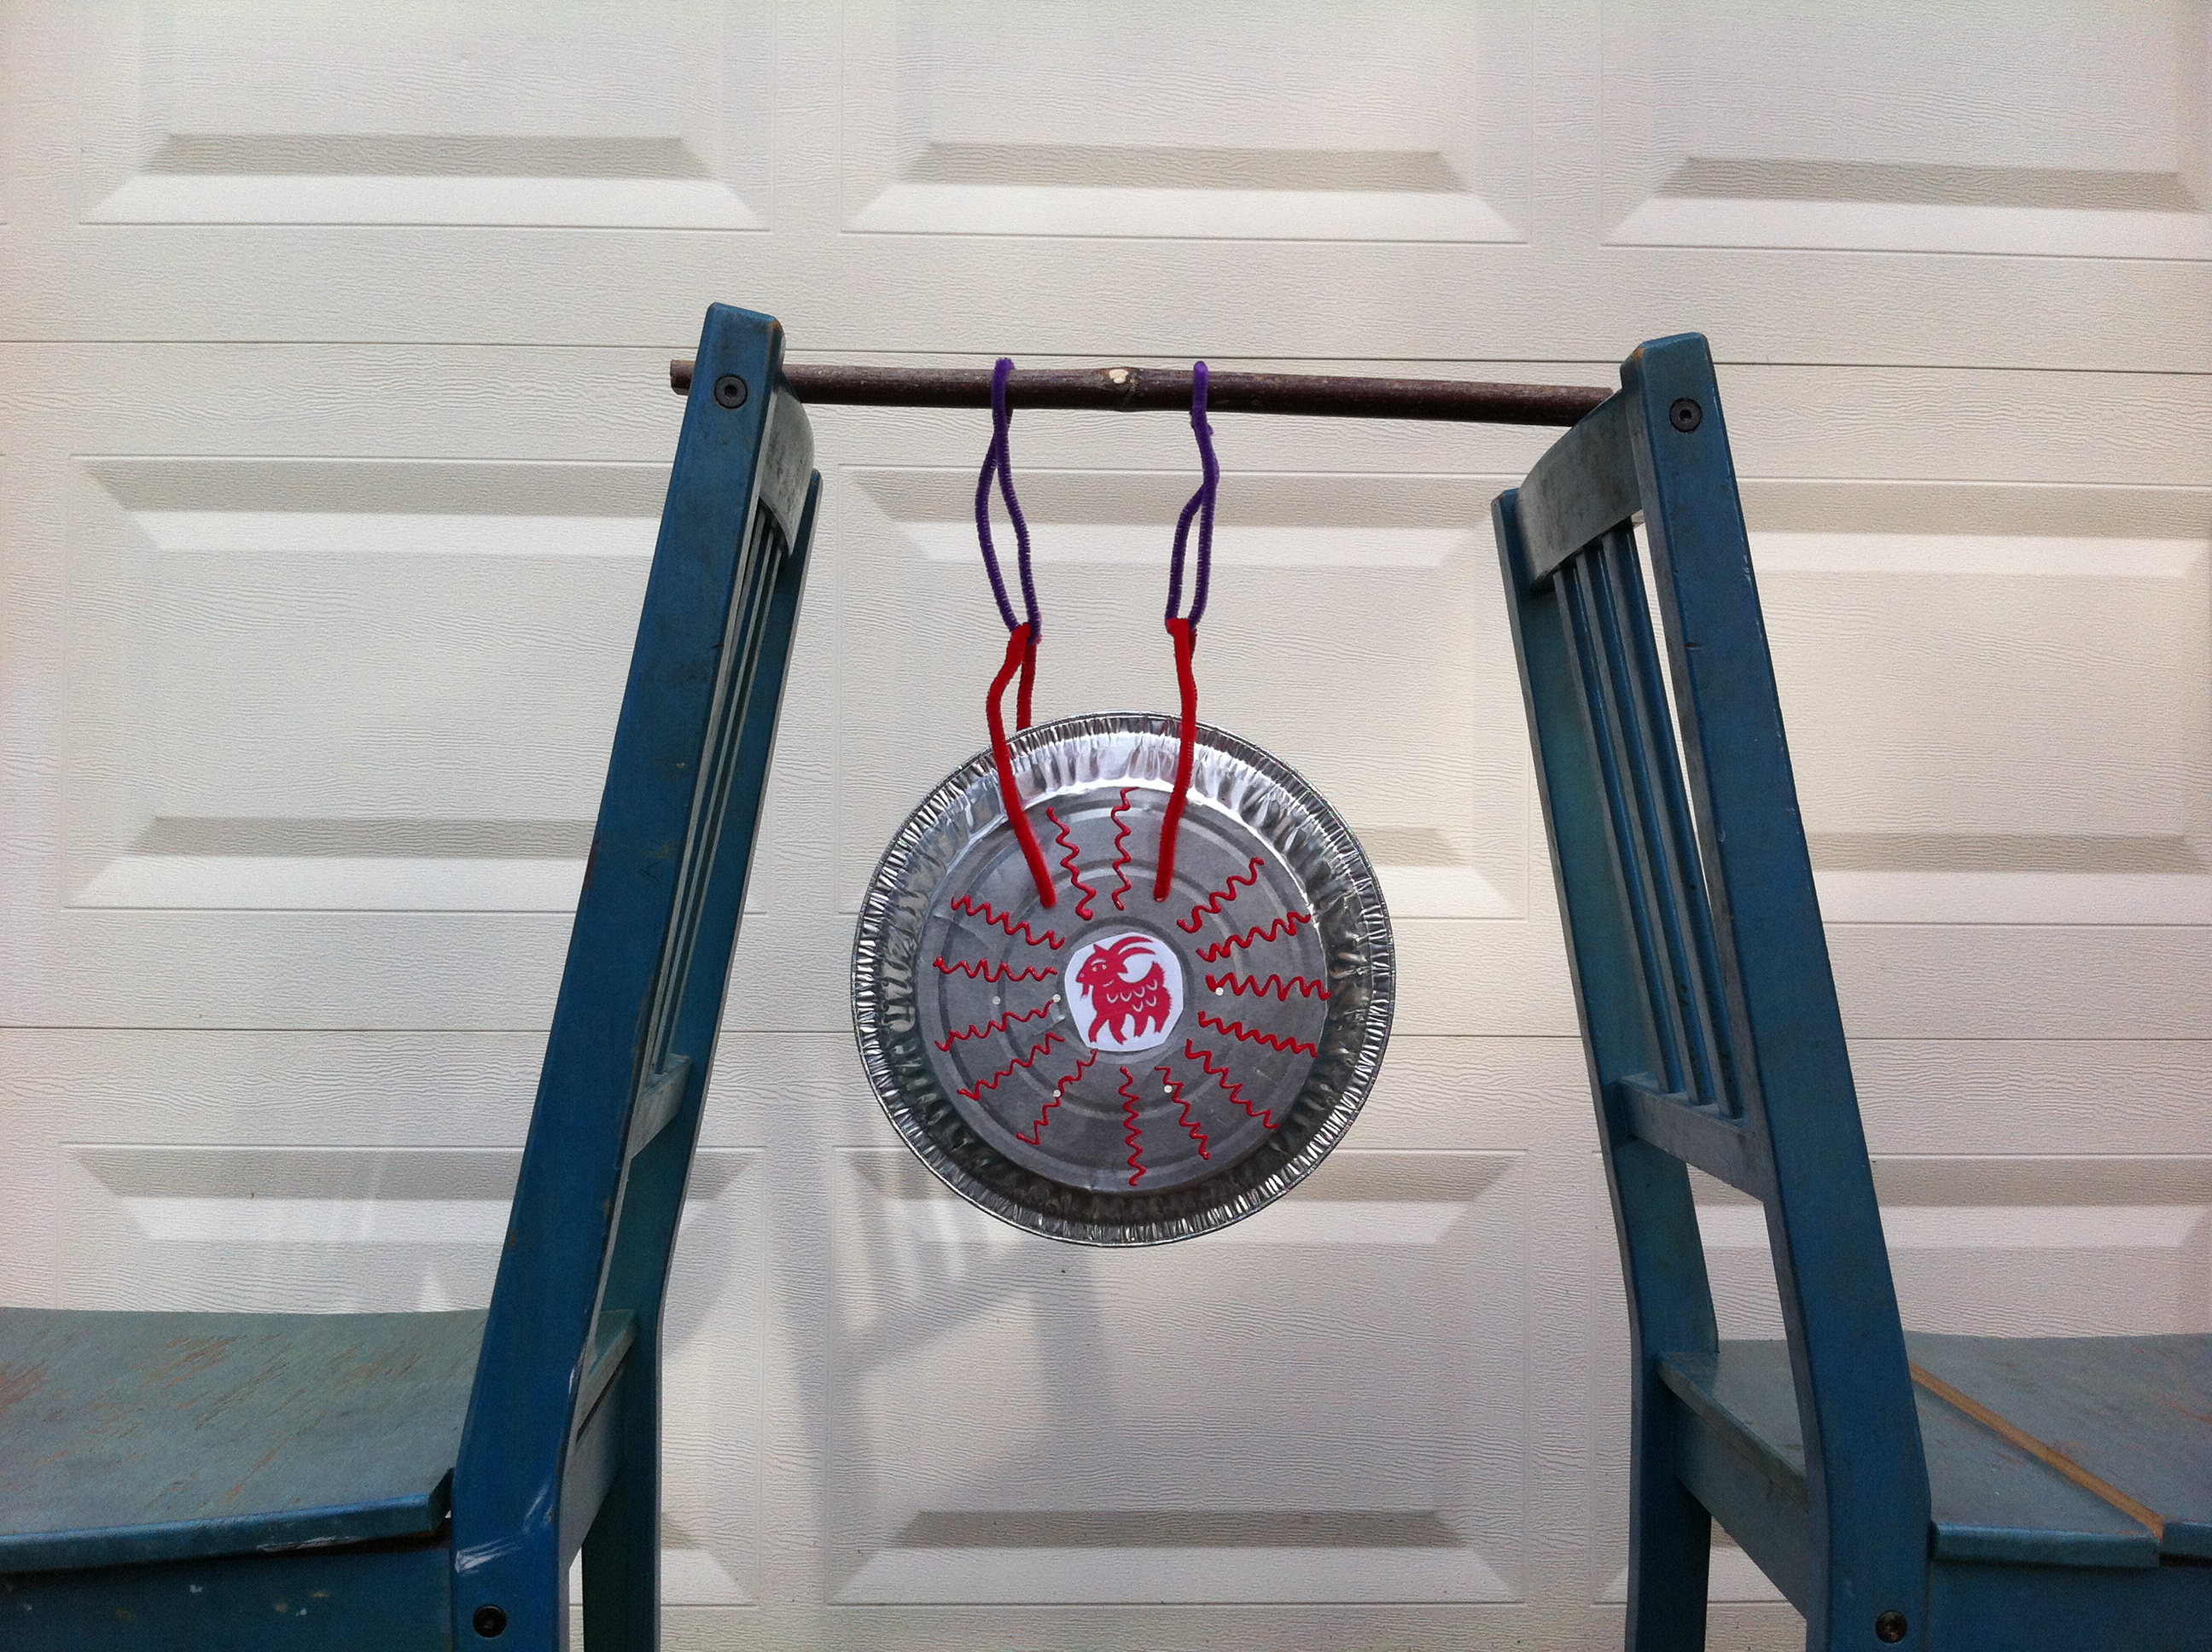
Make Your Own Vuvuzela

Can’t find a vuvu near you? Then make your own version out of some basic materials from around the house. Here’s what you need:

kyra pl;ays a vuvuMaterials:

Plastic cup

Cardboard roll from paper towels

Manilla folder

Sturdy tape and

Materials for decoration

vuvu brazil
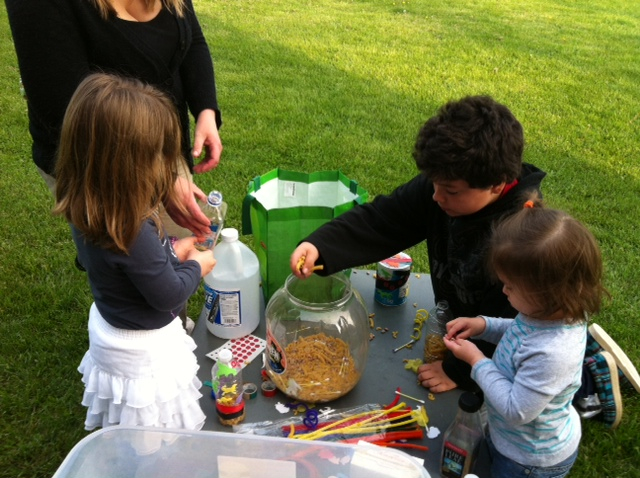
You can find step-by-step directions in the craft pdf below, but it’s quite easy. The plastic cup becomes the bell of the horn and fits into the cardboard roll. You’ll add a bit of manilla folder to fill out the horn and then decorate with your favorite colors or emblems from the team of your choice. Then, you play.
Check out the free craft pdf’s below for playing tips as well. And get ready for a good, hearty hoooonnnnk!

Win A Vuvuzela Plus a World Cup Activity Pack from KBN

On June 5th, my friends from Kid Blogger Network will give away a pack of world cup activities and prizes. I’ll donate the plastic vuvuzela, so you can win one of your own. Check back to this blog to get word of when the contest is live or subscribe to my feed to never miss a new musical post!

vuvu thumbnailResources

Make A Vuvuzela Craft Activity – Free From TeachersPayTeachers (Follow me on TPT!) http://www.teacherspayteachers.com/Product/The-Vuvuzela-Make-Play-Your-Own-South-African-Stadium-Horn-1242716

FacebookTwitterGoogle+Share

Make Your Own Bodhrán Irish Drum

Screen shot 2014-03-07 at 10.50.39 AMEvery culture has it’s own favorite types of drums.

In the Celtic tradition of Ireland, the bodhrán (pronounced “bow-ron”) is a drum that seems to have evolved from the tambourine.  Originally made from farm implements such as a sieve to separate grain, it’s generally 10 – 26” inches across and is played with a small wooden stick called a “tipper” (or cipín, in the Celtic language).

Whether you attempt to create a realistic bodhrán and tipper or just want to create an Irish-style drum, this easy craft makes a great introduction to Irish folk music.

bodhran drum suppliesGather Your Supplies

To create your homemade bodhrán, find a used pie tin or recycled take-out containers.  Circular metal containers  press-on tops work perfectly for this craft.  In addition, you’ll need materials for decorating the drum and a pencil or two plastic homemade bodhran (tin)spoons to serve as your tipper plus a bit of tape.

It you’re using a pie tin, you can decorate the sides or the top and you’re ready to play.  If you’re using take-out containers, decorate the blank side of the top circle with any kind of theme you like.  Since we’re writing this close to St. Patrick’s Day, we’ve chosen to decorate with shamrocks.

Make A Plastic Spoon Tipper

tippers yellowTo make a “tipper” for your drum, tape together two recycled plastic spoons.  If you don’t have any spoons handy, you can use an unsharpened pencil or a similar item like a chopstick or small thin piece of wood.

Time To Play!

Everyone loves to play on a drum.  If you have a simple stick as the beater, tap out a rhythm along with any of your favorite songs or discover some new Irish music to accompany.

If you’ve made a tipper, hold it in your hand between your thumb and first finger.

Tap on the drum with one side of it.  Then tap in the other side.  Practice tapping right, left, right, left until you get the hang of it.

Once you’ve mastered the back and forth tapping of the tipper, try picking up speed. You’ll be amazed at what some musicians can do with this drum after they’ve practiced a bit.

Below is a short video showing basic bodhran technique for kids as well as a Youtube video of a master musician who can really rock out on this awesome Irish instrument.

Homemade Bodhrán Musical Fun

Homemade Bodhran Fun- Click Here To Learn The Basic Techniques

Traditional Celtic Bodhrán – One Amazing Instrumentalist!

Links and Resources

Make Your Own Bodhran -  tutorial from TPT https://www.teacherspayteachers.com/Product/Irish-Drum-Make-and-Play-Your-Own-Bodhran-and-Tipper-2410657


“Beach In A Bottle” Rattle

This simple, sandy beach rattle makes a great musical craft whether you live near the ocean or are just dreaming of warmer weather and seaside play!

Supplies

beach rattle suppliesClear recycled bottle – any size or shape.

A small amount of sand, salt or sugar.  (You can also substitute rice, couscous or tiny pasta for the same effect)

Funnel

Small shells, pebbles or tiny treasures for inside the rattle

Colorful silk or artificial flowers

Electrical tape (to seal rattle)

(Optional) glitter, colored sand, colored rice

 Make Your Own Rattle

This craft couldn’t be easier.

Save, clean and dry a variety of clear recycled containers and assemble sand, salt or sugar along with a funnel, sturdy tape and other decorative goodies you might want to add to this project.

Using the funnel, fill the container with a small amount of sand, salt or sugar.  Put the lid on and listen to what the rattle sounds like.  Adjust (with more or less sand) until you find the sound that’s most pleasing.

Here’s a hint.  Less sand, salt or sugar sounds and looks better, but feel free to experiment and see what you can create.  When you’re done, seal the rattle up with sturdy tape (such as electrical tape) to keep the project completely child-safe.

Beach Treasures

Once you’ve found the perfect amount of “faux sand”, drop in your favorite tiny shells, pebbles or tiny treasures.  As you play the rattle and turn it from side to side, the small objects will appear and disappear in the sand.

 Tropical Flowers

Although this doesn’t change the sound of the rattle, it’s fun to add a bit of tropical color to the rattle.  Look for silk or artificial flowers from a craft bin or take apart an artificial Hawaiian lei for perfect addition to the fun musical craft.

A Very Quiet Rattle

This rattle makes a soft whooshing sound so it is perfect for children with noise sensitivity.  Several music therapists have commented that these “seaside” rattles are especially enjoyable to the kids who are on the autistic spectrum.

Rattle Away

Don’t be fooled by how simple this little instrument looks.  There are lots of ways to play a rattle – this type of rattle or any other one you might create or find in your musical bag of tricks!

Try some of these suggestions or make up your own ways to play.

Rattle back and forth

Rattle up and down

“Swoosh” the rattle – move the contents around in a circular motion.

Hold in one hand and tap against the other.

Switch hands and try the above.

Hold the rattle at the top and tap the bottom on a desk or on your knees.

Hold the rattle at the top and tap the rattle sideways on a desk or on your knees.

Shake the rattle while dancing or moving.

Play it along while singing a favorite song.

Play it along while listening to a favorite song on a cd player or media device.

Make up your own “rattle moves”.

A Call And Response Rattle Game 

This is a great game to play with kids.  It teaches listening skills, enhances motor skills and is just plain fun.   Best of all it can be done several different ways.  Try it “one-on-one”, with a parent and child, special education student and aide or teacher and student.  It also works really well in a group, such as a teacher and a classroom, parent and preschoolers or homeschoolers and siblings.

The leader plays a pattern and the other (or other) must play that pattern back to them.  Start simple and get more complex.  Trade off and let the student or child make up patterns that the teacher or others must imitate.

Here are three simple patterns to get you started:

Shake the rattle up high twice,

Down low twice

Swoosh it around once.

And stop.


Shake the rattle twice in your right hand.

Swoosh it in twice in your right hand

Tap it twice on the desk while holding it in your right hand

Then change hands and repeat the pattern with the left hand


Tap it on the desk loudly.

Tap it on the desk softly.

Swoosh the rattle around.

Shake the rattle three times in your right hand.

Shake the rattle three times in your left hand.

And stop – or do it backwards!

———

During the month of February 2014, we’re doing a feature on Hawaiian music and giving away a real ukulele as well as Hawaiian pu’illi rhythm sticks.  You can see that related feature here: http://www.dariamusic.com/monthly_song.php


Bang a Gong!

blue nipple gongBang a gong and every pays attention!

Tap a gong and you got a quiet, calming, resounding tone.

Gongs are wonderful instruments made from a circular metal object that hangs on a stand and is tapped or struck by a stick or beater.  Some are simple and plain.  Others are decorated beautifully with designs etched into the surface and hung on elaborately carved wooden stands.  All of them create beautiful notes when played.

What Can You Do With A Gong?

Gongs are great for marking time.  They are perfect for starting a day or an activity.  They can call kids in from recess or playtime or announce that a meal is ready.  They are a perfect addition to any home play, homeschool or classroom environment as well as a great way to learn about the culture of China, Tibet, Korea, Laos, Vietnam, Thailand and other countries where these play an important role in the cultural and religious life of the people.

Make Your Own Gong!

a smaller pie-tin gongDo you need a big budget to acquire a gong?  No way!  If you have a metal item such as a pie tin or recycled turkey roasting pan, you can craft your own unique gong.  Here are the supplies you’ll need:

Supplies

Metal pan

Broomstick, long stick or cardboard tube from inside wrapping paper

Yarn, string or pipecleaners

Materials for decorating the gong

Two chairs (to use as the stand for the gong)

horse gongInstructions

You can find step-by-step instructions in the pdf below, but basically, you decorate the pan, poke two small holes about 2 – 3 inches apart, slip string, yarn or pipecleaners through each hole and hang your gong from a broomstick or cardboard tube.  A makeshift stand is easily made from two chairs positioned back to back.

Last, to create a beater for your gong, cover a stick or wooden spoon with a bit of red felt or silk and tie it around the top.  Then experiment with the sound when touching it lightly, tapping harder or by striking several times in a row.  Below is a video of a serious gong being played to give you some  inspiration.

Decorate Your Gong

January 31st, 2014 marks the Chinese New Year and we welcome in the year of the horse.  It can be fun to create a gong with the theme of the New Year or to look up your birth year and make a gong with a pig, a rat, a sheep or a dragon.  Find a chart of birth years and Chinese Zodiac signs in the pdf below, along with more suggestions for making and playing this fun world music craft!

Resources

Step-By-Step Instructions/Make Your Own Gong And Chinese Zodiac Symbols PDF

http://www.dariamusic.com/docs/chinesegong.pdf

What Does The Gong Say?

Jingle Marching Sticks

making jingle sticksOne of the most wonderful things about making music with young children is that it easily becomes part of an active day.  Who can resist making a parade or dancing around the house or the classroom when they are carrying a marching jingle stick?  Best of all, the materials needed for this craft are often trashed (extra ribbon, tape, cardboard wrapping tubes, stray jingle bells) so this craft encourages you to upcycle, exercise and make music all at the same time.  What a great way to begin the holiday fun!

Make Your Own Jingle Stick

Here are the supplies to assemble:

A jingle stick – look for a cardboard tube from wrapping paper, 3 foot ruler or large stick

1 (or more) pipecleaners

6 – 10 jingles per pipecleaner

Colorful electrical tape or duct tape

Optional: Paint, stickers, yarn or duct tape, for decoration.

Screen shot 2013-11-15 at 3.05.34 PMBegin by stringing any number of jingles onto a pipecleaner.  Use electrical tape to fasten the pipecleaner into place on the stick.  It helps to fasten the pipecleaners to the stick between the jingles as well.  If you like, make several pipecleaners strung with bells to add to different parts of your stick.

Once the jingles are in place, decorate the rest of the marching stick.  Use paint, more tape, colorful ribbon, yarn or stickers to make it unique and wonderful.

Time To Play!

Other then using the jingle stick to lead a parade, there are lots of ways to get creative with your new instrument.

Sing any of your favorite holiday songs along to a beat created by your marching jingle stick.

Try tapping the stick on the floor while marching and use that sound as part of the rhythm being created.

Use marching jingle sticks as part of a holiday music presentation.

Try playing the jingle stick at a particular part of the song (like the chorus) or when you hear a particular word in a holiday song.  For instance, a class can jingle the bells only when you hear the word “jingle” in the song “jingle bells”.

If you like, try it along to this version of Jingle Bells which shares lots of different ways to say “Happy Holidays” in different countries around the globe.

Resources

Jingle Anklets –  http://www.dariamusic.com/docs/jinglebells.pdf

4 Easy Jingle Bells Instruments For Holiday Fun  – Craft Booklet from TeachersPayTeachers http://www.teacherspayteachers.com/Product/4-JINGLE-BELLS-CRAFT-ACTIVITIES-940926

4 Easy Jingle Bells Instruments For Holiday Fun  – Craft Booklet from DARIA’s Little Village Store http://dariasvillagestore.storenvy.com/collections/34585-all-products/products/3498803-4-jingle-bell-craft-activities-booklet

Easy Gourd Shekere For A Child – Or A Classroom

Peru_Preschool_Shakure

A shekere is a wonderful, versatile instrument from Africa.  Made from dried gourds of various sizes, the instrument has a netting over its rounded area that is beaded or woven with shells, seeds, nuts or other objects that rattle.  Since making the knots for the netting can be hard for smaller hands, we’re sharing a simplified version perfect for making with a child, a group of siblings or a classroom of kids.

Start With A Gourd

Shekeres are made from dried birdhouse gourds.  After they are harvested and stored for about a year in a dry location, they become sturdy and have a hardened outer shell.  As the gourds dry, the shell may not look perfect so some craftspeople sand the shell, bleach the shell or even paint and decorate it to make it more appealing before they begin the beading process.  You can try any of those approaches as well or use them “au natural”.

white gourd + necklace - shekere being madeMake A Gourd Necklace

The formal beadwork on a shekere is called a skirt.  For this project, our gourds will only have a necklace instead of a full “skirt”.

Take a piece of string, twine or embroidery thread and twist it around the top of the gourd, marking where it will overlap.  Measure it tight enough to stay on the gourd, but loose enough to rattle.  Don’t tie the string but instead lay it flat on a work surface.  It can be helpful to tape it into place.  Looking at the length of the string, you can get a good idea of how many strands of beads you can create to put onto it.

little gourd shekereJingles, Jangles and Bangles

Collect your bangles!  Look for any type of beads, buttons, jingle bells or similar objects you can use to create the sound of your instrument.  Here are some ideas for making several different types of creative shekeres.

Parent/Child Shekere

Parent and child create strands of noise-makers and they are strung alternately on the gourd.

Sibling – Friendship Shekere

Sister and brothers or friends create strands of noise-makers and they are strung on the gourd.

Classroom or Group Shekere

Each student or participant makes one string of noise-makers to add to the classroom instrument.

After you’ve finished creating your strands, add them to the necklace and tie it into place on the gourd.

mini shekere for storePlaying A Simple Shekere

Although these easy shekeres may not seem as versatile as their bigger cousins, you can hold them from the top and create several different types of rhythms. And if dried gourds are not readily available in your area, we’re also sharing a link below for making a recycled version out of plastic milk jugs.

Experiment with what you’ve created and have a blast!

shekere iconShekere Resources And Links

Hear A Shekere

http://www.dariamusic.com/shekere.php

Color A Shekere Online

http://www.dariamusic.com/color_Shekere.php

Make Your Own Shekere From Plastic Milk Jugs

http://www.dariamusic.com/make_Shekere.php

alphabet shekere 2Use A Shekere To Learn The Alphabet!

http://www.trueaimeducation.com/2012/10/guest-post-learning-letters-with.html

Shekere Kits And Step-By-Step Tutorial Available from DARIA’s Little Village store

http://dariasvillagestore.storenvy.com/


Make A Whistle – From A Blade Of Grass!

Even the simplest things can be a part of creative, everyday musical fun with your child!

Have you ever shown your kids how to make a simple blade of grass into a whistle that sounds like a duck call?  If this wasn’t one of your childhood games, don’t worry.  It’s easy to learn and a great way to share creative play with your child.

What Do You Need?

Only three things! A blade of grass, preferably a longer thin one, two thumbs and a bit of patience.  And as you try this activity, you might want to notice that you’re actually making a simple version of the type of reed found in woodwind instruments such as saxophones, clarinets and oboes.

How To Do It!

Although this seems easy, it does take some time to get the right sound, so don’t give up if it doesn’t work the first few times!  Place your two thumbs together, leaving space between them like you see in the above picture.

Next choose a long, thin piece of grass, and stretch it between your thumbs, making it as tight as you can.  The grass should look as if it is dividing the space between your thumbs.

Then, put your mouth up to your thumbs and blow gently.  A loud, squawking sound should emerge that sounds like a duck.  If not, adjust the grass, try another blade of grass or change your mouth position until you get the whistling sound.

With a bit of practice, you can be a “duck call” pro in no time! Here’s what it might sound like:

Making Music From Natural Items

Love spending time outdoors or in nature?  Here are some related musical crafts that you might enjoy:

Take A Nature Walk – Make A Recycled Rattle
http://tinytappingtoes.wordpress.com/2012/03/26/take-a-nature-walkmake-a-recycled-rattle/

10 Earth Day Music Crafts From Recycled Materials https://www.teacherspayteachers.com/Product/Reduce-Reuse-Recycle-Rock-Out-E-Book-With-10-Musical-Activities-653502

Make Your Own Recycled Shaker Eggs

Everyone loves those bright colorful eggs that go chugga-chugga-chugga when you shake them.  They’re a wonderful addition to any classroom or children’s music area.  But, can you whip up your own version at home from recycled or on-hand materials?   Absolutely!

Supplies

Shakee egg suppliesSupplies for this craft are easy.  Any “child-proof” medicine bottle.  A small amount of any type of filling such as dried beans, beads, rice, bird seed, grain (such as quinoa), sand, salt or tiny pasta like pastina.  You’ll also need a sturdy tape – colorful electric tape works wonderfully and doesn’t unravel after hours of play.

What if you don’t use that kind of bottle?  Ask around.  Often friends, colleagues, neighbors or family can save an item like this for you and you can save one more plastic product from making it’s way into the waste stream.

Make Your Own

This craft couldn’t be easier.  Simply fill and seal your bottle.  Before you add the tape, make sure you enjoy the sound. You might be surprised how having less filling in a bottle can create a nicer sound.  Is your rattle loud or soft enough?  If not, adjust what you’ve put inside.

Although I usually recommend that parents or caregivers make crafts with kids, this is one that may be best to make without the children present. Since the project uses aspirin or medicine bottles, it may not be a great idea to give the impression that these bottles; when filled with their original contents, are playthings.

To cover the bottle and turn into a shaker egg, wrap it in tape.  Feel free to be creative with striped patterns using different colored tape, if you like.

hands with shaker eggsShake Your Own

How complex can playing shaker eggs be?  You might be surprised at the many different ways you can play them.

Shake one quietly.
Shake one loudly.
Shake back and forth.
Shake up and down.
Swoosh the contents around inside (in a circular motion).
Shake two different eggs – one in each hand.
Shake two different eggs, alternating back and forth.

You get the idea – right?

Even this simple egg-style shaker can be great at building motor skills, listening skills or as a part of any musical activity.

All Eggs Are Not The Same

If you’ve made several eggs with different fillings, you’ve probably noticed that each sound a bit different.  Larger beads or dried beans will make a louder noise.  Tiny beads, grain or sand will make a very quiet sound. This can be a fun way of learning loud and soft or interacting with your child.  Ask them questions like:  “which egg shall we use for this song?  What sounds best to you?”.

Easy Morris Dancing Bells For Children

may day morris dancing

Around May Day, dancers in parts of England are getting ready to welcome the Spring by morris dancing.   They dress in colorful costumes and the bright and happy morris dance music is punctuated by the jingling and jangling of special bells worn on the legs.

Since young children love to move and dance, making an easy version of this traditional “knee-pad” instrument can be a fun way to welcome a new season, to exercise and to explore world cultures.

morris bells suppliesHere are the supplies you need for a simple, homemade version of morris dancing bells.

Supplies

Two short lengths of elastic of any width (about 10 – 14” long)

A handful of jingle bells

Any number of extra buttons, beads or similar jangles.

Assorted ribbons, yarns and embroidery thread

Needle and Thread

Start by cutting two pieces of elastic and making sure they can comfortably stretch around a child’s leg and sit just under the knee.  Leave a bit of extra length for the elastic to overlap.  This will be where you will sew or pin it in place.

morris bells - craftingPlace your elastic “laid out straight” onto your work area.  Since most elastic is white, you can use markers to color and decorate it before you add ribbons and bangles.

Create the hanging jingles by threading a jingle bell on a small ribbon or piece or embroidery thread.  Tie it onto the end and then add on any other buttons, beads or jangles that you like.  When you’ve reached the desired length, tie it in place onto your elastic.  Add as many of these as you like.

Add some ribbons or yarn to the morris bells.  Sew or tie them into place.  They may not add to the sound of your instrument, but they will move as you dance and add to the overall beauty of what you’ve created.

Last, sew or safety pin your morris bells to the right size for fitting around the leg of your child.

morris bells on kyraDancing With Bells!

You can use this craft to explore the music of morris dancing or the general music of the British Isles.  Or you can dance to any of your favorite songs.  If you get a chance to see actual morris dancers, you’ll notice that both boys and girls participate in this dance tradition.

Although there are many different traditions of morris dancing, some also involve waving handkerchiefs, dressing up in wild clothes or having a parade – all fun activities to do to welcome the Spring.

Easiest Instruments For Young Children – Recycled Rattles

Screen shot 2014-07-07 at 1.00.10 PMThere’s a reason you find rattles in almost every culture around the globe.

They are amazingly simple and very powerful at the same time.  A child playing a rattle becomes aware of how his or her movements change the sound they are making.  They realize how the sound they create can “fit” with a beat and most studies of young children show that they are keenly aware of rhythmic patterns.  Making and playing several varieties of homemade rattles can be a great way to explore music and have fun with a young child at the same time.

Recycled Rattles for Home or Classroom Play


Rattles made from gourds, seeds, feathers and a donkey's jawbone

Rattles made from gourds, seeds, feathers and a donkey’s jawbone

Most early rattles were made of materials such as dried gourds, seashells, clay, coconuts, bark and a variety of other natural objects.  In Africa, caxixi rattles are made from woven fiber.  In India, special rattles are made from colorful palm fronds woven together in clever patterns.  On the coast of Peru there’s even a rattle made from the jawbone of a donkey.  In short, people make instruments from materials that they have found available near their home.  We are going to take that same approach to creating recycled rattles!

Clean and dry a variety of small plastic containers (water bottles, juice containers, etc.) and assemble some objects that can serve as the contents of the rattles. Here’s a list of common materials that work well and the type of sound they create:

NORWESCAP the tableQuiet rattles: sand, salt, sugar, confetti, cotton balls, craft puff balls, paper bits, Q-tips, tiny pasta (such as pastina or acine de pepe).

Medium Rattles:  paper clips, small pebbles, birdseed, small beads, small dried beans, rice, smaller buttons.

Loud Rattles:  dried macaroni/pasta, large pebbles, large beads, coins, large dried beans, larger buttons.

The Inside of the Rattle

Choose the objects you’d like to add to the rattle to create the sound and also consider including some decorative elements.  Since plastic containers are transparent, you can easily add confetti, glitter, colorful ribbon, pipe-cleaners or similar items. They won’t alter the sound but they will add color, beauty and interest when the rattle is being played.

alphabet shekere 2The Outside of the Rattle

If you like, you can decorate the outside of the rattle with stickers, markers or add a handle made from pipe-cleaner, yarn or ribbon.  Feel free to get creative.  When you’re done, it’s time to seal it with some sturdy tape, such as electrical tape.  This helps keep the contents inside and generally makes it more child-safe around young music-makers.

Now you’re ready to have fun with your rattle!

Time To Play!

Peru_Preschool_ShakureShake along while you sing one of your favorite songs. Try playing slowly and shaking your rattle to the beat.  Then speed up the song. Can you keep up and keep in time?  Play along with recorded music.  Listen to different types of music and see how your rattle fits in with the music being played.

An Easy Rattle Game For Young Children

If everyone in a class or a small group has made a rattle, you try this easy game.

Ask the children to play a certain way until the music stops.  For instance, the teacher can say: “Shake your rattle softly until the music stops”.  The teacher stops the recorded music (like in a game of musical chairs) at an unexpected place and sees if all the students were able to stop at the same time.  Next, change the directions to other simple ways to play, such as:

Shake your rattle back and forth until the music stops.
Shake your rattle up and down until the music stops.
Shake your rattle round and round until the music stops.
Shake your rattle very softly until the music stops.
Shake your rattle loudly until the music stops.
Shake your rattle down low until the music stops.
Shake your rattle up high until the music stops.
Shake your rattle quickly until the music stops.
Shake your rattle slowly until the music stops.

Aside from this one game, there are lots of other ways you can make music and have fun with a rattle while you are learning, playing and recycling – all at the same time!

Here Are Some Variations On Rattle Crafts:

Monster Rattles – From Egg Cartons
https://www.teacherspayteachers.com/Product/HALLOWEEN-MUSICAL-RATTLE-BASED-ON-PERUVIAN-QUIJADA-1146672

Make Your Own African Coffee Can Drum – https://www.teacherspayteachers.com/Product/Make-Your-Own-African-Drum-Craft-3507618

chapchas (3) on red backgroundMake Your Own Maracas – https://www.teacherspayteachers.com/Product/Latin-American-Intruments-Make-Your-Own-Maracas-142802

MYO Chapchas- Goat Toe-Nail Rattlers from South America – https://www.teacherspayteachers.com/Product/Chapchas-A-Unique-Rattle-From-Latin-America-1426778