Category Archives: Early Learning With Music

A Music Tree Or Rhythm Clothesline For Outdoor Musical Fun!

rhythm tree - playground

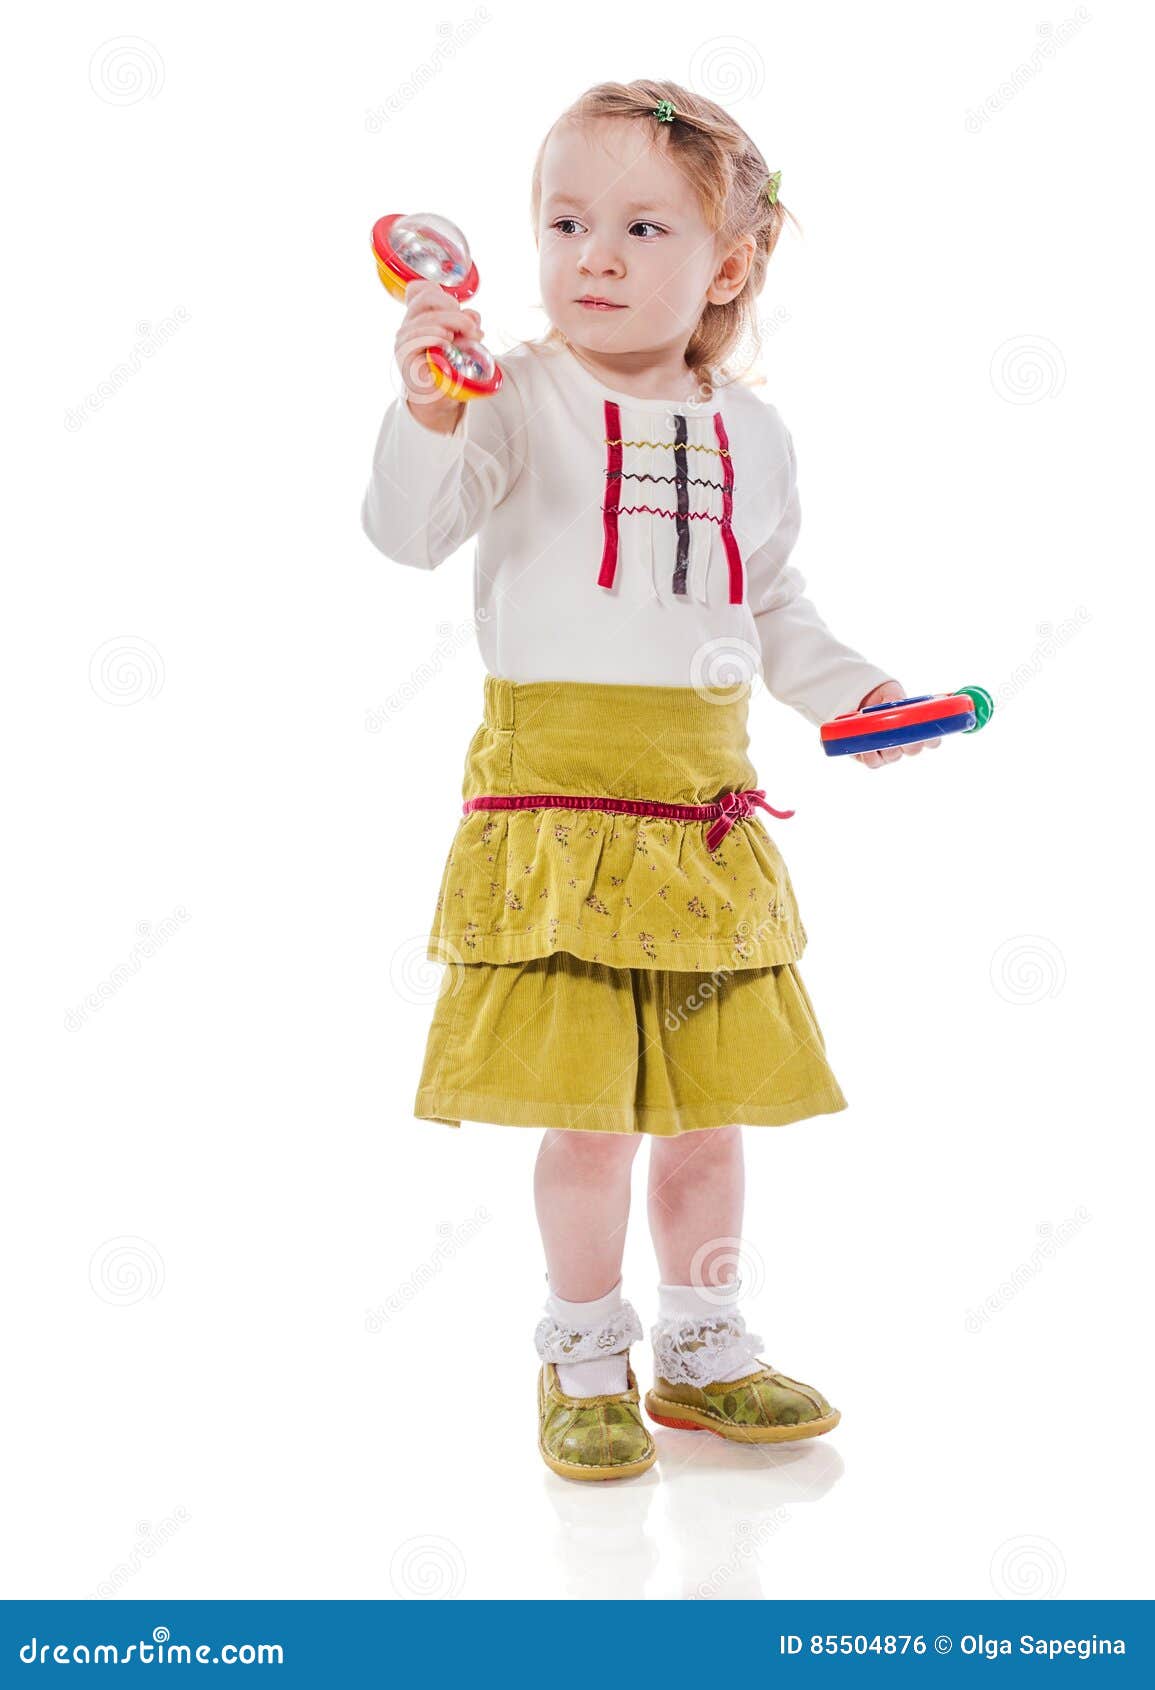
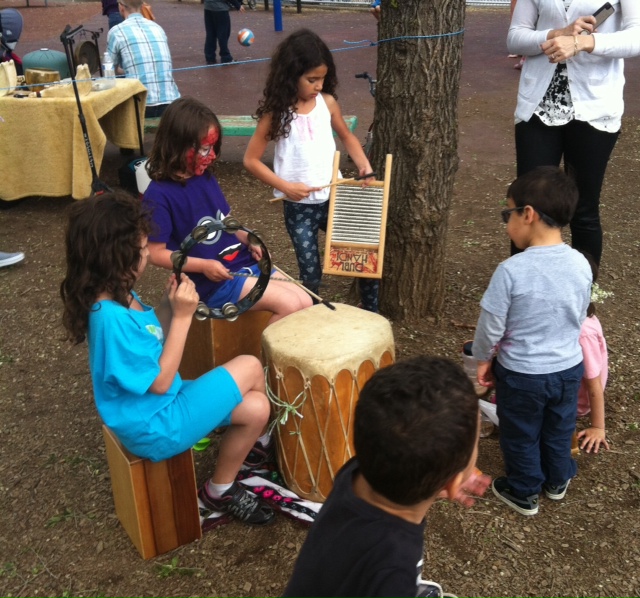
Getting outdoors and making music are two great activities for children of all ages – especially when the weather is wonderful!

If you have a special tree with low branches in your backyard or local park you can easily create a living musical sculpture for outdoor play.  If not, no worries.  Almost any playground, driveway or open space can accommodate a sturdy clothesline that will easily transform into a magnificent musical monstrosity just as easily!

And the best part of this project is that you already have everything you need to create a truly unique music tree or rhythm clothesline right in your garage, home basement and recycling bin!

Gather Your Materials!

If you’re making a musical tree, find some sturdy twine or rope to hand the instruments.

If you’re making a rhythm clothesline, you’ll need a longer, sturdy rope that will reach across your desired area.

A safe, sturdy stepladder

For Both Projects 

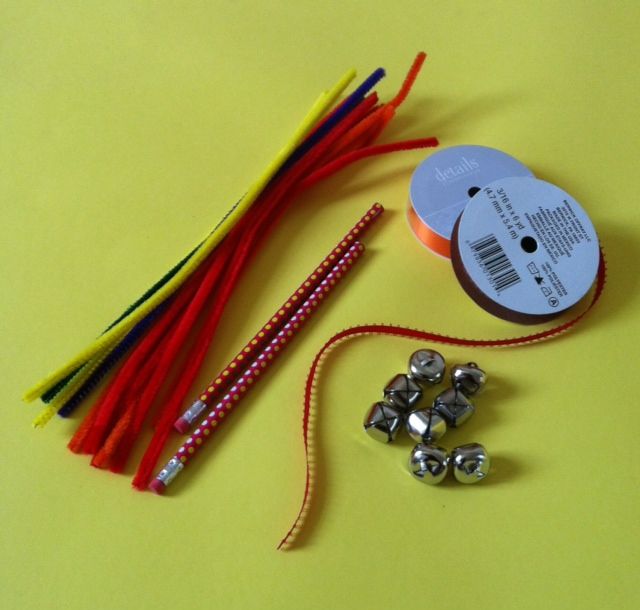
Extra string, twine or pipecleaners to attach instruments

Scissors

STARR GARDENS - a few instruments for Rhythm TreeInstruments

We’ll describe a variety of instruments perfect for this project and you can pick out what you want to create.  Or come up with some of your own awesome ideas!

Quick Tips and Suggestions

The pipecleaners help smaller children attach instruments without the need of knot-tying skills.

A basket for mallets keeps the area neat and organized.

If you make the instruments or gather the things you want to hang in advance, this project makes a fun activity for a party, family event or gathering of homeschoolers.
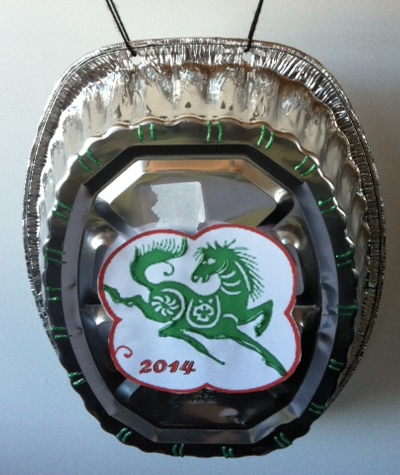
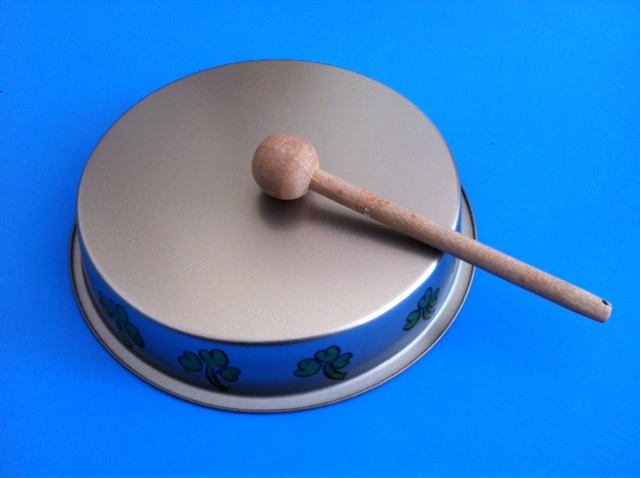
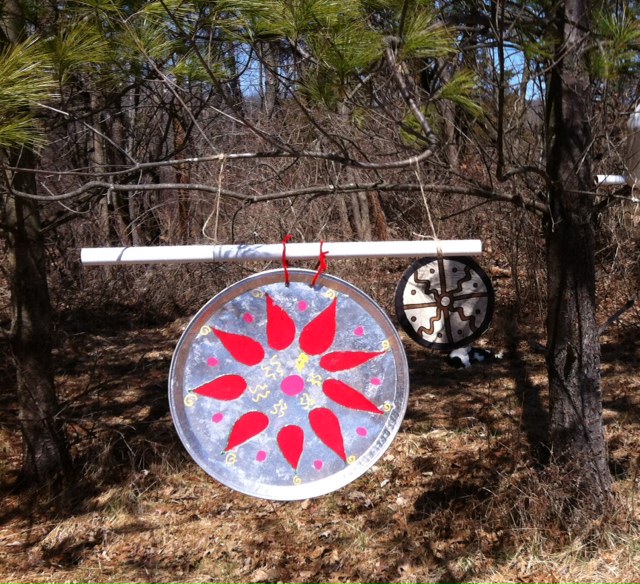
A Recycled Gong!

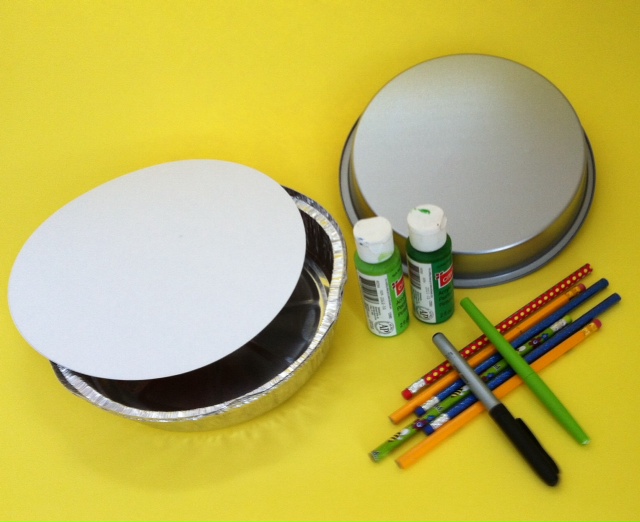
What better way to start off a musical session than banging a gong.  Take a used serving plate or aluminum turkey roasting pan, decorate and hang for a homemade gong.  (A complete Chinese gong craft is in the resource links below as well).

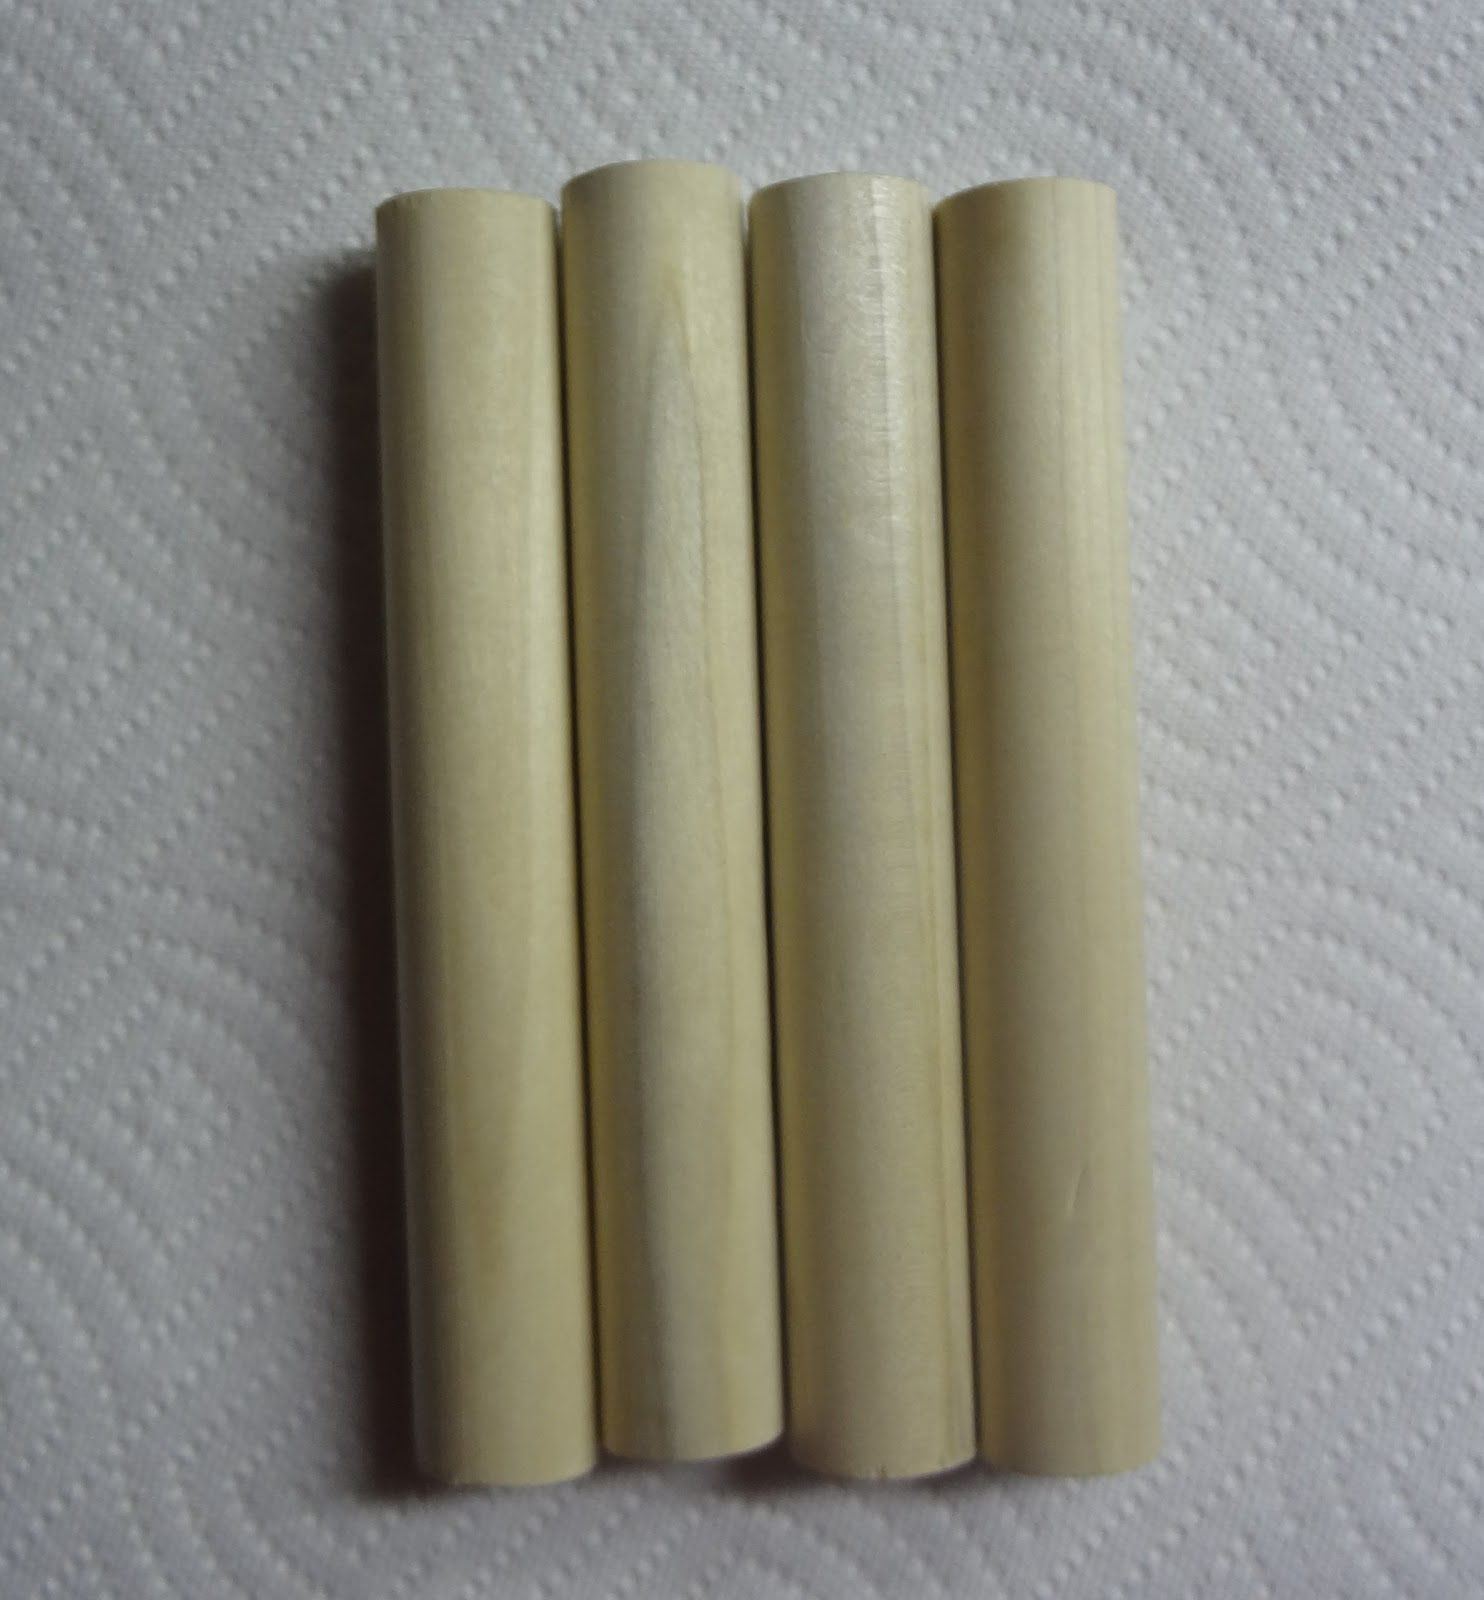
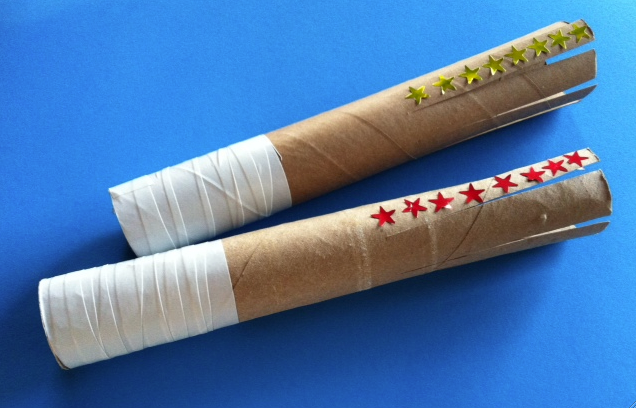
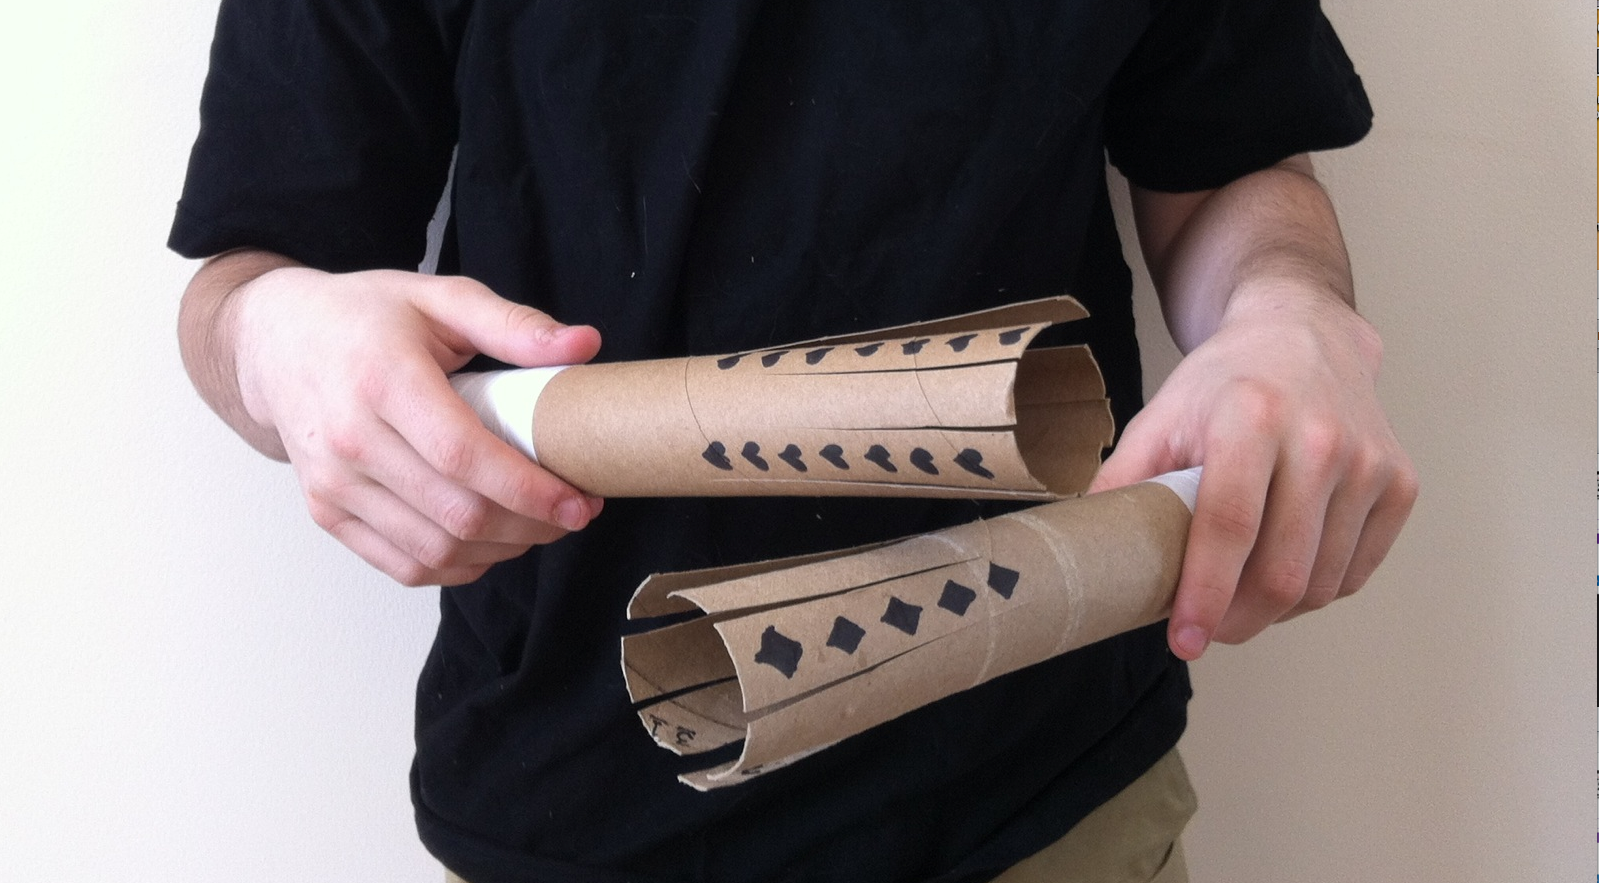
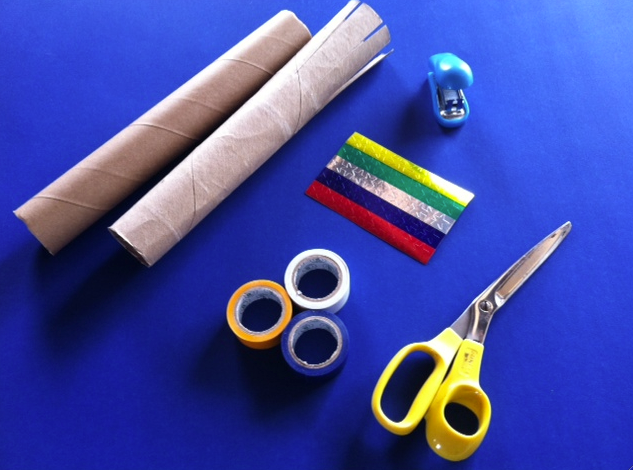
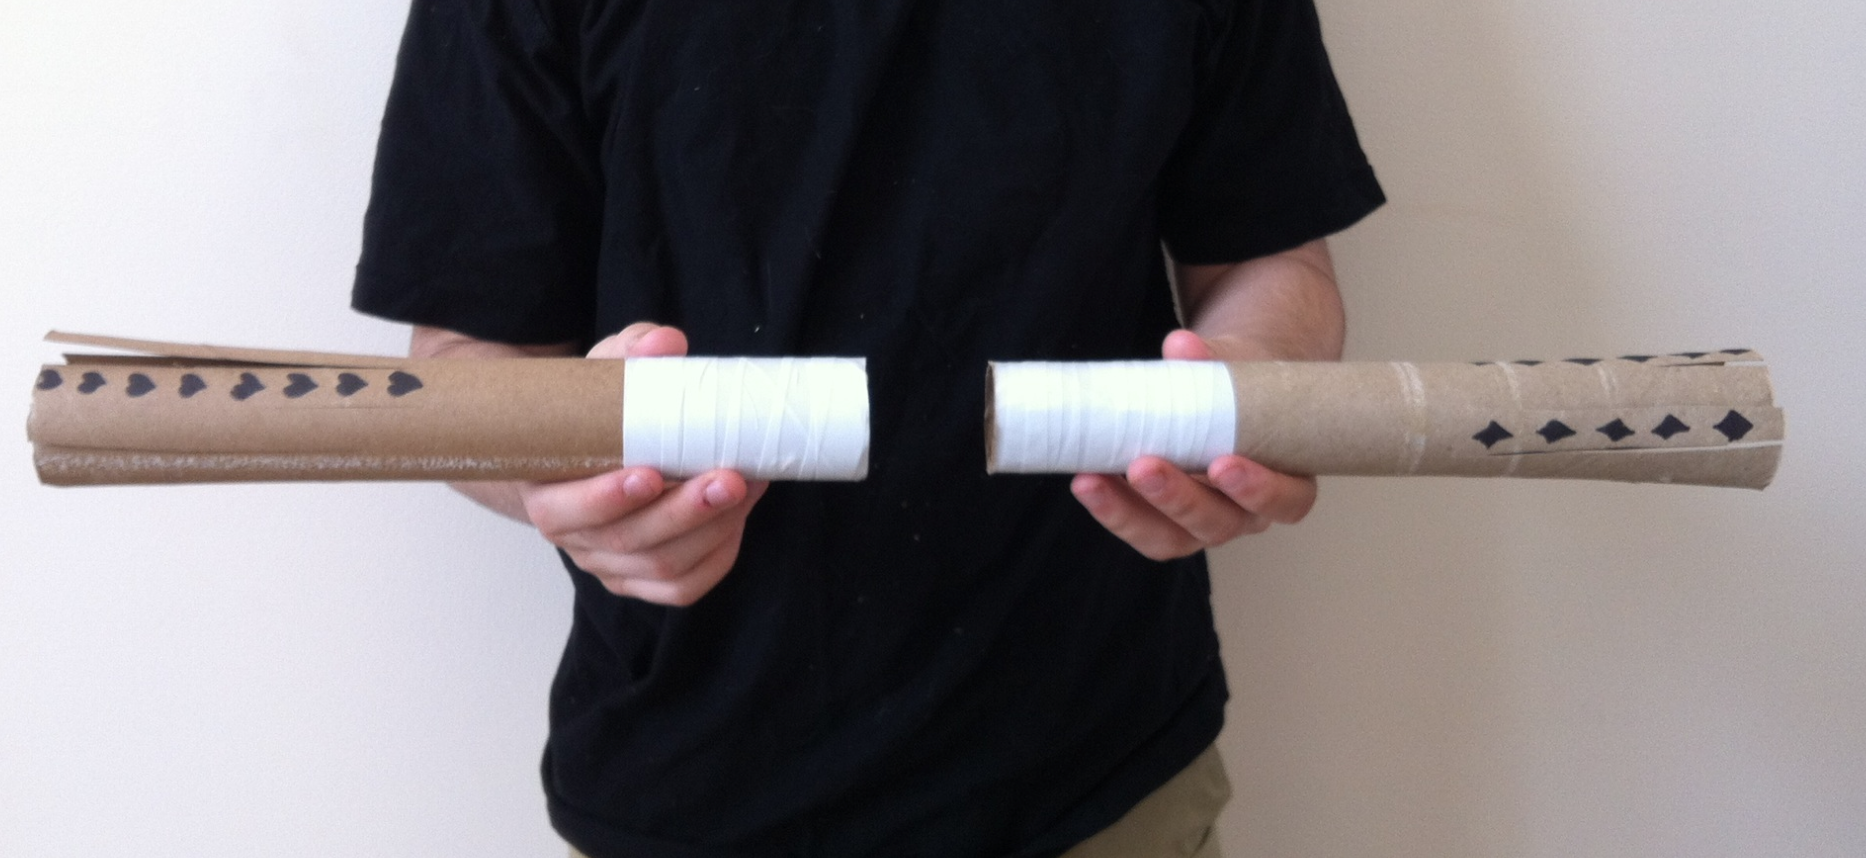
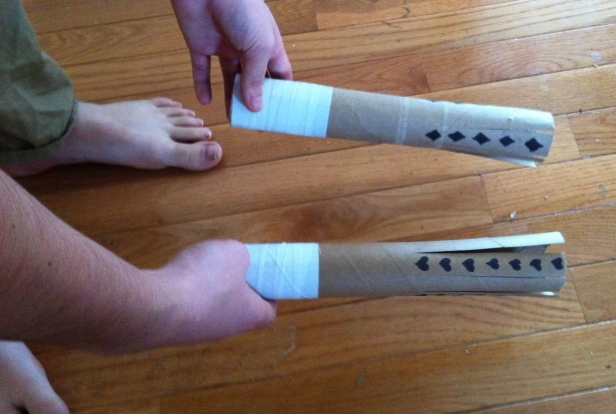
A Cardboard Roll Guiro

rhythm tree - paper towel roll guiroIf you’ve collected paper towel rolls, you can string them together and create something that looks like an oversized washboard.  Dragging a stick, mallet or whisk over the ridges will result in a wonderful “brrrrrrrrrrrrrrr” sound.

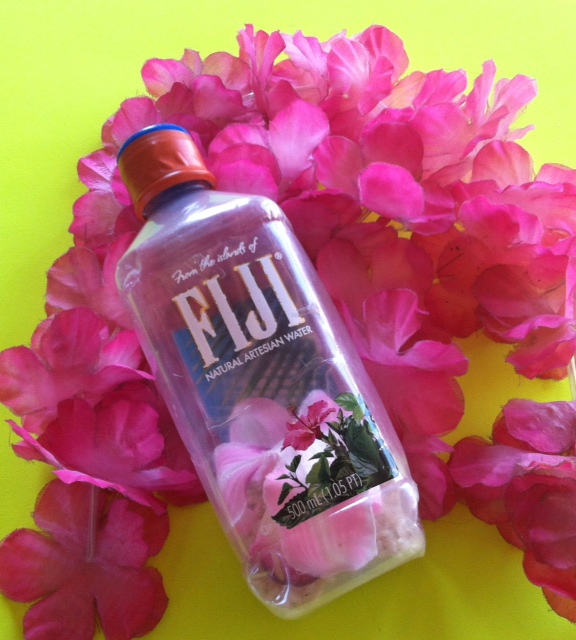
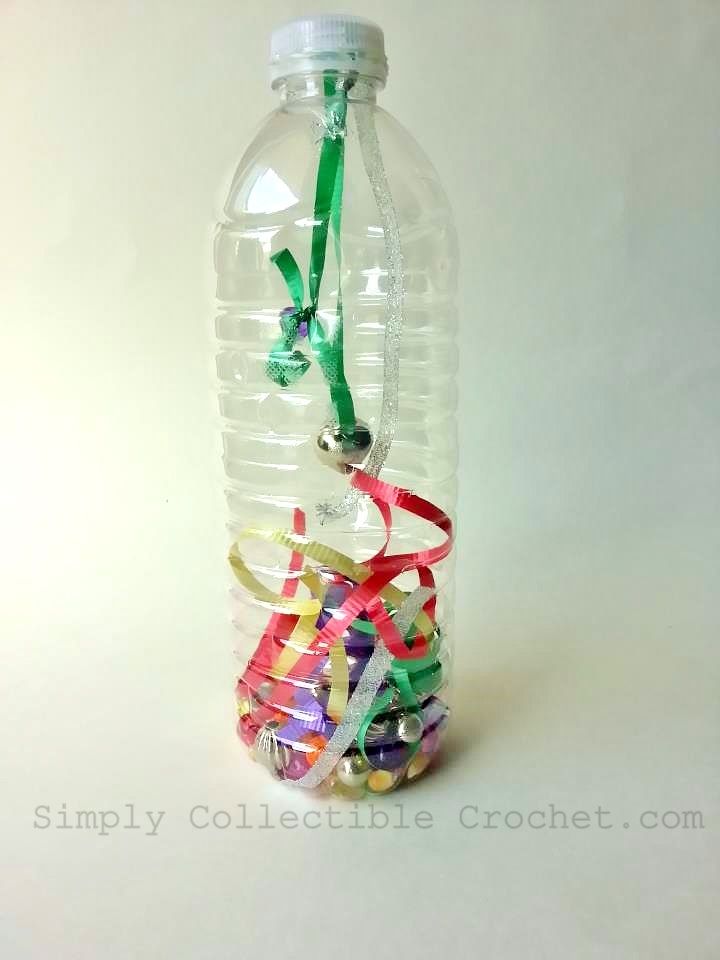
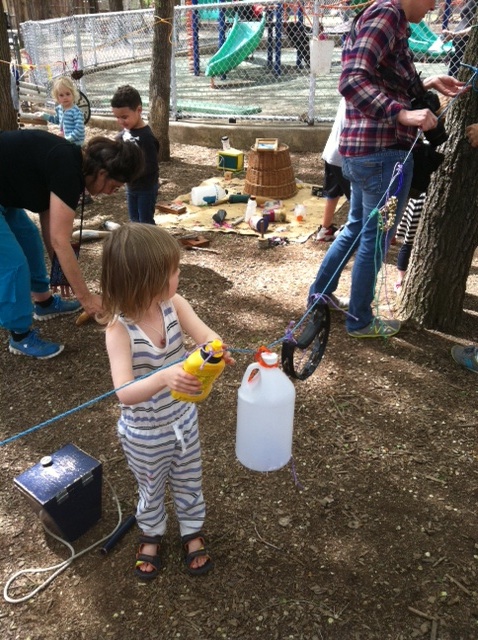
Hang Some Jingling Things

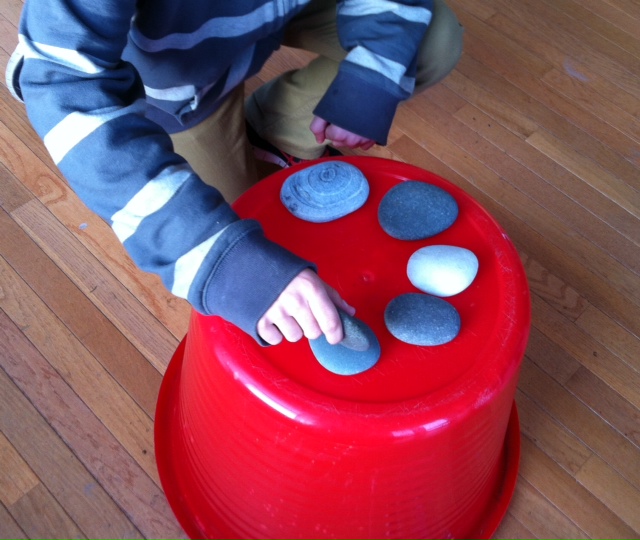
Filling up any clean gallon jugs or similar recycled plastic containers with things that ring or jingle makes a great addition to this project.  Add actual jingle bells; if you have them, or look for pebbles, birdseed, dried macaroni or similar objects that will ring, ding, whoosh or swoosh when the jug is tapped.
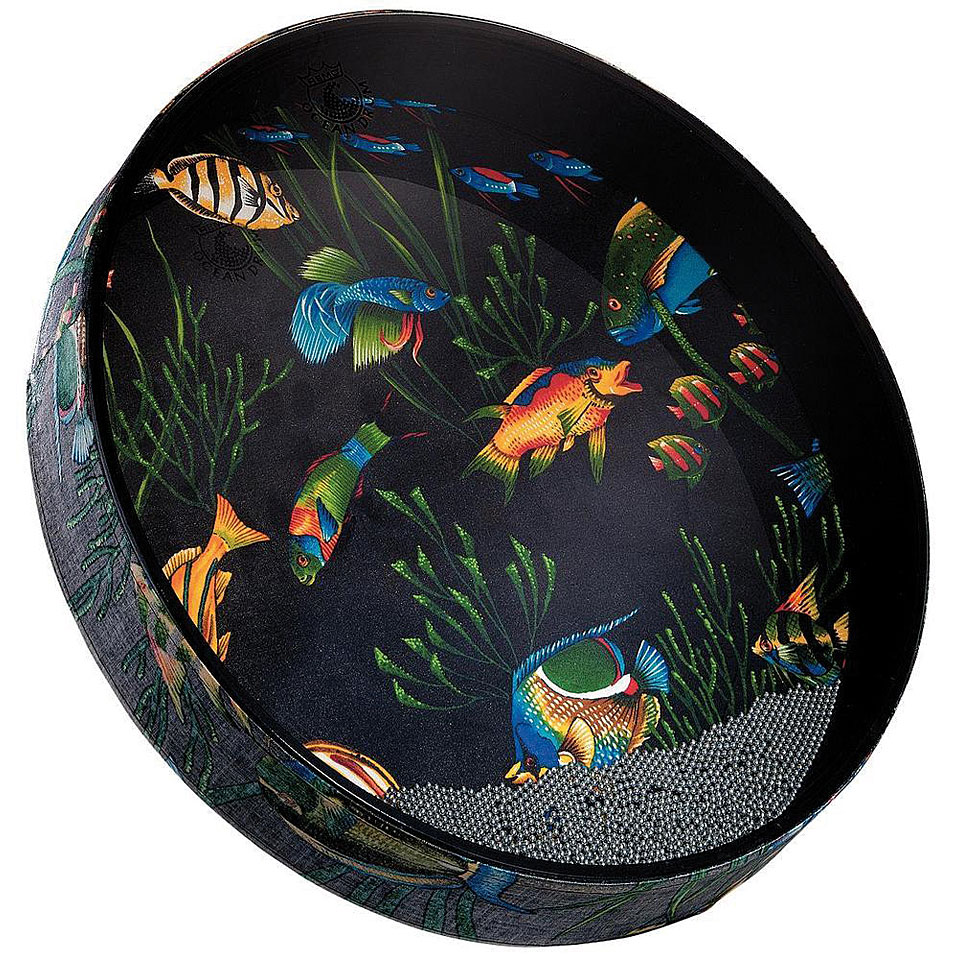
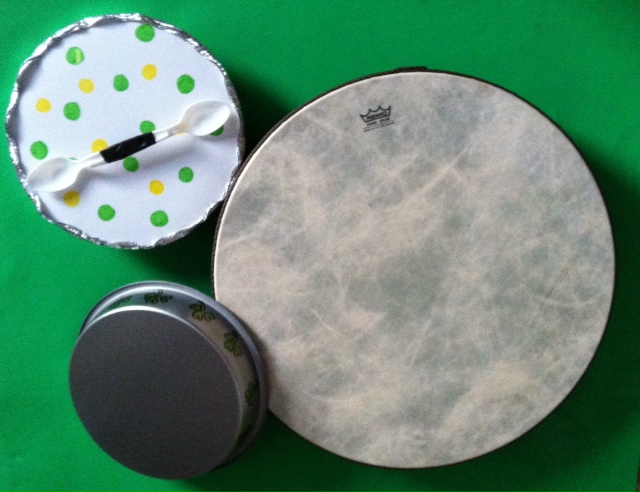
Rhythm tree - clothesline instrumentsTap A Tambourine

Do you have any older or almost discarded musical instruments?  Any broken wind chimes?  These sound great when attached to the tree and played.

And The Kitchen Sink?

rhythm tree playing tube
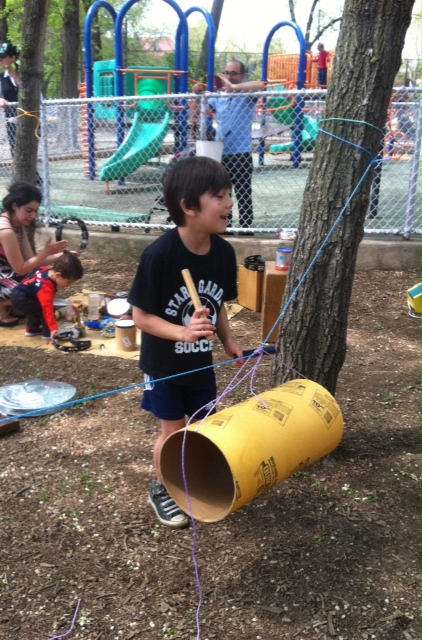
What else do you have around the house?  Here we found a large roll used to mold concrete in our garage and put it up so that it could be played like a hanging log drum.  What other items or objects can you find that might make some neat noise?
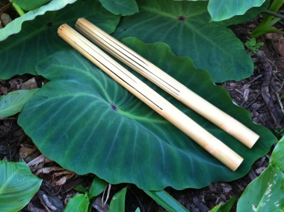
Make Some Mallets

Obviously, you can tap the instruments hanging from the tree with your hands.  But you can also make some mallets and show the kids how to play each item in new and different ways.  Great mallets can easily be created  from wooden dowels, sticks, unsharpened pencils, chopsticks or similar objects.

tippers yellow
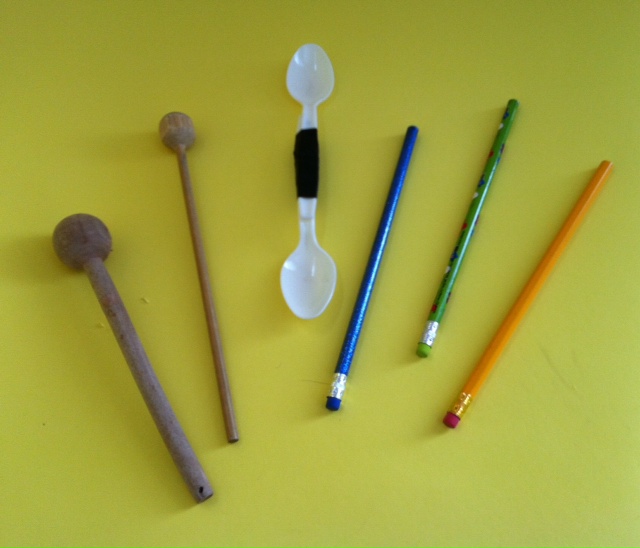
Most mallets used in world drumming have some kind of “head”, and this not only creates a better sound but helps kids move away from the concept of poking or hitting with sticks, to the idea of using them as real tools and instruments.
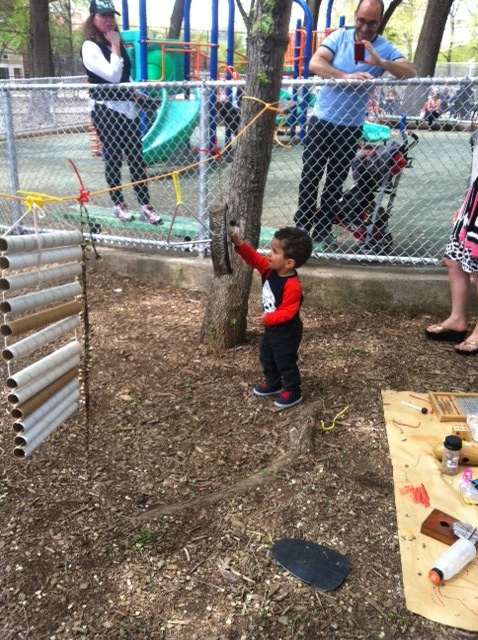
Play The Tree

Kids can get really excited about this project so it helps if the adults or older kids model different ways to play the instruments and encourage the kids to listen and try different techniques instead of just hitting or banging away.  For instance, tapping the gong in different places and in different ways results in distinct sounds.  Using two sticks to play a large tube can create some amazing rhythms.  Tapping different jingling jugs can make a series of different sounds that are like musical notes.

Rhythm Tree drumming around
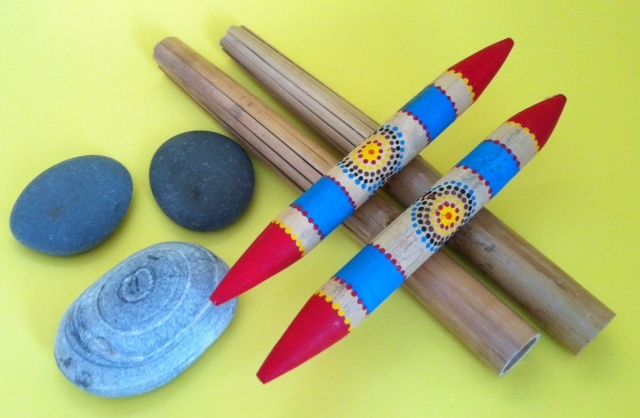
Dance and Drum, All Around!

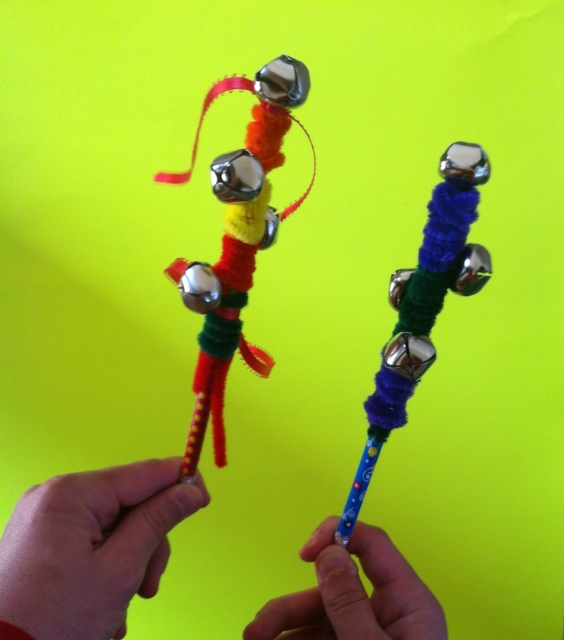
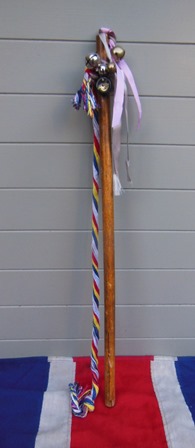
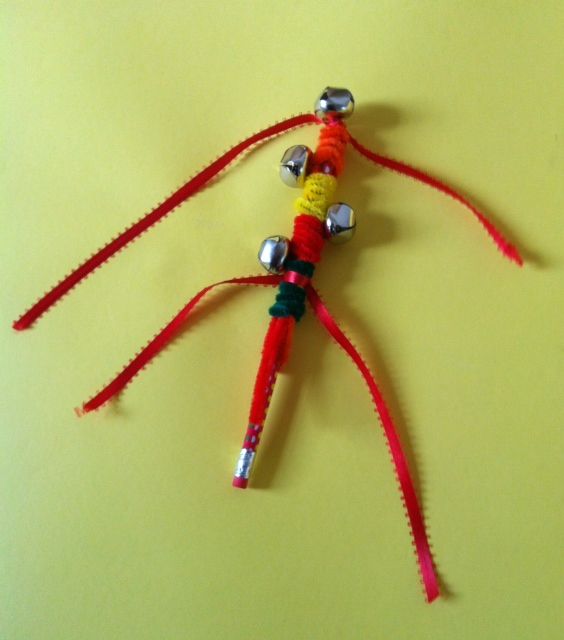
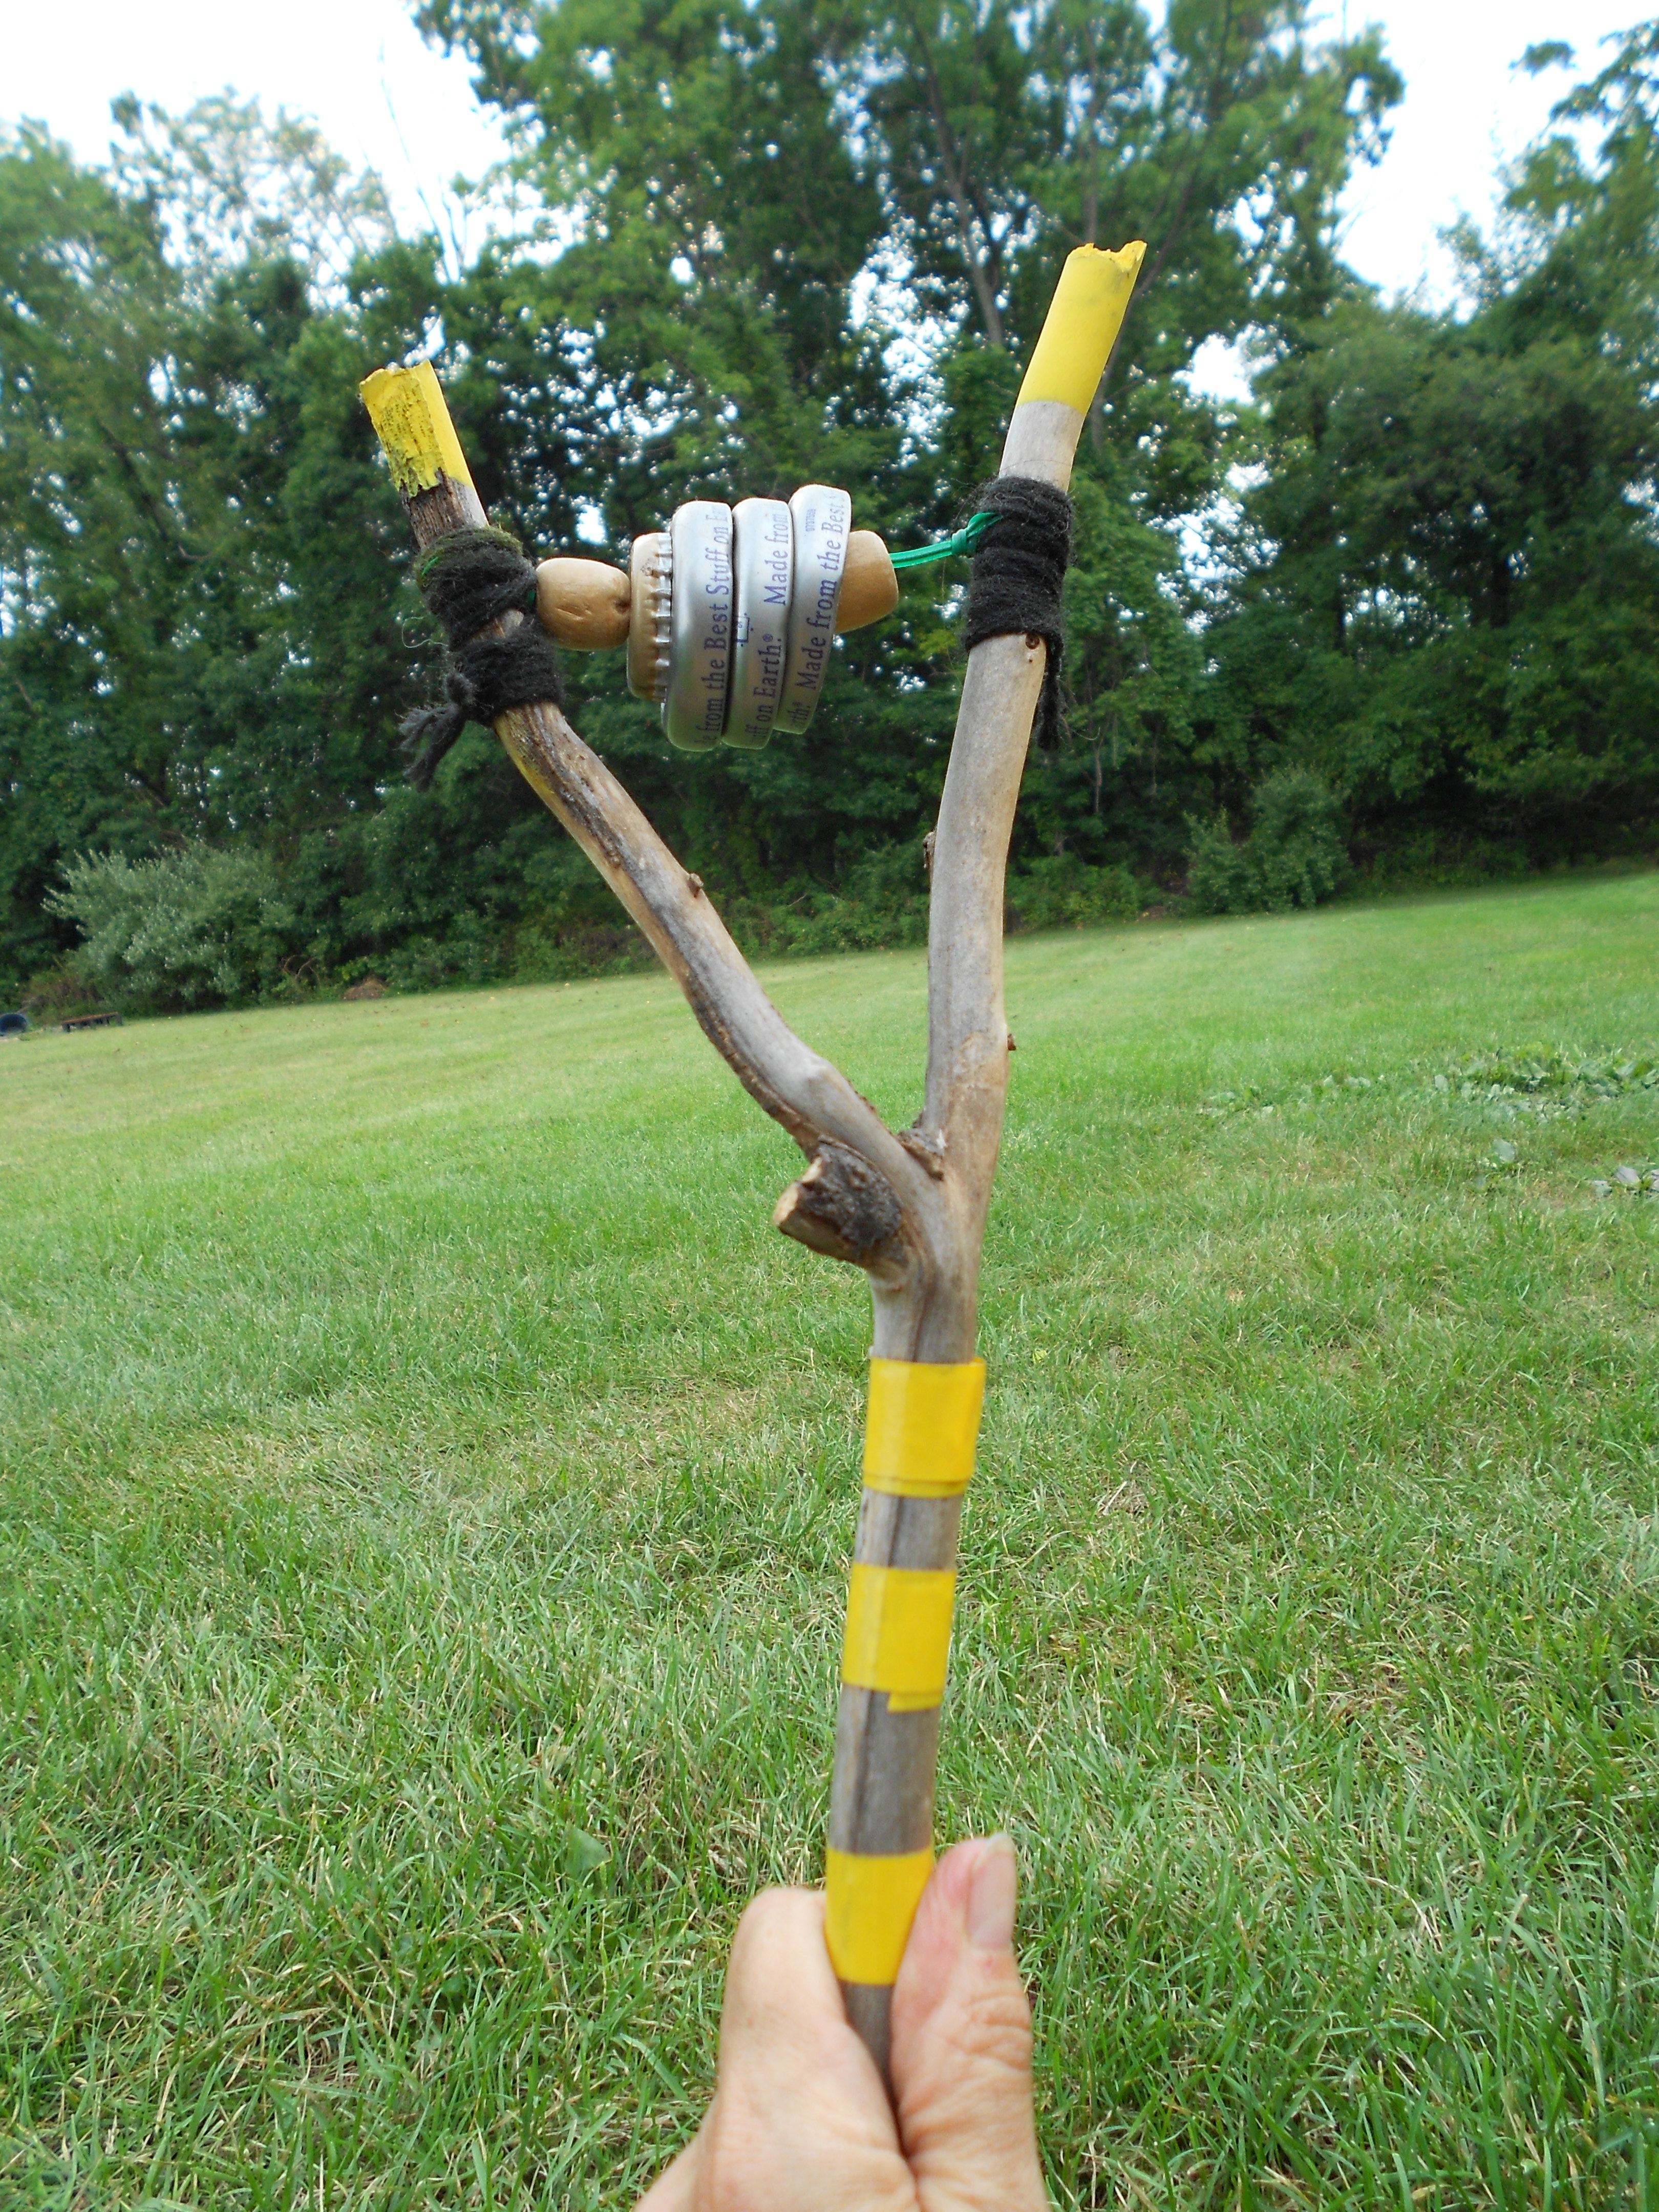
And, in addition to instruments hanging up, you can create things like jingle sticks or sistrums made from tree branches to dance and play around the musical sculpture.

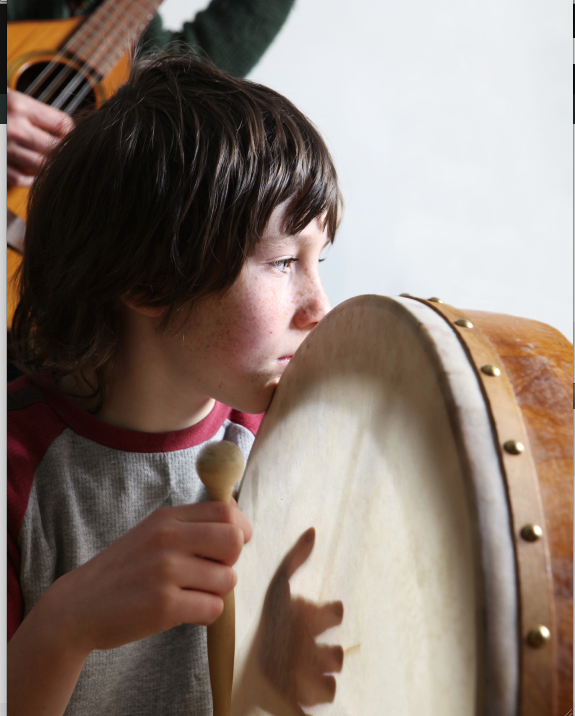
Don’t forget that you can also bring or make drums to play beside the tree.  You can create free form rhythms or you can sing and play the tree or clothesline at the same time.  Invite someone who plays guitar or another instrument to come and be part of the fun.  Or bring a music device and play recorded music as a soundtrack for your creative percussion.

Listen, learn and love it!

What different ways will you play?

wooden sistrumResources

Chinese Gong

http://www.dariamusic.com/docs/chinesegong.pdf

Tree Branch Sistrum

http://www.dariamusic.com/docs/naturalsistrum.pdf

Jingle Sticks

http://www.tinytappingtoes.com/classroom-music/easy-may-day-jingle-sticks/


FacebookTwitterGoogle+Share

Easy May Day Jingle Sticks

Many cultures celebrate the Spring with music and festivities.   In The British Isles, traditional morris dancers have bells on their legs and sticks in their hands that they use as part of the choreography of the dance.  You can use the same ideas to celebrate the season or as part of music and movement fun; indoors or outdoors, any time or the year.

morris bells on kyraBells and Sticks

We’ll be sharing a post soon about a variety of different dancing bell traditions from various cultures – each with it’s own simple craft versions you can try at home.  For now, if you’re looking for an easy, wearable  “morris bells” craft, check out the resources and links below.

And what do you hold in your hands while dancing?  These bright and colorful jingle sticks are easy to make and fit perfectly in a child’s hands while they are dancing or moving – around a Maypole or during any dancing or movement activity.

morris jingle sticks suppliesA Few Supplies

To make these easy jingle sticks, you’ll need:

Pencils (unsharpened)

Pipecleaners (4 – 8 per stick)

Assorted jingle bells

Ribbon (optional)

morris jingle sticks - pencil and bellWrap it Up!

Start your stick by threading a jingle bell into the middle of a pipecleaner.  Then wrap both sides of the pipecleaner down over the pencil.  Take a second pipecleaner and wrap around the pencil until it is covered, adding jingle bells at regular intervals.  When the pipecleaner is too short to wrap, start with another one and wrap the end of the last one underneath.

Use as many jingles as you like and then tie on pieces of colorful ribbons as streamers, if desired.

morris jingle stick completeWhat Can You Do With Jingle Sticks?

You can use jingle sticks for playing music while seated at a desk in class in school.  You can make a pair and hold one in each hand during any form or movement of free form dance.  You can shake jingle sticks along with the beat of a favorite song.  You can practice, left hand and right hand patterns while listening to recorded music or create left hand and right hand patterns while singing.

Get creative and have fun!

morris jingle sticks 2 sidewaysResources

Easy Morris Bells Craft

http://www.tinytappingtoes.com/early-learning-with-music/easy-morris-dancing-bells-for-children/

Make Your Own Indian-Style Ankle Bells (from Teachers Pay Teachers)

 http://www.teacherspayteachers.com/Product/Make-Your-Own-Indian-Style-Ankle-Bells-or-Ghungroo-486879


Reduce, Reuse, Recycle and Rock Out! 10 Great Recycled Instruments to Make With Your Child!

josef and cajon

Turn a broomstick into Australian bilma for some really versatile rhythm sticks. Or a cardboard box into a Peruvian cajón – perfect to learn hand-drumming!  You’d be surprised how many wonderfully unique world music instruments can Reduce, Reuse, Recycle and Rock Out - Coverbe made from recycled or repurposed materials.  And sound good.  And inspire musical play in your home or classroom.

Best of all, many of these instruments mean thinking about things in a new way.  Working with these simple crafts, kids can see how many important items originally came from nature – such as Native American turtle shell rattles, rainsticks from chola cactus branches and bamboo reeds were fashioned into panpipes.  Or how things take on a special significance when they are made by hand or made with love and personal attention.  And how some of the most amazing instruments are the quietest – like a simple sistrum that dates back to ancient Egypt.  Or a drum that can do an zamponas front and backamazing impression of the sounds of surf.

While crafting with your kids, you can explore a variety of beautiful world cultures and use it as a way of connecting with your class, your family or your community.

Here’s a list of the recycled instruments found in the E-book.

Screen shot 2014-03-03 at 5.26.10 PMACTIVITY ONE

Australian blima clapsticks from broomsticks or tree branches

ACTIVITY TWO

Peruvian style cajón drum from a cardboard box of any size

horse gong imageACTIVITY THREE

Chinese-style gong from a recycled roasting pan or cookie sheet

ACTIVITY FOUR:

A South American “quijada” jawbone instrument made from egg cartons

ACTIVITY FIVE

An ocean drum made from a pizza box and recycled plastic folders

ACTIVITY SIX

A rainstick made from a used mailing tube

ACTIVITY SEVEN

An Egyptian sistrum from a forked tree branch or a coat hanger

tingsha on white 1ACTIVITY EIGHT

Tinghsa handbells made from repurposed “Snapple” tops

ACTIVITY NINE

Native American turtle shell rattle from take-out containers

josef playing straw zamponasACTIVITY TEN

Panpipes from clean, recycled drinking straws

So download the book, dig into the recycling bin and make a joyful noise today!

Free Download!

If you’re reading this post during April 2014, you can get a free download of this awesomely green musical craft book here: http://www.dariamusic.com/monthly_song.php

Reduce, Reuse, Recycle and Rock Out! is also available from TeachersPayTeachers here:

http://www.teacherspayteachers.com/Product/Reduce-Reuse-Recycle-Rock-Out-E-Book-With-10-Musical-Activities-653502


Sing A Song For Earth Day!

whole world hands

Over a decade ago I wrote a song for Earth Day that has made it literally around the world.  Since it was recorded, it’s been used in programs and presentations in Taiwan, China, Singapore, Japan, Scotland, South America and across the entire United States, too!  It’s just a fact that honoring the Earth is a concept shared by everyone, everywhere, all around the globe!

“We’ve Got the Whole World In Our Hands” had very humble beginnings.  I was working with a group of elementary school students on an Earth Day project and they were excited about the many ways they could make a difference for the Earth.   To share what they learned, we decided to write a song to a melody that everyone recognized.  We chose the beautiful spiritual song  “He’s Got The Whole World In His Hands” and changed the lyrics slightly to reflect the idea of being a good steward of the Earth.

earth day handsNext, we added the children’s ideas to the song.  Naturally, the first suggestion had to do with the three “R”s – reduce, reuse and recycle.  Then the kids got really creative.  They offered dozens of suggestions that encompassed not only being green and living simpler, but also being kind to everyone and everything around them.  It was truly inspiring to see their vision of a planet filled with peace, harmony and more thoughtful life choices!

The original song has over 10 verses filled with great ideas about caring for the Earth.  When we recorded the song, we had to limit it to 4, so the song would not be too long.  Here’s the words to our final version:

Chorus:      We’ve got the whole world, in our hands
                     We’ve got the whole world, in our hands
                     We’ve got the whole world in our hands
                     We’ve got the whole world in our hands

We should recycle now – all that we can
Reduce, Reuse, Recycle – all that we can
We should recycle now – all that we can
We’ve got the whole world in our hands

Be kind to the plants and animals – of our land
We’ve got the whole world in our hands

Join hands with sisters and brothers – throughout the land
We’ve got the whole world in our hands

Dream your bright dream – then do all that you can
We’ve got the whole world in our hands

Here’s the video!

Lyrics and songsheet here:

http://www.dariamusic.com/wholeworld.php

An Earth Day Song Challenge!

Stay tuned.  Next week we’ll be asking you to write your own version of this song.  Cool prizes and more details to follow!


Whistle A Merry Tune – With A Tin Whistle

Tin whistle sheet music

It’s wonderful when a “first instrument” is so simple that a child can begin playing melodies and making music right away!  For just this reason, the tin whistle makes a great wind instrument to share with a child – or learn along with your child.  Even adults who consider themselves “musically challenged” can surprise themselves with what they can accomplish on this basic instrument.

In other words, if you can read a simple chart and place your fingers over the holes of a tin whistle, then you can play this instrument.  And, with a little bit of practice, it can sound great!

A Whistle With Many Names

Also known as a penny whistle or an Irish whistle, the tin whistle has a plastic or wooden mouthpiece; called a fipple, and a metal tube for the body.  Although they are made in all major keys, the most popular tin whistles are in the key of D and C.  Best of all, the fingerings used to play any tin whistle are similar to those used on the clarinet, flute and saxophone, so exploring this instrument can be a wonderful “headstart” for any child who might continue on with other wind instruments in the future.

child and tin whistleHow To Hold A Tin Whistle

Here are a few tips for playing the tin whistle.  First, hold the whistle at a 45 degree angle, facing downward and away from you.  If you’re right-handed, put that hand on the bottom and use your left hand on the top.  If you’re a lefty, reverse that order. Thumbs hold the whistle from below and you cover the six holes with your fingertips.

Now…blow!

With the mouthpiece between your lips (not between your teeth), give a steady breath of air.  You’ll know if you’ve got the right technique immediately because if you blow too softly, you’ll hear an airy or all-too-quiet note.  If you blow too forcefully, you’ll hear a shrill pitch or a squeak. Some musicians recommend that you blow as if you were saying the word “toooooo!”

holding the tin whistleLet Your Fingers Do The Walking!

Once you’ve found the right way to blow a note, begin removing your fingers starting at the bottom and going to the top (until they all are uncovered).  You’ll hear the difference in the sound and you can begin to play these notes to form your own melodies.

And, then?

From there, you can jam with your tin whistle or learn to play specific melodies.  You can try some advanced techniques like blowing a bit harder and getting a second octave (a set of higher notes) out of your tin whistle.  You can try different whistles in different keys or look for books that share your favorite songs or traditional Irish music which is perfectly suited to this simple folk instrument.

Prize Green tin whistle - key of DWin a Tin Whistle and Tin Whistle Instruction Book

During the month of March 2014, you can win a lovely green Walton’s pennywhistle in the key of D along with an easy instruction book.  Enter the easy Rafflecopter contest here:

http://www.dariamusic.com/monthly_song.php

Above photo of a young girl exploring the tin whistle is courtesy of from a blog written by an amazing percussive dance teaching artist named Malke Rosenfeld (www.malkerosenfeld.com).   You can read the full post here:
http://mathinyourfeet.blogspot.com/2012/03/all-in-good-time.html


Make Your Own Bodhrán Irish Drum

Screen shot 2014-03-07 at 10.50.39 AMEvery culture has it’s own favorite types of drums.

In the Celtic tradition of Ireland, the bodhrán (pronounced “bow-ron”) is a drum that seems to have evolved from the tambourine.  Originally made from farm implements such as a sieve to separate grain, it’s generally 10 – 26” inches across and is played with a small wooden stick called a “tipper” (or cipín, in the Celtic language).

Whether you attempt to create a realistic bodhrán and tipper or just want to create an Irish-style drum, this easy craft makes a great introduction to Irish folk music.

bodhran drum suppliesGather Your Supplies

To create your homemade bodhrán, find a used pie tin or recycled take-out containers.  Circular metal containers  press-on tops work perfectly for this craft.  In addition, you’ll need materials for decorating the drum and a pencil or two plastic homemade bodhran (tin)spoons to serve as your tipper plus a bit of tape.

It you’re using a pie tin, you can decorate the sides or the top and you’re ready to play.  If you’re using take-out containers, decorate the blank side of the top circle with any kind of theme you like.  Since we’re writing this close to St. Patrick’s Day, we’ve chosen to decorate with shamrocks.

Make A Plastic Spoon Tipper

tippers yellowTo make a “tipper” for your drum, tape together two recycled plastic spoons.  If you don’t have any spoons handy, you can use an unsharpened pencil or a similar item like a chopstick or small thin piece of wood.

Time To Play!

Everyone loves to play on a drum.  If you have a simple stick as the beater, tap out a rhythm along with any of your favorite songs or discover some new Irish music to accompany.

If you’ve made a tipper, hold it in your hand between your thumb and first finger.

Tap on the drum with one side of it.  Then tap in the other side.  Practice tapping right, left, right, left until you get the hang of it.

Once you’ve mastered the back and forth tapping of the tipper, try picking up speed. You’ll be amazed at what some musicians can do with this drum after they’ve practiced a bit.

Below is a short video showing basic bodhran technique for kids as well as a Youtube video of a master musician who can really rock out on this awesome Irish instrument.

Homemade Bodhrán Musical Fun

Homemade Bodhran Fun- Click Here To Learn The Basic Techniques

Traditional Celtic Bodhrán – One Amazing Instrumentalist!

All Natural Instruments – Sticks, Stones and Bamboo Percussion For Kids

natural instruments

How were the first musical instruments created?

It’s most likely they were made from “all natural” materials and were probably the result of wonderful coincidences.  Perhaps someone was gathering wood and realized that two sticks tapped together could create a beat.  A rock fell on another rock and made a pleasing sound.  Bamboo made a wonderful noise when rustling in the wind and inspired Hawaiian rhythm sticks. And since these noise-makers are made of such basic materials, they make great “first instruments” for exploring music with children at home, in the classroom or in the homeschool environment.

Here are three of our favorite “all natural” percussion instruments.

Austalian Clapsticks – “Bilma”

stick bilma1In Aboriginal Australia, two sticks struck together form a beat that can accompany the didgeridoo and become a part of singing, dancing and celebrating.  Whether you tap together two unsharpened pencils or take a nature walk to retrieve two perfect sticks, bilma making dots with q-tipsthese simple clapsticks can keep a beat while you sing or play along to any your favorite songs.

If you want to decorate your clapsticks with an Australian theme, you can use a dot motif.  In the activity below you can find step-by-step directions for making several different versions of crafty “dot” bilma.

hula rocks on blueRiver Rocks – Hawaiian `ili`ile

Can rocks make music?   Take a nature walk, collect a few and see for yourself.

In Hawaii, special smooth river rocks are part of the hula tradition. These small stones; called ‘ili’ili, are held in a dancer’s hand and tapped together for a percussion sound and that becomes part of the arm movements of the dance.  If you want to play “Hawaiian-style”, check out the post below for more about this tradition.

But you can also get creative and make up your own way of “playing rocks”.  Try josef rocks outsetting a few rocks out on the ground or table and hold one in your hand.  Use the rock in your hand to tap out a beat on one – or several- of the other rocks while you sing along, play recorded music or create your own rhythms with a friend, sibling, parent or fellow musician.

Bamboo Rhythm Sticks

Hawaiian pu’ili are rhythm sticks with one distinct difference.  They are made of lengths of bamboo, left whole on one side and split on the other.  When tapped together, the split ends rattle against each other making a unique sound.

Although making traditional bamboo pu’ili is not too hard, it does require some special tools and involves sharp edges.  An easier version; especially for young children, can be made from cardboard rolls from paper towels. They are easily cut and decorated and sound great for percussion play.

You can get complete instructions for homemade pu’ili at the post listed below.

Explore Nature and Music

Sticks, stones and reeds can make music.  Why not combine an exploration of music and nature to see what kind of inventive creations you can discover and play!

Screen shot 2014-03-03 at 5.26.10 PMLinks and Resources

Australian Bilma (From Teachers Pay Teachers)
http://www.teacherspayteachers.com/Product/Australian-Instruments-Make-Your-Own-Bilma-Clapsticks-1133140

Playing River Rocks As An Instrument – Hawaiian `ili`ile
(Post in Making Multicultural Music)
http://makingmulticulturalmusic.wordpress.com/2014/02/13/playing-river-rocks-as-an-instrument-hawaiian-iliile/

Play Some Pu’ili  (Post in Tiny Tapping Toes)
http://www.tinytappingtoes.com/classroom-music/make-your-own-puili-hawaiian-rhythm-sticks/

Musical Craft pdf’s from DARIAMUSIC
http://www.dariamusic.com/crafts.php

E-books, CD’s and more Musical Fun from DARIA’s TeachersPayTeachers Store
http://www.teacherspayteachers.com/Store/Daria-Marmaluk-Hajioannou

“Beach In A Bottle” Rattle

This simple, sandy beach rattle makes a great musical craft whether you live near the ocean or are just dreaming of warmer weather and seaside play!

Supplies

beach rattle suppliesClear recycled bottle – any size or shape.

A small amount of sand, salt or sugar.  (You can also substitute rice, couscous or tiny pasta for the same effect)

Funnel

Small shells, pebbles or tiny treasures for inside the rattle

Colorful silk or artificial flowers

Electrical tape (to seal rattle)

(Optional) glitter, colored sand, colored rice

 Make Your Own Rattle

This craft couldn’t be easier.

Save, clean and dry a variety of clear recycled containers and assemble sand, salt or sugar along with a funnel, sturdy tape and other decorative goodies you might want to add to this project.

Using the funnel, fill the container with a small amount of sand, salt or sugar.  Put the lid on and listen to what the rattle sounds like.  Adjust (with more or less sand) until you find the sound that’s most pleasing.

Here’s a hint.  Less sand, salt or sugar sounds and looks better, but feel free to experiment and see what you can create.  When you’re done, seal the rattle up with sturdy tape (such as electrical tape) to keep the project completely child-safe.

Beach Treasures

Once you’ve found the perfect amount of “faux sand”, drop in your favorite tiny shells, pebbles or tiny treasures.  As you play the rattle and turn it from side to side, the small objects will appear and disappear in the sand.

 Tropical Flowers

Although this doesn’t change the sound of the rattle, it’s fun to add a bit of tropical color to the rattle.  Look for silk or artificial flowers from a craft bin or take apart an artificial Hawaiian lei for perfect addition to the fun musical craft.

A Very Quiet Rattle

This rattle makes a soft whooshing sound so it is perfect for children with noise sensitivity.  Several music therapists have commented that these “seaside” rattles are especially enjoyable to the kids who are on the autistic spectrum.

Rattle Away

Don’t be fooled by how simple this little instrument looks.  There are lots of ways to play a rattle – this type of rattle or any other one you might create or find in your musical bag of tricks!

Try some of these suggestions or make up your own ways to play.

Rattle back and forth

Rattle up and down

“Swoosh” the rattle – move the contents around in a circular motion.

Hold in one hand and tap against the other.

Switch hands and try the above.

Hold the rattle at the top and tap the bottom on a desk or on your knees.

Hold the rattle at the top and tap the rattle sideways on a desk or on your knees.

Shake the rattle while dancing or moving.

Play it along while singing a favorite song.

Play it along while listening to a favorite song on a cd player or media device.

Make up your own “rattle moves”.

A Call And Response Rattle Game 

This is a great game to play with kids.  It teaches listening skills, enhances motor skills and is just plain fun.   Best of all it can be done several different ways.  Try it “one-on-one”, with a parent and child, special education student and aide or teacher and student.  It also works really well in a group, such as a teacher and a classroom, parent and preschoolers or homeschoolers and siblings.

The leader plays a pattern and the other (or other) must play that pattern back to them.  Start simple and get more complex.  Trade off and let the student or child make up patterns that the teacher or others must imitate.

Here are three simple patterns to get you started:

Shake the rattle up high twice,

Down low twice

Swoosh it around once.

And stop.


Shake the rattle twice in your right hand.

Swoosh it in twice in your right hand

Tap it twice on the desk while holding it in your right hand

Then change hands and repeat the pattern with the left hand


Tap it on the desk loudly.

Tap it on the desk softly.

Swoosh the rattle around.

Shake the rattle three times in your right hand.

Shake the rattle three times in your left hand.

And stop – or do it backwards!

———

During the month of February 2014, we’re doing a feature on Hawaiian music and giving away a real ukulele as well as Hawaiian pu’illi rhythm sticks.  You can see that related feature here: http://www.dariamusic.com/monthly_song.php


How Loud is Too Loud – Part II

Adorable girl hearingHave you ever noticed that we live in a very noisy world?

We’ve just published a short but very important post talking about noise levels and children (http://www.tinytappingtoes.com/uncategorized/how-loud-is-too-loud-part-1/).  But many parents also wonder about related issues that are also worth considering.  Here are some common sense answers that might help when thinking about sound, music and other types of entertainment or media in relation to young children.

Talk to Me, Mommy!

Don’t forget that the human brain learned how to develop in a world that consisted mainly of other humans speaking, singing or talking.  The added stimulation from t.v., radio and electronic devices are fairly new and although they can provide helpful and educational content, most studies show that the input from human contact makes the most difference to a child.  Whenever possible, experts suggest that parents emphasize “one-on-one time” speaking or interacting with a baby or young child and downplay external media, no matter how educational it might seem.

Silence is Golden

Similarly, having some time for quiet, quiet activities, family conversation or turning off electronic media can help everyone in the family feel more relaxed and calm.  Believe it or not, even when there’s no media playing, a child’s brain is still performing the important function of listening and cataloguing sounds such as a bird singing, a phone ringing, siblings chatting or a car passing by.

Turning down the noise level can often help a child process the world around them in a way that is meaningful and integrated.   In case after case, studies show that in regard to external noise and electronic media – less is often more.

When In Doubt, Turn It Down

And since we’ve all gotten used to a louder world, it helps to give some thought to things like stereo speakers in cars or where a baby is seated in a room.  If a car seat is buckled in a location with the car’s speaker is nearby, what may seem like a reasonable volume to the driver, might easily be too loud for the child whose ears are closer to the source of the sound.

In the same way, what might seem like a normal t.v. or radio volume to a parent cooking dinner across a room, might be too loud for a child seated next to the sound source.

When in Doubt – Check It Out

It makes perfect sense that a child might cry when hearing noises that are too loud for them.  But what if they continue to express discomfort with sound or sound levels when things seem to be at a reasonable volume?  In this case, visit your pediatrician.  Although most children receive a hearing screening before leaving a hospital or birth center, regular check-ups can detect problems and solve them in a timely manner.

Nemours, a non-profit education medical website has these comments about treatment regular check-ups and hearing loss:

“Treatment for hearing loss can be the most effective if it’s started by the time a child is 6 months old.  Kids who seem to have normal hearing should continue to have their hearing evaluated at regular doctors’ appointments. Hearing tests are usually done at ages 4, 5, 6, 8, 10, 12, 15, and 18, and any other time if there’s a concern.”

Speak Up, Turn It Down!

Recently I attended a party that was a benefit for pediatric brain cancer.  Sadly; as entertainment, the hosts had hired a dj who insisted on playing music so loud it could cause hearing loss in small children, many of which were playing near the speakers.

If you’re having a party or visiting one where the noise level is questionable or too high, speak up!  DJ’s are often situated behind their speakers and may not recognize the noise level for guests in the room.  And, if it’s still a concern, let the musicians, dj or party host know how you feel.  Damaging noise levels can create problems for children, some of which won’t appear immediately but can have permanent and devastating results.

Again, you can check out the facts in our latest post about children, ear protection and hearing loss as well as at the Nemours KidsHealth Website at the links below.

Resources

How Loud is Too Loud –Part 1 http://www.tinytappingtoes.com/uncategorized/how-loud-is-too-loud-part-1/

Hearing Evaluation Information For Children From The Nemours KidsHealth Website:
http://kidshealth.org/parent/general/eyes/hear.html

Make Your Own Pu’ili – Hawaiian Rhythm Sticks

Rhythm sticks are great additions to almost any type of musical play with children.  Found all around the world, most rhythm sticks are about 6 to 8” long and made of solid wood.  Hawaiian rhythm sticks, however, take a really unique puili sticks on a leafapproach to this age-old instrument.  Called pu’ili; they are made from longer sticks of bamboo, solid on one end and slit on the other to make a rattling noise when struck together.  And they are tapped in many different ways, often as part of the hula tradition so making and playing your own pu’ili sticks can be a fun way to enjoy movement and music at the same time.

Want to see how they are played as part of the Hawaiian tradition?  Watch this short video and you will be amazed at the coordination of the dancers and the many different ways two sticks can be used to create rhythm and become part of the graceful moves in this dance.


Crafty Pu’ili Sticks

Actual pu’ili sticks are made from lengths of bamboo, generally around 12 – 18” long.  They are left solid at one end and then cut into numerous slats on the other end.  Our craft version uses the cardboard roll from paper towels and adds a few elements for decoration and durability.  Supplies you need are:

Screen shot 2014-02-01 at 12.38.21 PM2 cardboard tubes from paper towels

Scissors

(Optional)  Electrical or duct tape

Stickers, markers or other materials for decoration

This is such an easy craft.  Simply cut slits in one side of the cardboard rolls and use the electrical tape or duct tape to wrap the other (uncut) end.  This will indicate which side to hold and help the sticks last longer.

Although it’s not traditional, you can decorate the cut side, using markers or stickers, paint, glitter and glue or whatever inspires your imagination.  Once you’re done – it’s time to play!

One quick note here, since they are made of cardboard, these pu’ili sticks may not last a long time.  If you enjoy this musical craft, it may be a good idea to save these paper towel rolls and make several pairs.

Playing Your Pu’ili

There are lots of basic moves for playing these rhythm sticks that any child or adult can master right away.  Try some of these easy suggestions:

Hold one stick in your right hand in front of you. Tap with the left stick.

Hold one stick in your left hand in front of you. Tap with the right stick.

Hold one stick in your right hand by your right shoulder. Tap with the left stick.

Hold one stick in your left hand by your left shoulder. Tap with the right stick.

Screen shot 2014-02-01 at 12.38.34 PMTap the two wrapped ends together in front of you.

(If seated at a desk or table) Tap the two wrapped ends on the desk or table in front of you.

(If seated on the ground) Tap the two wrapped ends on the ground in front of you.

Screen shot 2014-02-02 at 8.33.56 AMIf standing, tap both sticks on the ground by your right toe.

If standing, tap both sticks on the ground by your left toe.

Mix and match these moves.

Mix and match these moves in time with Hawaiian music.

Mix and match these moves in time with any of your favorite types of music.

Rhythm Games

Once you’ve mastered the basic moves, you can also play with an adult, partner, friend or even a group.  In the video above, you probably noticed how the dancers tapped each other’s sticks.  You can try something similar.  If you sit across from a partner, pick out what moves you want to do (such as – let’s tap right, then left sticks in the middle) and give them a try.   Make up your own patterns with or without music.

If you’re seated in a circle with a group, you can try patterns such as this one:

Everyone taps both wrapped ends on the ground twice, then taps both sticks together in front of themselves.

Everyone taps both wrapped ends on the ground twice, then reaches out to tap the sticks of their neighbors, both right and left.

Repeat the pattern while keeping a beat.  Try it without music, while singing or while playing recorded music.

—————–

Photograph of pu’ili sticks on a tropical leaf, used by permission from NaKani O Hula Farms.  Their farm grows and creates many traditional Hawaiian instruments and crafts.  Find them at:

http://www.nakaniohula.com/about-us/