Tag Archives: kids music

Best “First” Instruments For Kids – A Tin Can Dulcimer!

bean can instrumentIf you can count, you can play this instrument.

It’s just that easy!

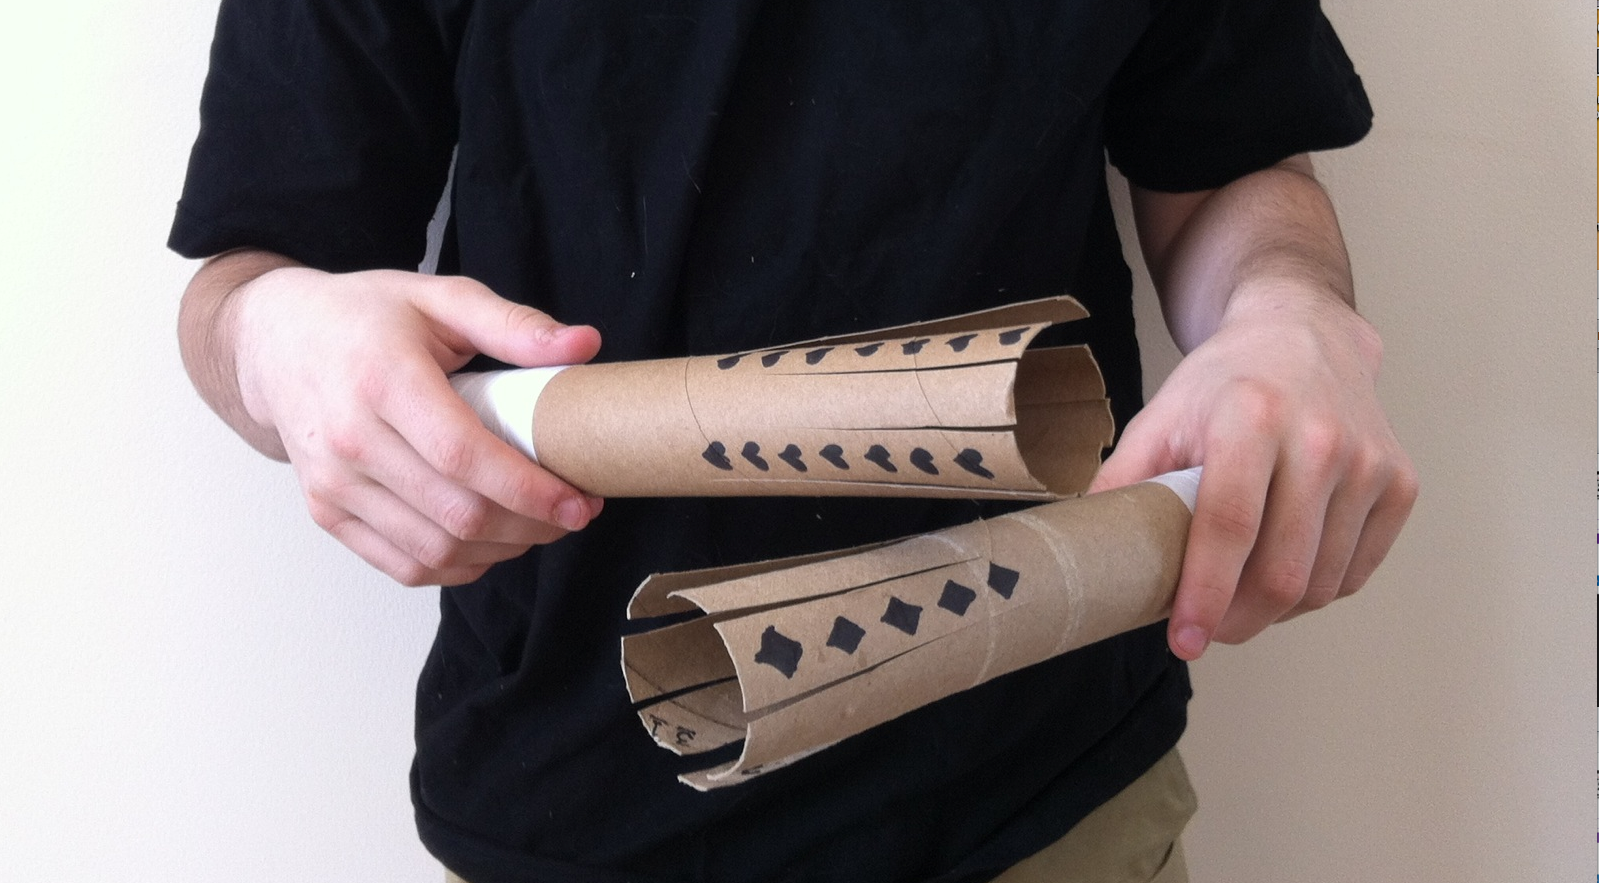
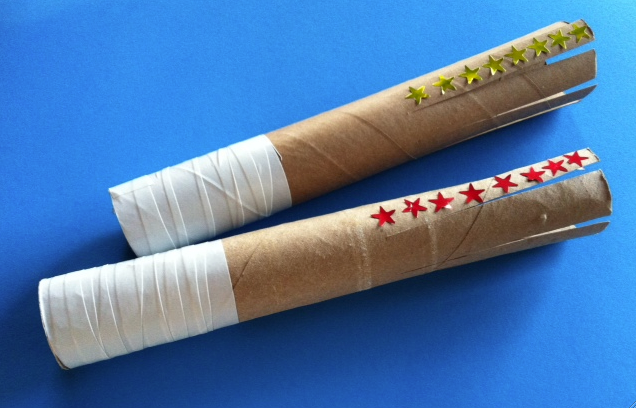
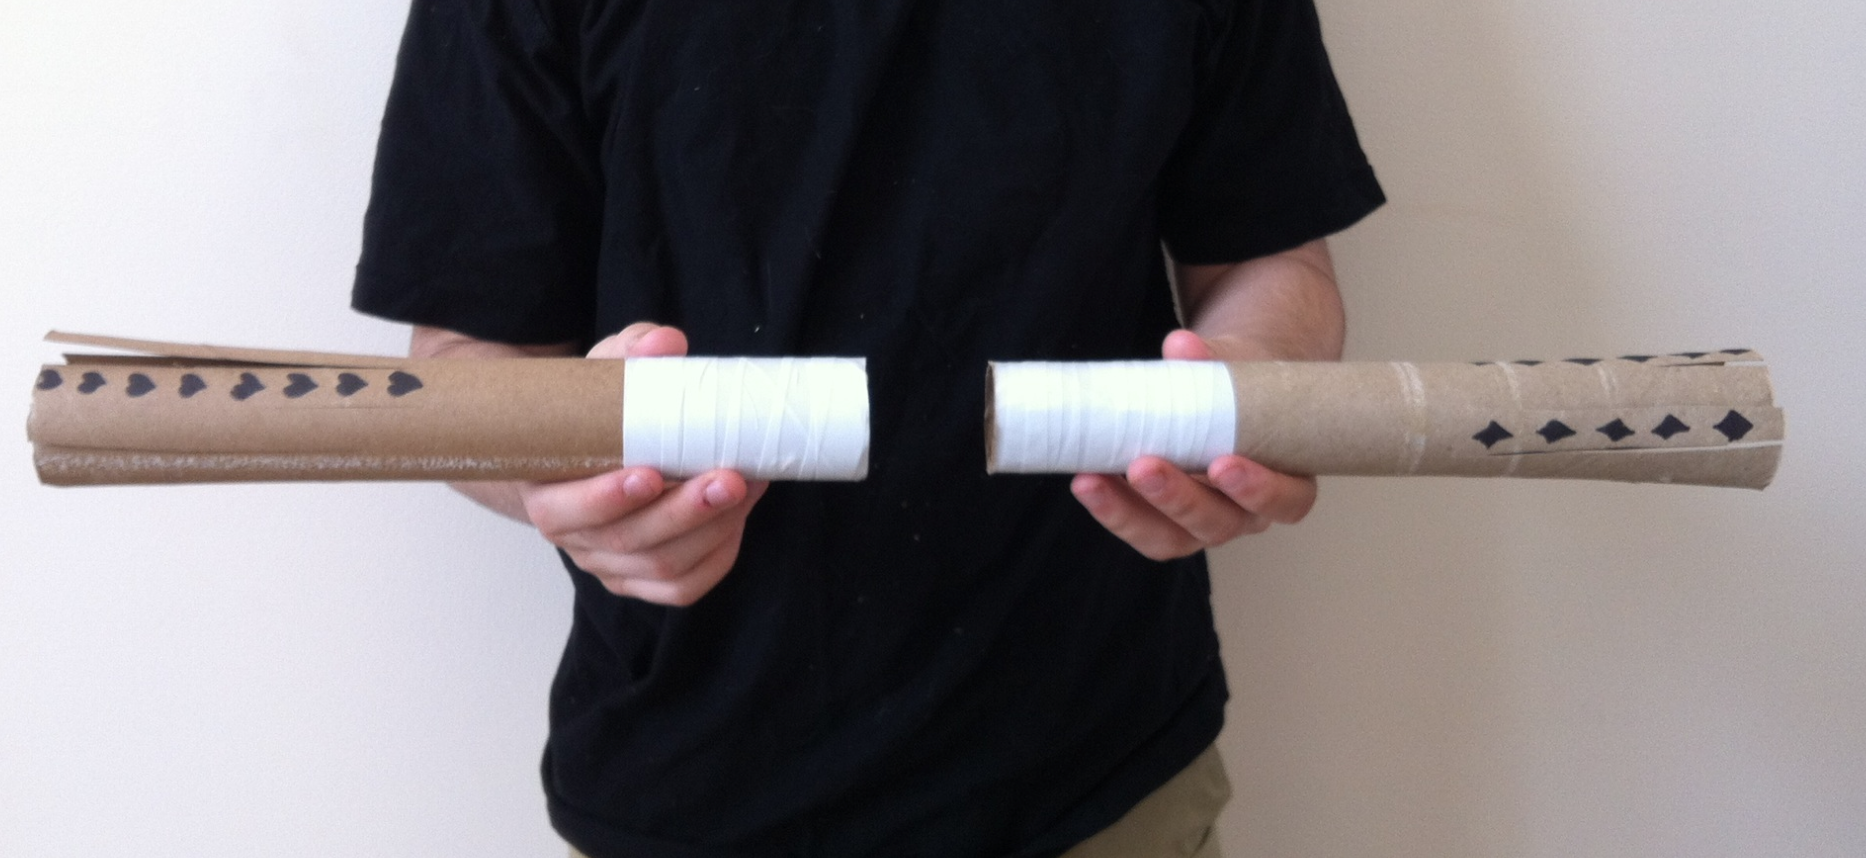
This simple one-stringed instrument made from a humble tin can is a great confidence booster for either young kids or adults who may doubt their musical ability.  Constructed like an Appalachian (stringed) dulcimer, you can play any note up and down the fretboard and sound great!  And check out the “play-by-the-numbers” songs or songbook and you’ll be able to master songs you recognize literally within minutes.  What fun!

It’s Bigger Cousin – The Dulcimer

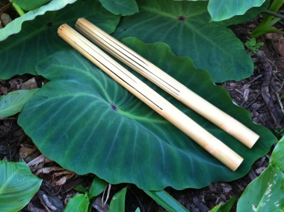
The stringed dulcimer from Appalachia is a really similar instrument made with a wooden body and a few more strings.  If you’d like to see one, color one or hear one being played, check out the links below. This tin can instrument simplifies it even more.  There’s only one string to play and a long fretboard marked with numbers.  To play it, you read the numbers to the song and push down the correct fret with your fingers.

fretboard yellowWhat’s A Fret?  Don’t Fret About It!

Okay, pardon my pun here.  The frets are the long spaces on the  fretboard.   When playing the instrument, push down gently but firmly at the center of each space – or fret- and then strum or pluck the string with the other hand.

So if the songbook says 3 – 4 – 5.  They press down of the 3rd fret in the middle, the 4th fret in the middle and the 5th fret in the middle.

And if you see a “0”, that just means to pluck or strum the instrument without holding down any fret.
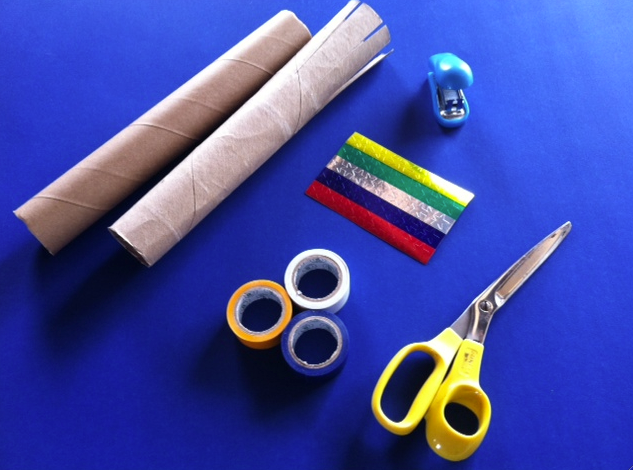
can and picks yellowPick-Ing It All Up!

You might want to pluck the one string with your fingers, but most folks prefer a pick.  That’s a tough piece of plastic shaped in a teardrop or triangular shape used to strum over the strings.  Some picks are softer and some are harder.  If you have a few picks from a music store, try them out and see which ones you like the best.  It not, cut up a milk jug or a similar piece of tougher recycled plastic (like a coffee can lid) and make your own.

What Does It Sound Like?

The tin can instrument is a ton of fun.  Check it out here as we play the first song we learned on it – “Oh When The Saints Go Marching In”.

Links And Resources

Hear A Dulcimer
http://www.dariamusic.com/dulcimer.php

Hear A Dulcimer Song
http://www.dariamusic.com/dulcimer.php

Color A Dulcimer (Online)
http://www.dariamusic.com/color_Dulcimer.php


FacebookTwitterGoogle+Share

Road Trips With Kids – A Time To Share Special Songs

little girl road trip USEAlthough no one likes to be cooped up in a car for long periods of time, family road trips – short or long – can create some wonderful memories. Music is a great way to pass the time, share songs from your past, or even write some new ones.

Here are some handy ways to add music to a family outing or a vacation get-away.

What To Pack

Does your child have a favorite cd? Bring that along. Is there a new cd you’ve been wanting to listen to with your kids? Add that one for novelty. Don’t forget a playlist for sleepytime as that can help create a car naptime on a long journey or be a welcome nighttime ritual if you’re away from home or in unfamiliar surroundings.

Screen shot 2014-07-07 at 1.03.32 PMChildhood Memories

A road trip can be a great place to share special memories from your own past through music. What songs did you love during your childhood? School days? Did you go to a summer camp or participate in a girl scout or boy scout troop? What songs made you laugh or smile back then and still bring up happy memories now?

You can share these songs by singing them aloud, teaching them to your child or look for cd’s/digital versions you can play on your car stereo. What a great way for your child to connect with your roots and feel a sense of continuity with the past!

Don’t Forget The Classics

Even if you’re not camping out and singing around a campfire, there are some classic summertime songs. What about “Kumbayah” and Woody Guthrie’s “This Land Is Your Land”? Around 4th of July you may want to sing “Grand Old Flag” or enjoy some Americana tunes such as “Liza Jane” or “Oh Susannah”. Do you remember John, Jacob Jingleheimer Schmidt or a song about a hole in the bottom of the sea? What songs are your childhood “classics”?

Screen shot 2014-07-07 at 1.00.10 PMMake It Interactive!

Remember the many great ways to make music interactive. You can carry a small basket of quiet instruments along with you, encourage your child to tap or clap quietly to the beat or learn and sing the chorus of any song together. Get creative! For instance, pick an easy song like “Baa, Baa Black Sheep” and have your child give your different colors to add to the song (Baa, Baa Green Sheep, Polka-Dotted Sheep?).

We’ll write more about “homemade songs” soon, but for the time being – make any road trip more fun by adding music!

Resources and Links

Best Instruments for Quiet Time With A Child http://www.tinytappingtoes.com/babies-and-music/best-instruments-for-quiet-time-with-a-child/

Write Your Own Lullabye http://www.tinytappingtoes.com/uncategorized/a-lullabye-to-make-your-own/

Summer Music Projects – https://www.teacherspayteachers.com/Product/12-Summer-Camp-Music-Crafts-3243132

Make Your Own Pu’ili – Hawaiian Rhythm Sticks

Rhythm sticks are great additions to almost any type of musical play with children.  Found all around the world, most rhythm sticks are about 6 to 8” long and made of solid wood.  Hawaiian rhythm sticks, however, take a really unique puili sticks on a leafapproach to this age-old instrument.  Called pu’ili; they are made from longer sticks of bamboo, solid on one end and slit on the other to make a rattling noise when struck together.  And they are tapped in many different ways, often as part of the hula tradition so making and playing your own pu’ili sticks can be a fun way to enjoy movement and music at the same time.

Want to see how they are played as part of the Hawaiian tradition?  Watch this short video and you will be amazed at the coordination of the dancers and the many different ways two sticks can be used to create rhythm and become part of the graceful moves in this dance.


Crafty Pu’ili Sticks

Actual pu’ili sticks are made from lengths of bamboo, generally around 12 – 18” long.  They are left solid at one end and then cut into numerous slats on the other end.  Our craft version uses the cardboard roll from paper towels and adds a few elements for decoration and durability.  Supplies you need are:

Screen shot 2014-02-01 at 12.38.21 PM2 cardboard tubes from paper towels

Scissors

(Optional)  Electrical or duct tape

Stickers, markers or other materials for decoration

This is such an easy craft.  Simply cut slits in one side of the cardboard rolls and use the electrical tape or duct tape to wrap the other (uncut) end.  This will indicate which side to hold and help the sticks last longer.

Although it’s not traditional, you can decorate the cut side, using markers or stickers, paint, glitter and glue or whatever inspires your imagination.  Once you’re done – it’s time to play!

One quick note here, since they are made of cardboard, these pu’ili sticks may not last a long time.  If you enjoy this musical craft, it may be a good idea to save these paper towel rolls and make several pairs.

Playing Your Pu’ili

There are lots of basic moves for playing these rhythm sticks that any child or adult can master right away.  Try some of these easy suggestions:

Hold one stick in your right hand in front of you. Tap with the left stick.

Hold one stick in your left hand in front of you. Tap with the right stick.

Hold one stick in your right hand by your right shoulder. Tap with the left stick.

Hold one stick in your left hand by your left shoulder. Tap with the right stick.

Screen shot 2014-02-01 at 12.38.34 PMTap the two wrapped ends together in front of you.

(If seated at a desk or table) Tap the two wrapped ends on the desk or table in front of you.

(If seated on the ground) Tap the two wrapped ends on the ground in front of you.

Screen shot 2014-02-02 at 8.33.56 AMIf standing, tap both sticks on the ground by your right toe.

If standing, tap both sticks on the ground by your left toe.

Mix and match these moves.

Mix and match these moves in time with Hawaiian music.

Mix and match these moves in time with any of your favorite types of music.

Rhythm Games

Once you’ve mastered the basic moves, you can also play with an adult, partner, friend or even a group.  In the video above, you probably noticed how the dancers tapped each other’s sticks.  You can try something similar.  If you sit across from a partner, pick out what moves you want to do (such as – let’s tap right, then left sticks in the middle) and give them a try.   Make up your own patterns with or without music.

If you’re seated in a circle with a group, you can try patterns such as this one:

Everyone taps both wrapped ends on the ground twice, then taps both sticks together in front of themselves.

Everyone taps both wrapped ends on the ground twice, then reaches out to tap the sticks of their neighbors, both right and left.

Repeat the pattern while keeping a beat.  Try it without music, while singing or while playing recorded music.

—————–

Photograph of pu’ili sticks on a tropical leaf, used by permission from NaKani O Hula Farms.  Their farm grows and creates many traditional Hawaiian instruments and crafts.  Find them at:

http://www.nakaniohula.com/about-us/


Introducing MLK’s message to Young Children – Through Music!

It’s never too early to share important and powerful messages with young children.

This is especially true when choosing books, music and other positive and kid-friendly media that become part of your children’s lives.  In fact, this was exactly the reason I wrote a children’s song based on MLK’s “I Have A Dream” speech made during the March On Washington, whose 50th anniversary is today!

Although most people recall mainly the “I Have A Dream” section, the entire speech is worth reading or hearing.  And MLK’s messages are easy for kids to grasp and live out.  What child does not want to be included and treated fairly?  Every child appreciates an environment that is fair, balanced and gives everyone a chance.   Big concepts such as respect, equality and dignity aren’t lost on little ears.

In honor of the anniversary of the 1963 March on Washington, I’m offering free downloads of this song on my website (link below).  I’m also encouraging parents to seek out and include books, music and other media in their child’s life that show inspirational leaders, such as MLK.  Find ways to help your children “meet” spiritual and inspirational leaders and their lives will surely reflect these positive ideas and worthy goals.

Remember, no child is too small to make a difference.

“Everybody can be great… because anybody can serve.”

-Rev. Dr. Martin Luther King Jr.

———

Watch an animation of the I HAVE A DREAM children’s song here:

[youtube=http://www.youtube.com/watch?v=lBQ36WnekVM&w=500&h=281]

Links:

Free Download of the I Have A Dream Song

http://www.dariamusic.com/monthly_song.php

Free MLK Coloring Page For Young Children

http://www.teacherspayteachers.com/Product/MLK-Rainbow-Coloring-Page-for-Younger-Children-475121

Free MLK Coloring Page For Older Children (With Many MLK Quotes)
http://www.teacherspayteachers.com/Product/MLK-Rainbow-And-Popular-Quotes-Coloring-Page-for-Older-Children-475123

Can You Kazoo?

If you can hum softly – you can play a kazoo.

It’s a great first instrument because it easily builds confidence in musical ability while allowing a child or adult to recognize melodies and experiment with playing them.  And a truly outrageous kazoo solo can send any child into a fit of giggles.  It’s just plain fun!

How do you play a kazoo?  Place your mouth to the opening and hum quietly.  Avoid humming loudly or blowing into the mouthpiece, neither will give you that classic kazoo sound.

Take a bit of time to practice.  It’s incredibly versatile and fun once you get the hang of just how to do it.  Then what?

Here are some ideas, games and activities you can do with a kazoo!

Play Along With Your Favorite Music

Both parent and child can sound like a rock star when they play along with favorite songs and take their own solos or rock out on the melody!

Name That Tune

Parent or child play a melody on their kazoo and the other must guess what the name of the song is.

Stump The Band!

Parent or child name a song and the other must play it or lose a point/turn.

Call and Response Kazoo

Parent or child play a series of notes or a short song and the other must play it back exactly.  It’s best to start with simple short musical phrases and get more complicated as the game goes on.

———————-

Did You Know?

There is a National Kazoo Day.  You can find out more about it here:

http://www.nationalkazooday.com/index.html

Tips from Serious Kazoo Players

WikiHow has a nice post with more tips for playing kazoos with kids.  You can check it out here:

http://www.wikihow.com/Play-the-Kazoo

It’s So Simple To Play The Spoons!

Would you like to dazzle your young children or quiet a classroom of kids?  Or be the star of the next long car or bus ride?  Then take a few minutes to master the art of the musical spoons and you’ll soon be playing like a professional percussionist!

All you need for developing this homegrown skill are two spoons and a bit of patience and practice.

Start With the Spoons

First, find two spoons of equal size and shape.  Although seasoned players can make any two spoons work, it’s best to learn with matching spoons.  Any spoons will work; even plastic ones, however the best sounds seems to come from the heavier metal ones so find a few pairs and see what sounds best to you.

Holding The Spoons!

The real trick to playing the spoons is getting the right grip.

Take a look at this picture.  Put the end of one spoon between your thumb and pointer finger.  Put the end of the other spoon between your pointer and middle finger.  Hold them all the way down near the end of the spoons grasping tightly enough not to drop them but loose enough so that they can still click together.

Screen shot 2013-06-04 at 10.40.07 AMIf you’re right handed – you’ll probably do better with your right hand and vice versa for lefties!

Rat-a-tat-a-tat

Take your spoons and see if you can make them click together.  Tap them between your knee and your other hand (held above the spoons), moving the spoons  – not your knee or your “non-spoon hand”.  Tap back and forth until you get a nice steady rhythm.

Try it slow.  Try it fast.  Try it along with your favorite song.  Then you’ll be ready to move on to the fancy stuff!

Drum Roll, Please!  

Once playing a simple beat isn’t enough, try this move that sounds a bit like a drum roll!  Hold your spoons in your dominant hand and place your other hand, palm up with fingers spread.  Hold the fingers of your “non-spoon hand” as stiffly as you can.

Then, brush the spoons over your upturned hand allowing them to clink once on each finger, like a ball falling down stairs and tapping each one along it’s way.   Practice this until you can do this smoothly and can add it to any song effortlessly while playing.

Rock Out To Your Favorite Songs

The best way to get good at playing the spoons is by practicing.  Play along while you sing.  Play along while your child sings.  Play along to your favorite recorded music or a family member who can play an instrument.  Although this is a simple instrument, it can really add a lot to a front porch jam or an impromptu music party!

And if all else fails, you can get a pair of connected spoons, just like these!  Happy tapping!

Make A Whistle – From A Blade Of Grass!

Even the simplest things can be a part of creative, everyday musical fun with your child!

Have you ever shown your kids how to make a simple blade of grass into a whistle that sounds like a duck call?  If this wasn’t one of your childhood games, don’t worry.  It’s easy to learn and a great way to share creative play with your child.

What Do You Need?

Only three things! A blade of grass, preferably a longer thin one, two thumbs and a bit of patience.  And as you try this activity, you might want to notice that you’re actually making a simple version of the type of reed found in woodwind instruments such as saxophones, clarinets and oboes.

How To Do It!

Although this seems easy, it does take some time to get the right sound, so don’t give up if it doesn’t work the first few times!  Place your two thumbs together, leaving space between them like you see in the above picture.

Next choose a long, thin piece of grass, and stretch it between your thumbs, making it as tight as you can.  The grass should look as if it is dividing the space between your thumbs.

Then, put your mouth up to your thumbs and blow gently.  A loud, squawking sound should emerge that sounds like a duck.  If not, adjust the grass, try another blade of grass or change your mouth position until you get the whistling sound.

With a bit of practice, you can be a “duck call” pro in no time! Here’s what it might sound like:

Making Music From Natural Items

Love spending time outdoors or in nature?  Here are some related musical crafts that you might enjoy:

Take A Nature Walk – Make A Recycled Rattle
http://tinytappingtoes.wordpress.com/2012/03/26/take-a-nature-walkmake-a-recycled-rattle/

10 Earth Day Music Crafts From Recycled Materials https://www.teacherspayteachers.com/Product/Reduce-Reuse-Recycle-Rock-Out-E-Book-With-10-Musical-Activities-653502

Best Instruments For Quiet Time With A Child!

playing rainstick in the grassMost people associate making music with expressing yourself, having fun and making noise!  Although its great fun to sing, dance and play an instrument, there are also many world traditions that use music to quiet the soul, to learn to listen and to encourage rest, sleep or meditation.  Quiet time instruments or music are perfect for sharing with your children around naptime, bedtime or for a break during a busy  day.

The Rainstick

Originally, rainsticks were made from a special cactus whose long “arms” dried and fell to the ground. They were filled with seeds, beads or pebbles and as these tiny objects fell from one side of the cactus to the other, the sound that emerged was like a gentle rain or a quietly trickling stream. The sound of a rainstick (known in South America as palo de lluvia) is so peaceful and relaxing that it is often heard in meditation tapes or used as part of music therapy.

How do you play a rainstick?  You turn it up-side-down or hold it at an angle so that the contents can flow from one end to the other.  Notice the difference in sound when you hold it vertically or at an angle.  You can also “shimmy” the rainstick gently as it flows or hold it horizontally and shake it like a rattle.

How can you use the rainstick as a quiet time instrument?  “Play” the rainstick along with relaxing music until you feel like resting or try some of these games.

          A class or group of children listen to rainstick while a teacher turns it over.  When the last pebble falls, the first child with their hand up gets to be the new leader or wins that round.

          Try the above game with the children’s eyes closed.

          Try this game with young children at naptime in a preschool setting.  After each child has a chance to play the rainstick, they lie down to rest.  The teacher picks each student by seeing which one is waiting most quietly and giving them the first turns until everyone is ready to rest.

Use your own ideas and make up your own games or rainstick activities.  Don’t have a rainstick?  You can win one from DARIA’s world music for kids website or make your own version from simple, recycled materials, by checking out the links below.

The Ocean Drum

The sound of the surf can be so soothing.  And playing an ocean drum, can help you bring the quiet sound of ocean waves right into your classroom or home, creating a relaxing space to rest or refocus your energies.

What is an ocean drum?  It’s a two-sided drum with clear material stretched over a round frame.  Inside the drum are small round objects such as bee-bees or pebbles.  As the drum is tilted back and forth, the tiny objects move across the head of the drum creating a sound remarkably like ocean waves gently breaking on a beach.

By holding the drum at different angles, the player can control how the waves move – quickly and enthusiastically or softly and quietly.  Along with the repetitive sound, the look of the small objects moving back and forth can create a relaxing experience that is remarkably comforting for any child but one that is especially appreciated by children on the autistic spectrum.

Don’t have an ocean drum?  You can make your own version from a shipping box.  Find the simple instructions at the link below.

bronze singing bowl 2Singing Bowl and Tingsha

In the near future, we’ll do a detailed article on using these additional two instruments for relaxation and quiet time with small children.  In the meantime, you can to find more general information and a “Make Your Own Tingsha” post at the links below.

———

Links:

Make Your Own Rainstick

http://www.dariamusic.com/docs/RAINSTICK%20Instructions.pdf

Make Your Own Ocean Drum

http://www.dariamusic.com/docs/Ocean%20Drum%20Instructions.pdf

The Singing Bowl

http://makingmulticulturalmusic.wordpress.com/2013/02/16/gongs-handbells-and-singing-bowls-three-great-instruments-for-exploring-the-culture-of-china-tibet-nepal-and-asia/

Make Your Own Tinghsa

http://www.dariamusic.com/docs/MakeYourOwnTingsha.pdf

Make a Roly Poly Musical Thing!

roly poly things (3)There are so many great ways of enjoying musical play with a young child.  It’s a fun learning experience for kids of any age or ability and also a great de-stresser for mom, dad or caregiver.

Here’s a project that’s easy to make and provides an opportunity to take time out of a busy day to play and have fun with a little one that you love.

What’s A Roly Poly Musical Thing?

Anything you want it to be!  Start with any cylindrical container like these and gather a few supplies to decorate and fill them. Here’s a basic supply list.

roly poly suppliesSupplies

 Any recycled container that can roll.

Material to decorate: stickers, markers, colorful tape, etc.

Objects to fill: dried beans, rice, birdseed, jingle bells,

beads, buttons, macaroni, jingle bells, Q-tips, sand, salt, pebbles.

If your object is transparent – You may wish to add decorative objects that won’t change the sound but will add visual interest such as glitter, colorful puffballs or confetti.

Sturdy tape (such as electrical or duct tape) to seal the project.

Make Your Roly Poly Thing!

First clean and dry the container you’ll be using.  Then decide how you’ll decorate. You can do this as a coloring project, add stickers or apply colorful tape.

roly poly thingSince you’ll be playing with this homemade toy by rolling it, remember that it can be fun to create designs that will be interesting when they are rolled back and forth, like changes in color, various stripes, patterns or wiggly lines or different stickers that might appear like different “faces” of the roly poly thing.

If your object is transparent, consider what you might put inside to make interesting patterns when the object is rolled.

Next, add the items that will create sound as your object rolls.  Larger objects like dried pasta or large buttons make louder noises.  Smaller items like sand or seed beads make a quiet “whooshing” sound.

Once you are pleased with the look and sound of your project, you can seal it up.  Use a sturdy tape such as electric or duct tape and you’ll be ready to play.

Time To Play!rolling roly poly

There are lots of fun ways to play with a roly poly thing.  Here are some of our favorite ways:

Roll between two hands on the floor

Roll between two hands on a tabletop or at a desk

Roll back and forth between two players on the floor

Roll back and forth in time to music

roly on the tableRoll back and forth in time to slow quiet music

Roll back and forth in time to fast-paced, up-tempo music

Roll back and forth while singing or counting

Roll back and forth, rolling when music plays, stopping when music stops.

Make up your own games and your own rules.

Be creative and have fun!

————————

Looking for songs to “roll” along to?

Play Along With Any OF DARIA’s Songs on her Youtube Channel

www.youtube.com/user/DariaMusic

Easiest Instruments For Young Children – Recycled Rattles

Screen shot 2014-07-07 at 1.00.10 PMThere’s a reason you find rattles in almost every culture around the globe.

They are amazingly simple and very powerful at the same time.  A child playing a rattle becomes aware of how his or her movements change the sound they are making.  They realize how the sound they create can “fit” with a beat and most studies of young children show that they are keenly aware of rhythmic patterns.  Making and playing several varieties of homemade rattles can be a great way to explore music and have fun with a young child at the same time.

Recycled Rattles for Home or Classroom Play


Rattles made from gourds, seeds, feathers and a donkey's jawbone

Rattles made from gourds, seeds, feathers and a donkey’s jawbone

Most early rattles were made of materials such as dried gourds, seashells, clay, coconuts, bark and a variety of other natural objects.  In Africa, caxixi rattles are made from woven fiber.  In India, special rattles are made from colorful palm fronds woven together in clever patterns.  On the coast of Peru there’s even a rattle made from the jawbone of a donkey.  In short, people make instruments from materials that they have found available near their home.  We are going to take that same approach to creating recycled rattles!

Clean and dry a variety of small plastic containers (water bottles, juice containers, etc.) and assemble some objects that can serve as the contents of the rattles. Here’s a list of common materials that work well and the type of sound they create:

NORWESCAP the tableQuiet rattles: sand, salt, sugar, confetti, cotton balls, craft puff balls, paper bits, Q-tips, tiny pasta (such as pastina or acine de pepe).

Medium Rattles:  paper clips, small pebbles, birdseed, small beads, small dried beans, rice, smaller buttons.

Loud Rattles:  dried macaroni/pasta, large pebbles, large beads, coins, large dried beans, larger buttons.

The Inside of the Rattle

Choose the objects you’d like to add to the rattle to create the sound and also consider including some decorative elements.  Since plastic containers are transparent, you can easily add confetti, glitter, colorful ribbon, pipe-cleaners or similar items. They won’t alter the sound but they will add color, beauty and interest when the rattle is being played.

alphabet shekere 2The Outside of the Rattle

If you like, you can decorate the outside of the rattle with stickers, markers or add a handle made from pipe-cleaner, yarn or ribbon.  Feel free to get creative.  When you’re done, it’s time to seal it with some sturdy tape, such as electrical tape.  This helps keep the contents inside and generally makes it more child-safe around young music-makers.

Now you’re ready to have fun with your rattle!

Time To Play!

Peru_Preschool_ShakureShake along while you sing one of your favorite songs. Try playing slowly and shaking your rattle to the beat.  Then speed up the song. Can you keep up and keep in time?  Play along with recorded music.  Listen to different types of music and see how your rattle fits in with the music being played.

An Easy Rattle Game For Young Children

If everyone in a class or a small group has made a rattle, you try this easy game.

Ask the children to play a certain way until the music stops.  For instance, the teacher can say: “Shake your rattle softly until the music stops”.  The teacher stops the recorded music (like in a game of musical chairs) at an unexpected place and sees if all the students were able to stop at the same time.  Next, change the directions to other simple ways to play, such as:

Shake your rattle back and forth until the music stops.
Shake your rattle up and down until the music stops.
Shake your rattle round and round until the music stops.
Shake your rattle very softly until the music stops.
Shake your rattle loudly until the music stops.
Shake your rattle down low until the music stops.
Shake your rattle up high until the music stops.
Shake your rattle quickly until the music stops.
Shake your rattle slowly until the music stops.

Aside from this one game, there are lots of other ways you can make music and have fun with a rattle while you are learning, playing and recycling – all at the same time!

Here Are Some Variations On Rattle Crafts:

Monster Rattles – From Egg Cartons
https://www.teacherspayteachers.com/Product/HALLOWEEN-MUSICAL-RATTLE-BASED-ON-PERUVIAN-QUIJADA-1146672

Make Your Own African Coffee Can Drum – https://www.teacherspayteachers.com/Product/Make-Your-Own-African-Drum-Craft-3507618

chapchas (3) on red backgroundMake Your Own Maracas – https://www.teacherspayteachers.com/Product/Latin-American-Intruments-Make-Your-Own-Maracas-142802

MYO Chapchas- Goat Toe-Nail Rattlers from South America – https://www.teacherspayteachers.com/Product/Chapchas-A-Unique-Rattle-From-Latin-America-1426778