Category Archives: Special Needs/Kids of All Abilities

How Loud is Too Loud – Part II

Adorable girl hearing
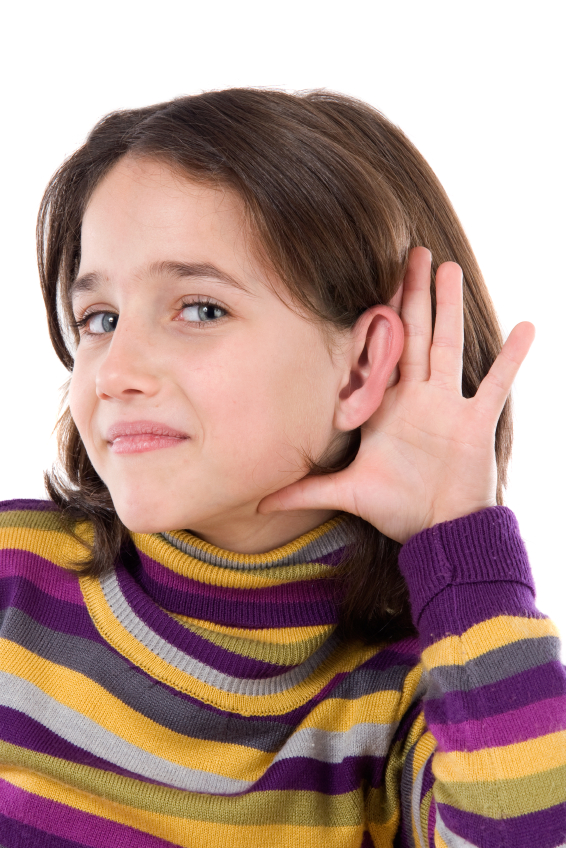
Have you ever noticed that we live in a very noisy world?

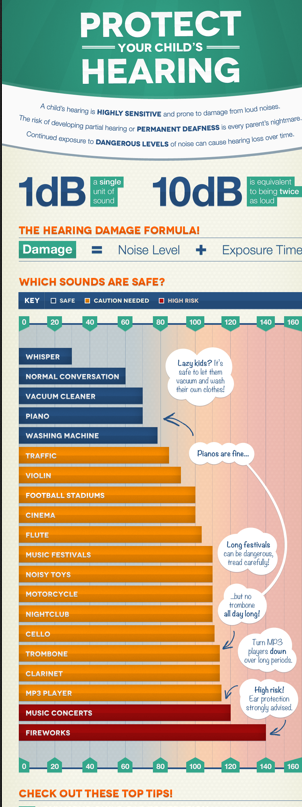
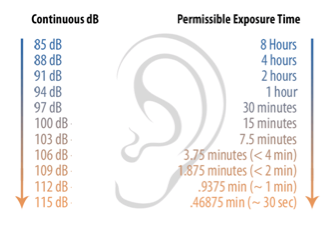
We’ve just published a short but very important post talking about noise levels and children (http://www.tinytappingtoes.com/uncategorized/how-loud-is-too-loud-part-1/).  But many parents also wonder about related issues that are also worth considering.  Here are some common sense answers that might help when thinking about sound, music and other types of entertainment or media in relation to young children.

Talk to Me, Mommy!

Don’t forget that the human brain learned how to develop in a world that consisted mainly of other humans speaking, singing or talking.  The added stimulation from t.v., radio and electronic devices are fairly new and although they can provide helpful and educational content, most studies show that the input from human contact makes the most difference to a child.  Whenever possible, experts suggest that parents emphasize “one-on-one time” speaking or interacting with a baby or young child and downplay external media, no matter how educational it might seem.

Silence is Golden

Similarly, having some time for quiet, quiet activities, family conversation or turning off electronic media can help everyone in the family feel more relaxed and calm.  Believe it or not, even when there’s no media playing, a child’s brain is still performing the important function of listening and cataloguing sounds such as a bird singing, a phone ringing, siblings chatting or a car passing by.

Turning down the noise level can often help a child process the world around them in a way that is meaningful and integrated.   In case after case, studies show that in regard to external noise and electronic media – less is often more.

When In Doubt, Turn It Down

And since we’ve all gotten used to a louder world, it helps to give some thought to things like stereo speakers in cars or where a baby is seated in a room.  If a car seat is buckled in a location with the car’s speaker is nearby, what may seem like a reasonable volume to the driver, might easily be too loud for the child whose ears are closer to the source of the sound.

In the same way, what might seem like a normal t.v. or radio volume to a parent cooking dinner across a room, might be too loud for a child seated next to the sound source.

When in Doubt – Check It Out

It makes perfect sense that a child might cry when hearing noises that are too loud for them.  But what if they continue to express discomfort with sound or sound levels when things seem to be at a reasonable volume?  In this case, visit your pediatrician.  Although most children receive a hearing screening before leaving a hospital or birth center, regular check-ups can detect problems and solve them in a timely manner.

Nemours, a non-profit education medical website has these comments about treatment regular check-ups and hearing loss:

“Treatment for hearing loss can be the most effective if it’s started by the time a child is 6 months old.  Kids who seem to have normal hearing should continue to have their hearing evaluated at regular doctors’ appointments. Hearing tests are usually done at ages 4, 5, 6, 8, 10, 12, 15, and 18, and any other time if there’s a concern.”

Speak Up, Turn It Down!

Recently I attended a party that was a benefit for pediatric brain cancer.  Sadly; as entertainment, the hosts had hired a dj who insisted on playing music so loud it could cause hearing loss in small children, many of which were playing near the speakers.

If you’re having a party or visiting one where the noise level is questionable or too high, speak up!  DJ’s are often situated behind their speakers and may not recognize the noise level for guests in the room.  And, if it’s still a concern, let the musicians, dj or party host know how you feel.  Damaging noise levels can create problems for children, some of which won’t appear immediately but can have permanent and devastating results.

Again, you can check out the facts in our latest post about children, ear protection and hearing loss as well as at the Nemours KidsHealth Website at the links below.

Resources

How Loud is Too Loud –Part 1 http://www.tinytappingtoes.com/uncategorized/how-loud-is-too-loud-part-1/

Hearing Evaluation Information For Children From The Nemours KidsHealth Website:
http://kidshealth.org/parent/general/eyes/hear.html

FacebookTwitterGoogle+Share

How Loud Is Too Loud? Part 1

Screen shot 2014-02-05 at 12.51.40 PMThis guest post by Rob Doole tackles the important topic of hearing loss and young children.  Rob is the director of Allearplugs.com.

Music can be very beneficial to young children, allowing them to develop their sense of creativity and melody while generating memories that will stay with them forever. I always remember the songs I sang at school and appreciate how they developed my love of music that remains today.

However, musical memories are not always fond; young children exposed to high noise levels can develop hearing problems such as tinnitus during their youth.  Children’s hearing is highly sensitive and vulnerable to harm from loud noises and damage to their ear drums at an early age will inhibit their development later on in life.  It’s therefore important that you take some steps to protect and educate your children about the dangers of loud noise from music.

As illustrated below, the risks of your child developing hearing loss depends on the volume of noise and the exposure time:

Screen shot 2014-02-05 at 12.39.43 PM

Sound is measured in decibels (dB), with 85db being the threshold for safe or dangerous noise; to put this in context, playing a piano is around 70dB, and within the safe limits; listening to a live violin performance, at 92dB, would be above the threshold.

Exceeding the threshold for ‘dangerous’ noise is possible, provided the time frame of exposure is within safe limits, as outlined below from dangerousdecibels.org.

permissable exposure tim

Long periods of loud noise can be just as damaging as quick, sudden bursts and it’s important that you take precautions to reduce the likelihood of both exposures from occurring over time.

Most of your child’s music lessons or home practice is likely remain within safe thresholds, particularly when lessons only last for up to an hour at a time. However, as your children get older and want to try new instruments, these thresholds are likely to be exceeded; for example, the violin (86dB), flute (103dB) or cello (110dB) are all loud.

Other musical activities, like an all-day family music festival, could also create risks, with noise reaching 110dB very close to the stage (safe for under two minutes); my advice here is to use hearing protection, Edz Kids Ear Defenders (http://www.allearplugs.com/children/kids-ear-defenders/)  work really well, while moving as far away from the speakers as possible and taking regular breaks.

With new technology highly focused towards high-volume, personal ‘in-ear’ devices like MP3 players, it’s also really important that you educate young children about their dangers as soon as possible.  On their loudest settings, MP3 players can reach sound ratings of up to 115dB, which can be seriously detrimental over a sustained period of time.

Make sure music is turned down below 85dB for longer periods, or limited to very short time time frames above this threshold. It is often the sustained, lower-level sound exposures which have the potential to cause ‘unseen’ damage in children, so be sure to monitor their exposure as their enjoyment of music grows.

Rob’s company, Allearplugs.com offers the Edz Kids Ear Defenders as well as a full range of options for children’s hearing protection, check them out at http://www.allearplugs.com/.

Read more from Rob Doole and get his latest updates at: https://plus.google.com/115842769732285976259/posts

Make Your Own Pu’ili – Hawaiian Rhythm Sticks

Rhythm sticks are great additions to almost any type of musical play with children.  Found all around the world, most rhythm sticks are about 6 to 8” long and made of solid wood.  Hawaiian rhythm sticks, however, take a really unique puili sticks on a leafapproach to this age-old instrument.  Called pu’ili; they are made from longer sticks of bamboo, solid on one end and slit on the other to make a rattling noise when struck together.  And they are tapped in many different ways, often as part of the hula tradition so making and playing your own pu’ili sticks can be a fun way to enjoy movement and music at the same time.

Want to see how they are played as part of the Hawaiian tradition?  Watch this short video and you will be amazed at the coordination of the dancers and the many different ways two sticks can be used to create rhythm and become part of the graceful moves in this dance.


Crafty Pu’ili Sticks

Actual pu’ili sticks are made from lengths of bamboo, generally around 12 – 18” long.  They are left solid at one end and then cut into numerous slats on the other end.  Our craft version uses the cardboard roll from paper towels and adds a few elements for decoration and durability.  Supplies you need are:

Screen shot 2014-02-01 at 12.38.21 PM2 cardboard tubes from paper towels

Scissors

(Optional)  Electrical or duct tape

Stickers, markers or other materials for decoration

This is such an easy craft.  Simply cut slits in one side of the cardboard rolls and use the electrical tape or duct tape to wrap the other (uncut) end.  This will indicate which side to hold and help the sticks last longer.

Although it’s not traditional, you can decorate the cut side, using markers or stickers, paint, glitter and glue or whatever inspires your imagination.  Once you’re done – it’s time to play!

One quick note here, since they are made of cardboard, these pu’ili sticks may not last a long time.  If you enjoy this musical craft, it may be a good idea to save these paper towel rolls and make several pairs.

Playing Your Pu’ili

There are lots of basic moves for playing these rhythm sticks that any child or adult can master right away.  Try some of these easy suggestions:

Hold one stick in your right hand in front of you. Tap with the left stick.

Hold one stick in your left hand in front of you. Tap with the right stick.

Hold one stick in your right hand by your right shoulder. Tap with the left stick.

Hold one stick in your left hand by your left shoulder. Tap with the right stick.

Screen shot 2014-02-01 at 12.38.34 PMTap the two wrapped ends together in front of you.

(If seated at a desk or table) Tap the two wrapped ends on the desk or table in front of you.

(If seated on the ground) Tap the two wrapped ends on the ground in front of you.

Screen shot 2014-02-02 at 8.33.56 AMIf standing, tap both sticks on the ground by your right toe.

If standing, tap both sticks on the ground by your left toe.

Mix and match these moves.

Mix and match these moves in time with Hawaiian music.

Mix and match these moves in time with any of your favorite types of music.

Rhythm Games

Once you’ve mastered the basic moves, you can also play with an adult, partner, friend or even a group.  In the video above, you probably noticed how the dancers tapped each other’s sticks.  You can try something similar.  If you sit across from a partner, pick out what moves you want to do (such as – let’s tap right, then left sticks in the middle) and give them a try.   Make up your own patterns with or without music.

If you’re seated in a circle with a group, you can try patterns such as this one:

Everyone taps both wrapped ends on the ground twice, then taps both sticks together in front of themselves.

Everyone taps both wrapped ends on the ground twice, then reaches out to tap the sticks of their neighbors, both right and left.

Repeat the pattern while keeping a beat.  Try it without music, while singing or while playing recorded music.

—————–

Photograph of pu’ili sticks on a tropical leaf, used by permission from NaKani O Hula Farms.  Their farm grows and creates many traditional Hawaiian instruments and crafts.  Find them at:

http://www.nakaniohula.com/about-us/


Easy Gourd Shekere For A Child – Or A Classroom

Peru_Preschool_Shakure

A shekere is a wonderful, versatile instrument from Africa.  Made from dried gourds of various sizes, the instrument has a netting over its rounded area that is beaded or woven with shells, seeds, nuts or other objects that rattle.  Since making the knots for the netting can be hard for smaller hands, we’re sharing a simplified version perfect for making with a child, a group of siblings or a classroom of kids.

Start With A Gourd

Shekeres are made from dried birdhouse gourds.  After they are harvested and stored for about a year in a dry location, they become sturdy and have a hardened outer shell.  As the gourds dry, the shell may not look perfect so some craftspeople sand the shell, bleach the shell or even paint and decorate it to make it more appealing before they begin the beading process.  You can try any of those approaches as well or use them “au natural”.

white gourd + necklace - shekere being madeMake A Gourd Necklace

The formal beadwork on a shekere is called a skirt.  For this project, our gourds will only have a necklace instead of a full “skirt”.

Take a piece of string, twine or embroidery thread and twist it around the top of the gourd, marking where it will overlap.  Measure it tight enough to stay on the gourd, but loose enough to rattle.  Don’t tie the string but instead lay it flat on a work surface.  It can be helpful to tape it into place.  Looking at the length of the string, you can get a good idea of how many strands of beads you can create to put onto it.

little gourd shekereJingles, Jangles and Bangles

Collect your bangles!  Look for any type of beads, buttons, jingle bells or similar objects you can use to create the sound of your instrument.  Here are some ideas for making several different types of creative shekeres.

Parent/Child Shekere

Parent and child create strands of noise-makers and they are strung alternately on the gourd.

Sibling – Friendship Shekere

Sister and brothers or friends create strands of noise-makers and they are strung on the gourd.

Classroom or Group Shekere

Each student or participant makes one string of noise-makers to add to the classroom instrument.

After you’ve finished creating your strands, add them to the necklace and tie it into place on the gourd.

mini shekere for storePlaying A Simple Shekere

Although these easy shekeres may not seem as versatile as their bigger cousins, you can hold them from the top and create several different types of rhythms. And if dried gourds are not readily available in your area, we’re also sharing a link below for making a recycled version out of plastic milk jugs.

Experiment with what you’ve created and have a blast!

shekere iconShekere Resources And Links

Hear A Shekere

http://www.dariamusic.com/shekere.php

Color A Shekere Online

http://www.dariamusic.com/color_Shekere.php

Make Your Own Shekere From Plastic Milk Jugs

http://www.dariamusic.com/make_Shekere.php

alphabet shekere 2Use A Shekere To Learn The Alphabet!

http://www.trueaimeducation.com/2012/10/guest-post-learning-letters-with.html

Shekere Kits And Step-By-Step Tutorial Available from DARIA’s Little Village store

http://dariasvillagestore.storenvy.com/


Can You Kazoo?

If you can hum softly – you can play a kazoo.

It’s a great first instrument because it easily builds confidence in musical ability while allowing a child or adult to recognize melodies and experiment with playing them.  And a truly outrageous kazoo solo can send any child into a fit of giggles.  It’s just plain fun!

How do you play a kazoo?  Place your mouth to the opening and hum quietly.  Avoid humming loudly or blowing into the mouthpiece, neither will give you that classic kazoo sound.

Take a bit of time to practice.  It’s incredibly versatile and fun once you get the hang of just how to do it.  Then what?

Here are some ideas, games and activities you can do with a kazoo!

Play Along With Your Favorite Music

Both parent and child can sound like a rock star when they play along with favorite songs and take their own solos or rock out on the melody!

Name That Tune

Parent or child play a melody on their kazoo and the other must guess what the name of the song is.

Stump The Band!

Parent or child name a song and the other must play it or lose a point/turn.

Call and Response Kazoo

Parent or child play a series of notes or a short song and the other must play it back exactly.  It’s best to start with simple short musical phrases and get more complicated as the game goes on.

———————-

Did You Know?

There is a National Kazoo Day.  You can find out more about it here:

http://www.nationalkazooday.com/index.html

Tips from Serious Kazoo Players

WikiHow has a nice post with more tips for playing kazoos with kids.  You can check it out here:

http://www.wikihow.com/Play-the-Kazoo

It’s So Simple To Play The Spoons!

Would you like to dazzle your young children or quiet a classroom of kids?  Or be the star of the next long car or bus ride?  Then take a few minutes to master the art of the musical spoons and you’ll soon be playing like a professional percussionist!

All you need for developing this homegrown skill are two spoons and a bit of patience and practice.

Start With the Spoons

First, find two spoons of equal size and shape.  Although seasoned players can make any two spoons work, it’s best to learn with matching spoons.  Any spoons will work; even plastic ones, however the best sounds seems to come from the heavier metal ones so find a few pairs and see what sounds best to you.

Holding The Spoons!

The real trick to playing the spoons is getting the right grip.

Take a look at this picture.  Put the end of one spoon between your thumb and pointer finger.  Put the end of the other spoon between your pointer and middle finger.  Hold them all the way down near the end of the spoons grasping tightly enough not to drop them but loose enough so that they can still click together.

Screen shot 2013-06-04 at 10.40.07 AMIf you’re right handed – you’ll probably do better with your right hand and vice versa for lefties!

Rat-a-tat-a-tat

Take your spoons and see if you can make them click together.  Tap them between your knee and your other hand (held above the spoons), moving the spoons  – not your knee or your “non-spoon hand”.  Tap back and forth until you get a nice steady rhythm.

Try it slow.  Try it fast.  Try it along with your favorite song.  Then you’ll be ready to move on to the fancy stuff!

Drum Roll, Please!  

Once playing a simple beat isn’t enough, try this move that sounds a bit like a drum roll!  Hold your spoons in your dominant hand and place your other hand, palm up with fingers spread.  Hold the fingers of your “non-spoon hand” as stiffly as you can.

Then, brush the spoons over your upturned hand allowing them to clink once on each finger, like a ball falling down stairs and tapping each one along it’s way.   Practice this until you can do this smoothly and can add it to any song effortlessly while playing.

Rock Out To Your Favorite Songs

The best way to get good at playing the spoons is by practicing.  Play along while you sing.  Play along while your child sings.  Play along to your favorite recorded music or a family member who can play an instrument.  Although this is a simple instrument, it can really add a lot to a front porch jam or an impromptu music party!

And if all else fails, you can get a pair of connected spoons, just like these!  Happy tapping!

Best Instruments For Quiet Time With A Child!

playing rainstick in the grass
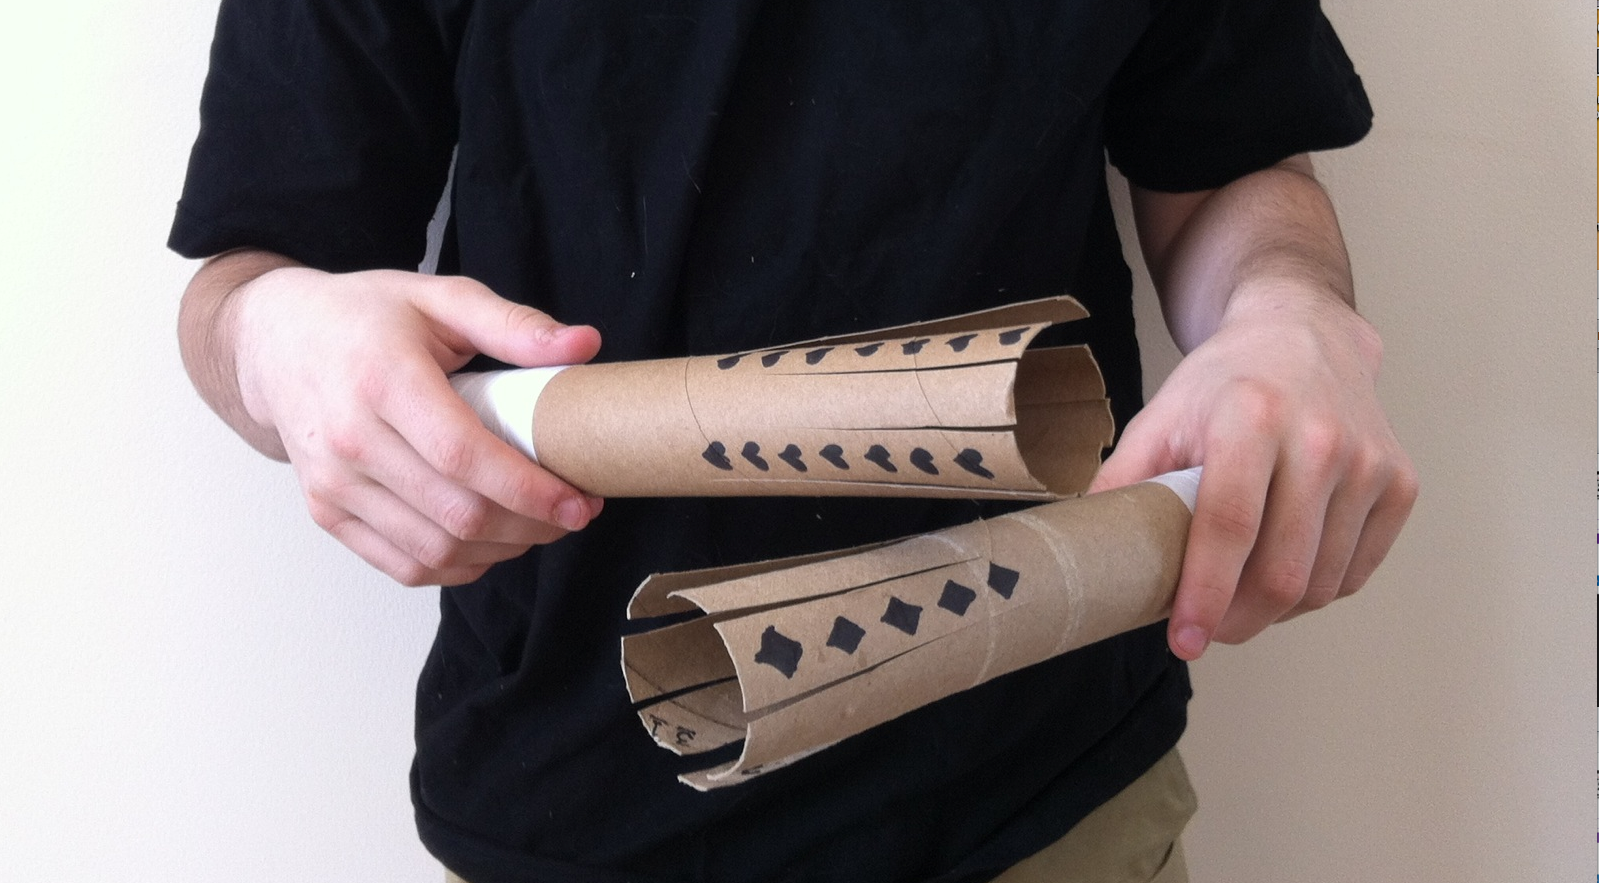
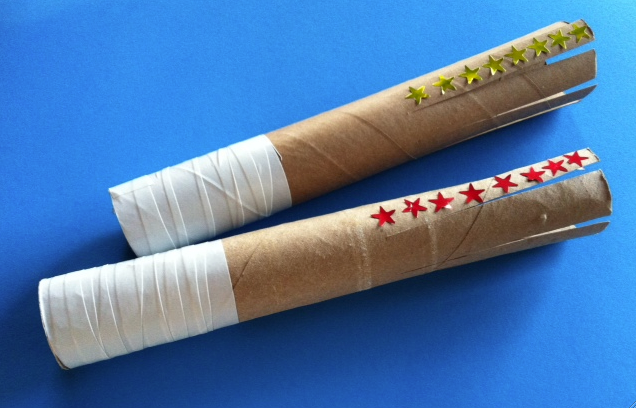
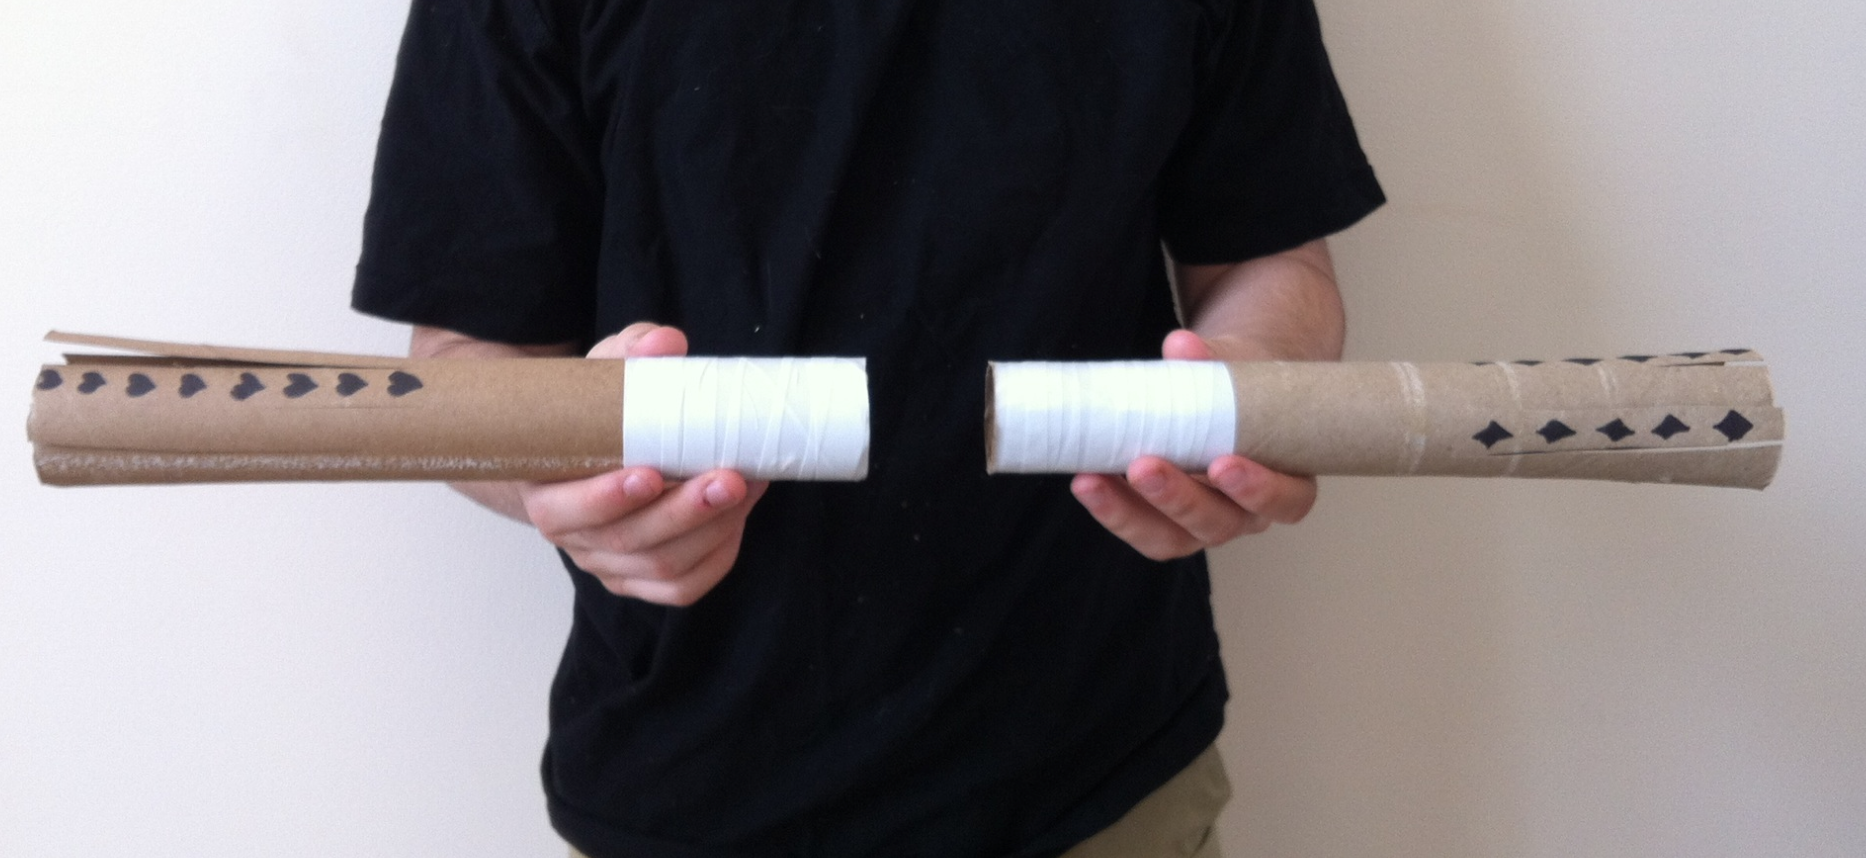
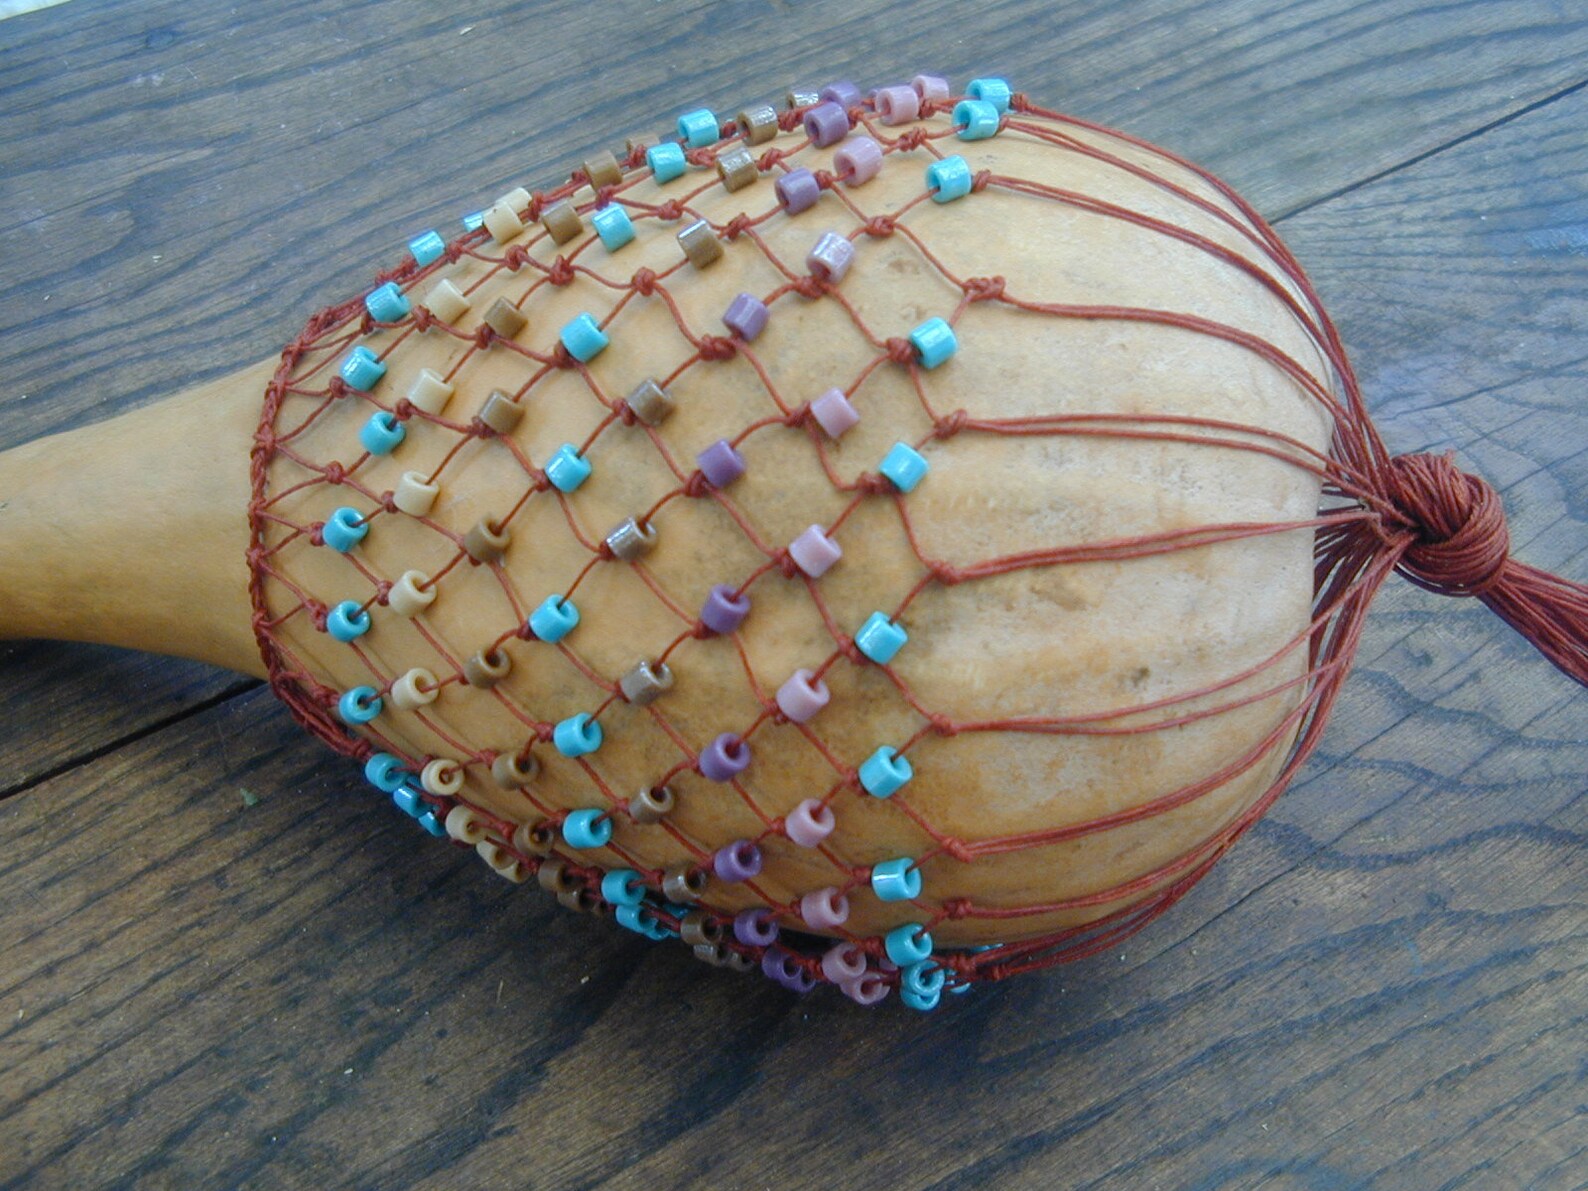
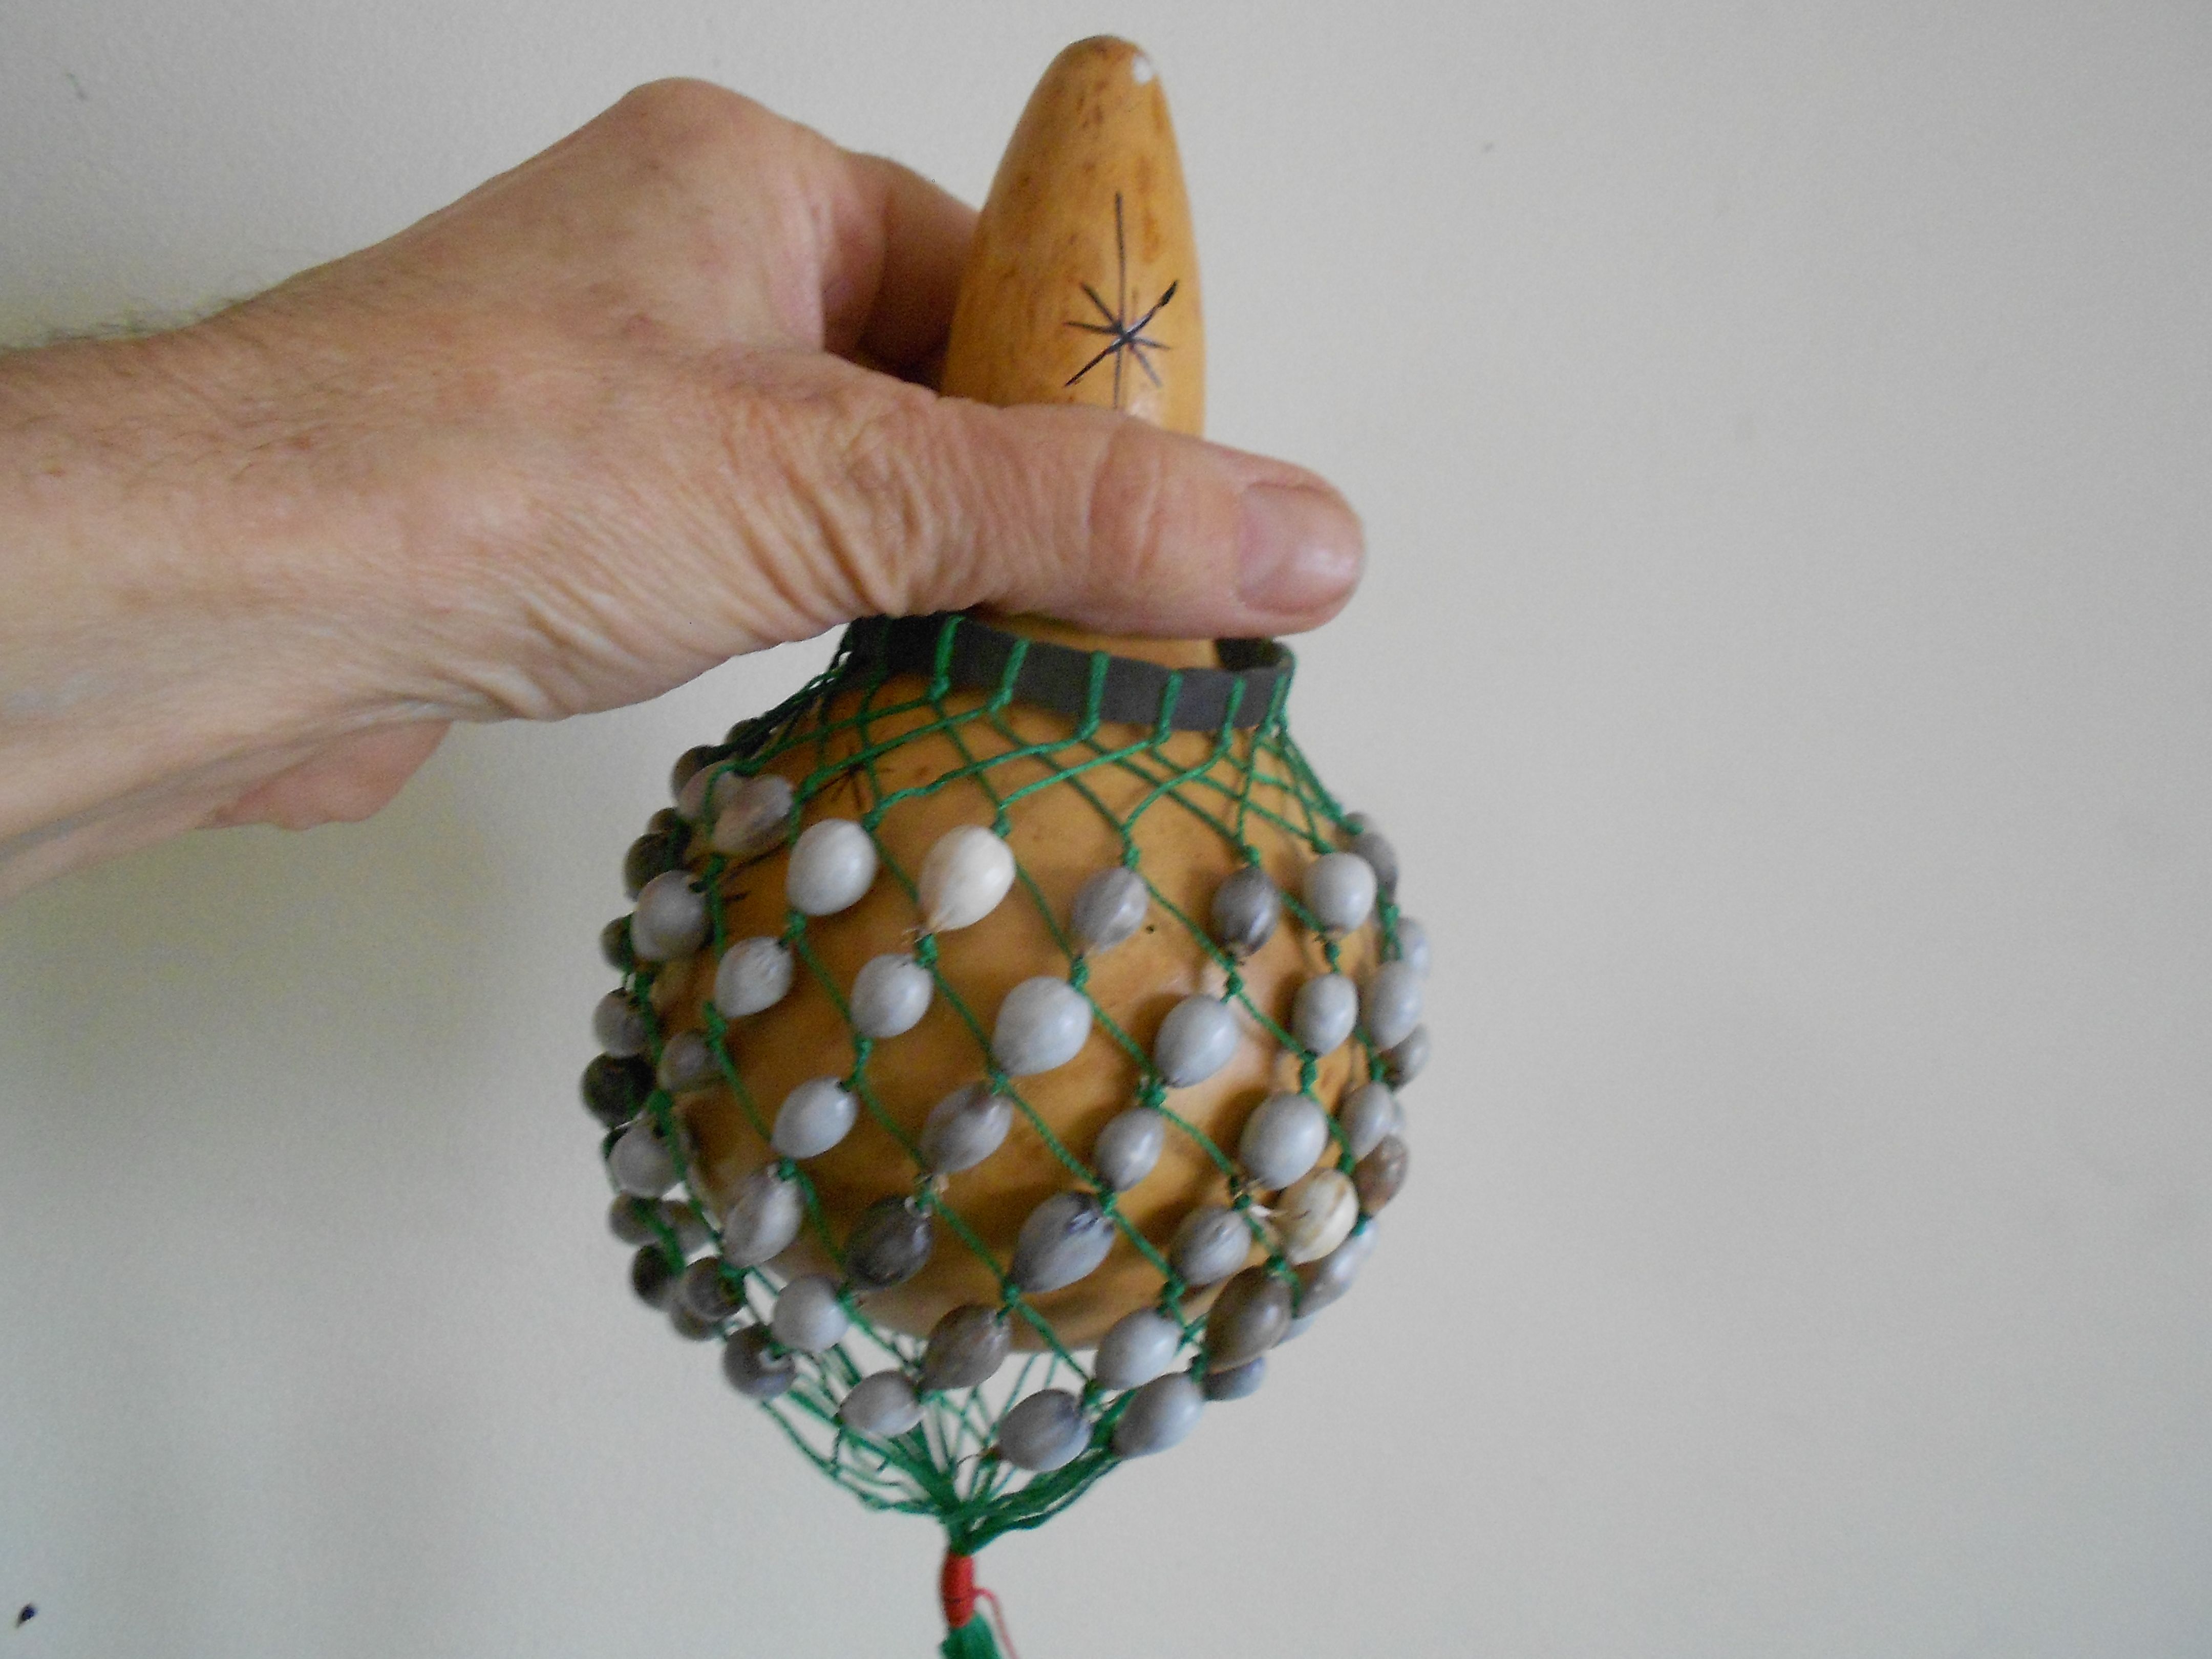
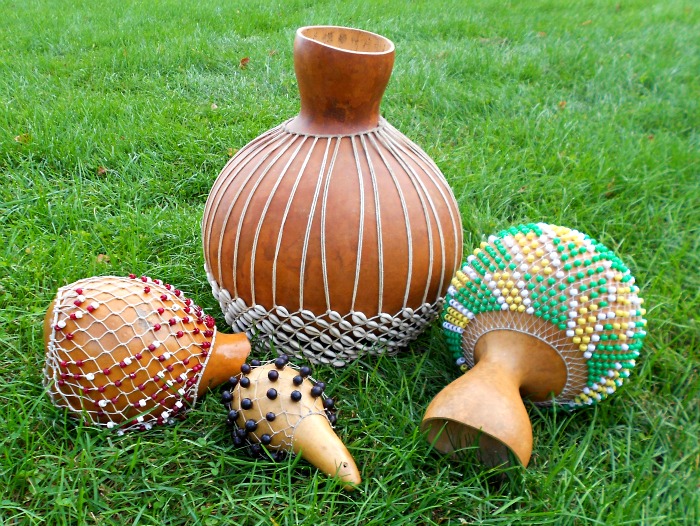
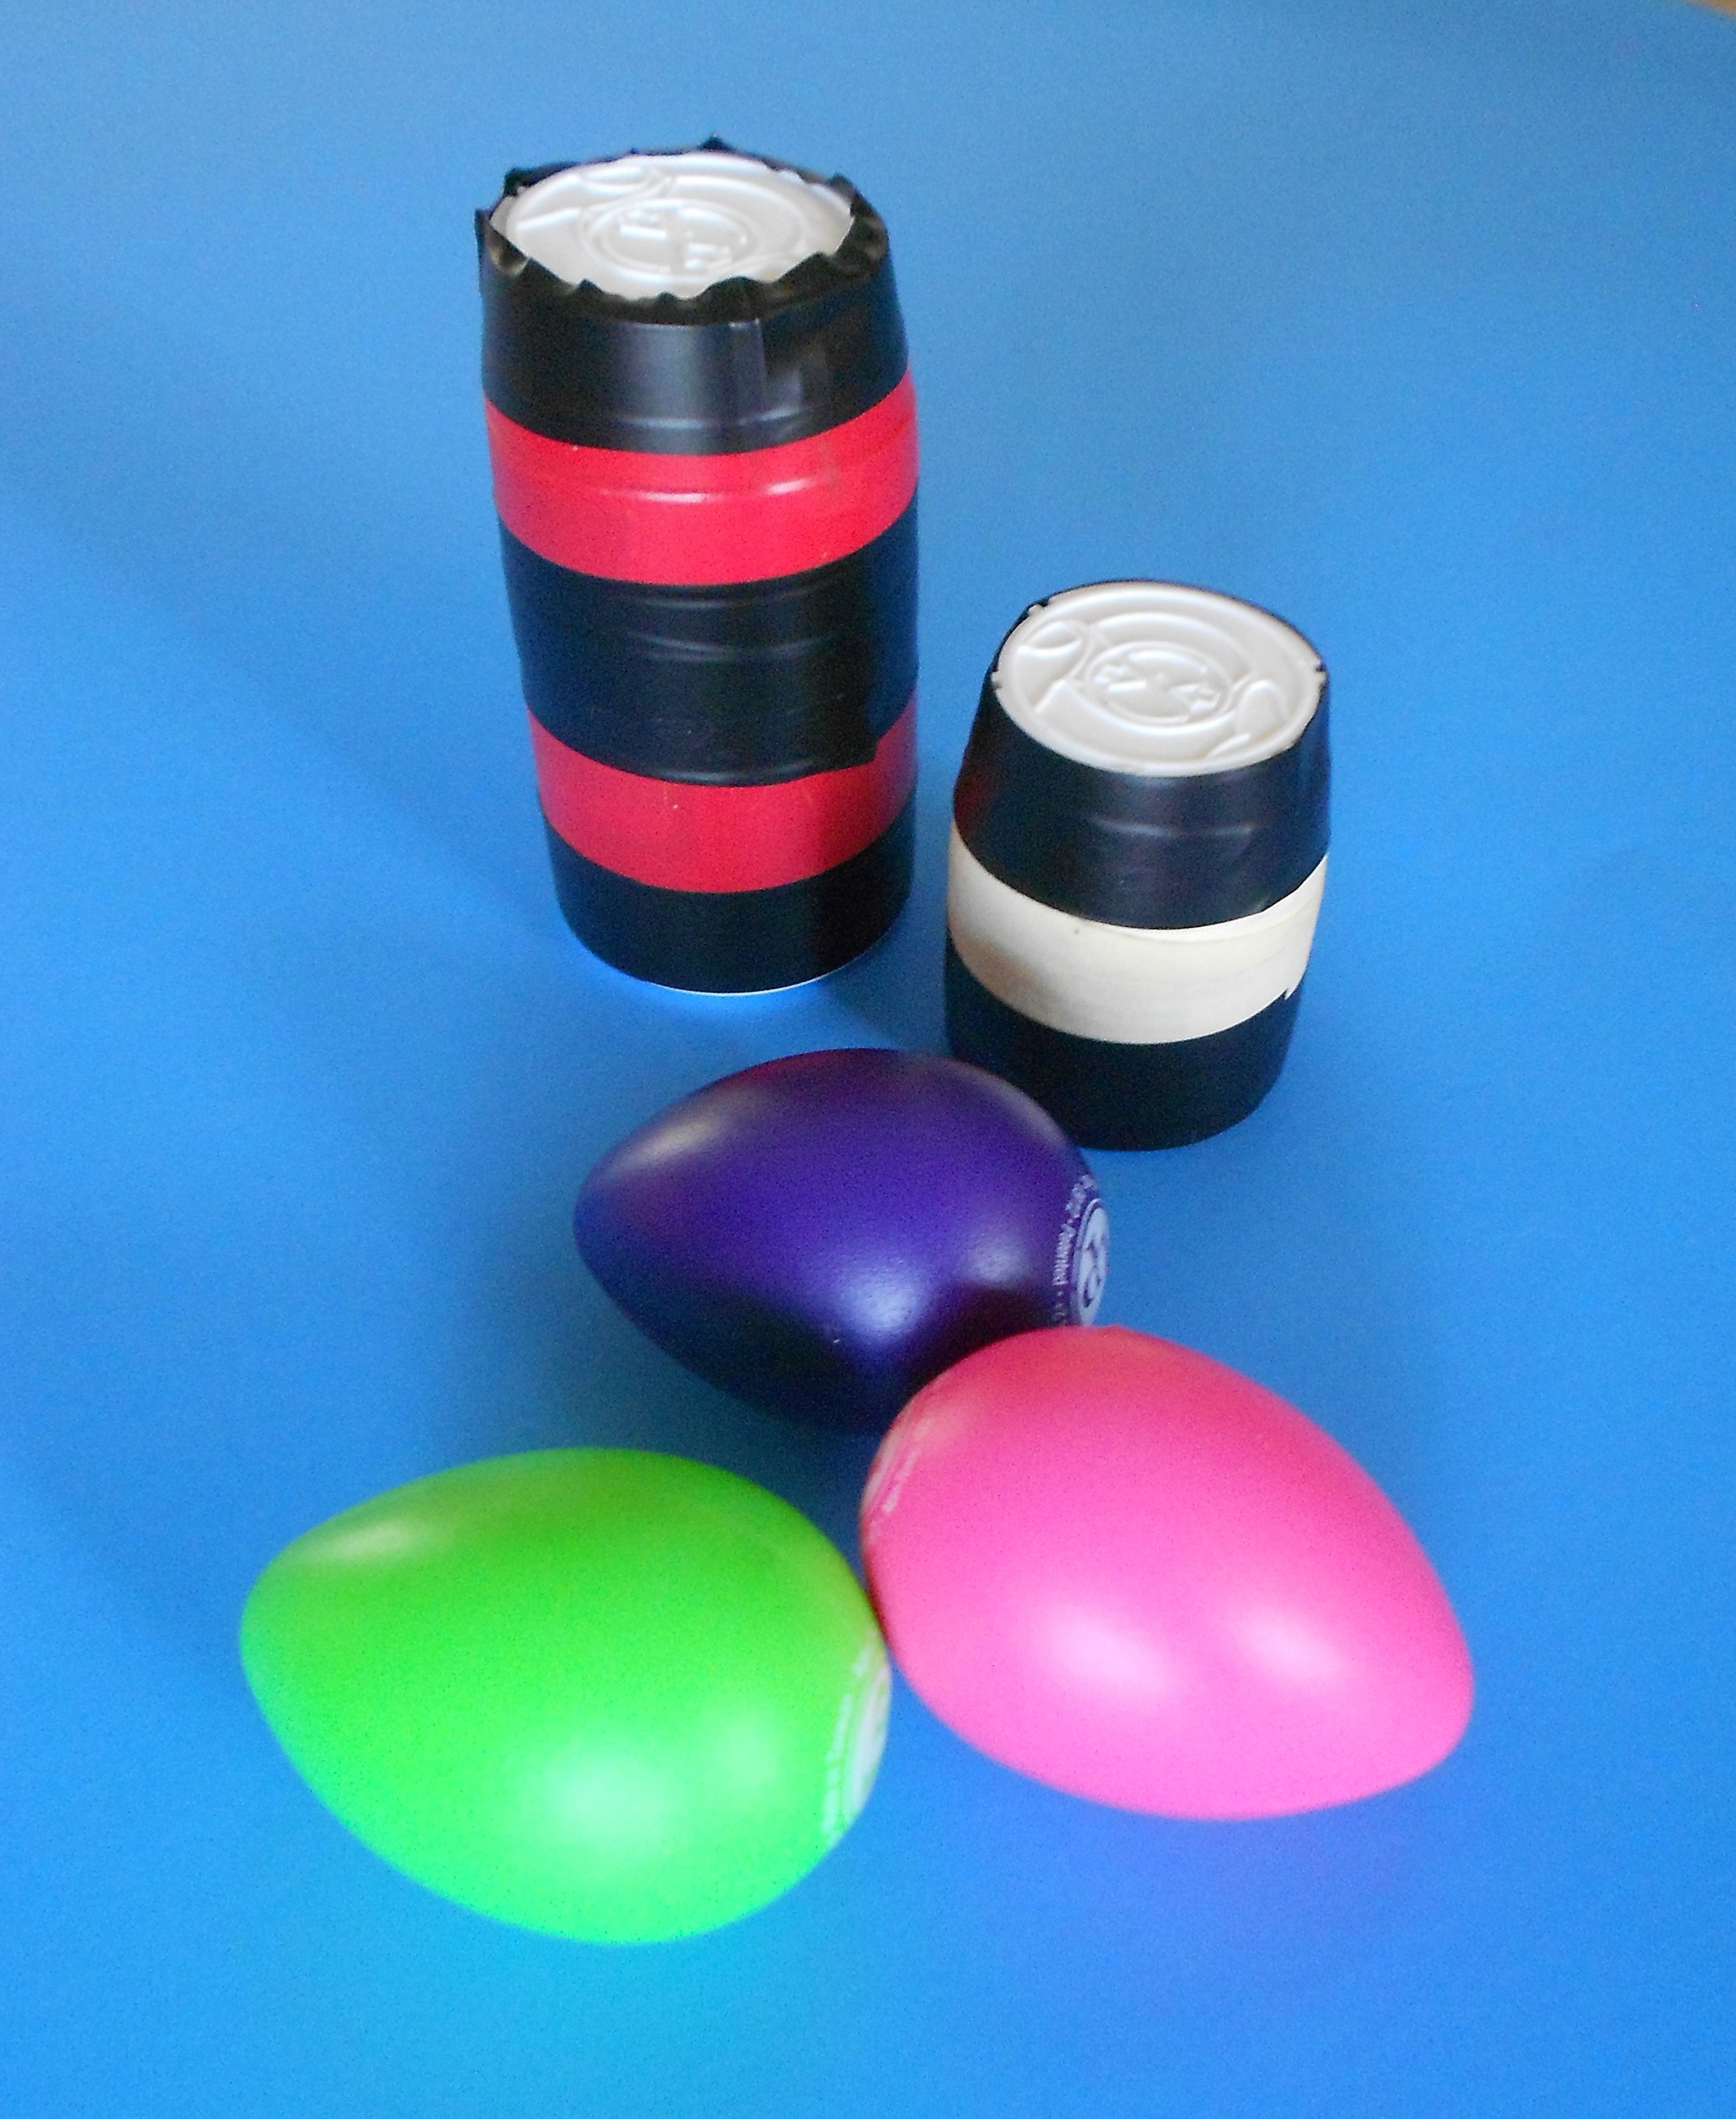
Most people associate making music with expressing yourself, having fun and making noise!  Although its great fun to sing, dance and play an instrument, there are also many world traditions that use music to quiet the soul, to learn to listen and to encourage rest, sleep or meditation.  Quiet time instruments or music are perfect for sharing with your children around naptime, bedtime or for a break during a busy  day.

The Rainstick

Originally, rainsticks were made from a special cactus whose long “arms” dried and fell to the ground. They were filled with seeds, beads or pebbles and as these tiny objects fell from one side of the cactus to the other, the sound that emerged was like a gentle rain or a quietly trickling stream. The sound of a rainstick (known in South America as palo de lluvia) is so peaceful and relaxing that it is often heard in meditation tapes or used as part of music therapy.

How do you play a rainstick?  You turn it up-side-down or hold it at an angle so that the contents can flow from one end to the other.  Notice the difference in sound when you hold it vertically or at an angle.  You can also “shimmy” the rainstick gently as it flows or hold it horizontally and shake it like a rattle.

How can you use the rainstick as a quiet time instrument?  “Play” the rainstick along with relaxing music until you feel like resting or try some of these games.

          A class or group of children listen to rainstick while a teacher turns it over.  When the last pebble falls, the first child with their hand up gets to be the new leader or wins that round.

          Try the above game with the children’s eyes closed.

          Try this game with young children at naptime in a preschool setting.  After each child has a chance to play the rainstick, they lie down to rest.  The teacher picks each student by seeing which one is waiting most quietly and giving them the first turns until everyone is ready to rest.

Use your own ideas and make up your own games or rainstick activities.  Don’t have a rainstick?  You can win one from DARIA’s world music for kids website or make your own version from simple, recycled materials, by checking out the links below.

The Ocean Drum

The sound of the surf can be so soothing.  And playing an ocean drum, can help you bring the quiet sound of ocean waves right into your classroom or home, creating a relaxing space to rest or refocus your energies.

What is an ocean drum?  It’s a two-sided drum with clear material stretched over a round frame.  Inside the drum are small round objects such as bee-bees or pebbles.  As the drum is tilted back and forth, the tiny objects move across the head of the drum creating a sound remarkably like ocean waves gently breaking on a beach.

By holding the drum at different angles, the player can control how the waves move – quickly and enthusiastically or softly and quietly.  Along with the repetitive sound, the look of the small objects moving back and forth can create a relaxing experience that is remarkably comforting for any child but one that is especially appreciated by children on the autistic spectrum.

Don’t have an ocean drum?  You can make your own version from a shipping box.  Find the simple instructions at the link below.

bronze singing bowl 2Singing Bowl and Tingsha

In the near future, we’ll do a detailed article on using these additional two instruments for relaxation and quiet time with small children.  In the meantime, you can to find more general information and a “Make Your Own Tingsha” post at the links below.

———

Links:

Make Your Own Rainstick

http://www.dariamusic.com/docs/RAINSTICK%20Instructions.pdf

Make Your Own Ocean Drum

http://www.dariamusic.com/docs/Ocean%20Drum%20Instructions.pdf

The Singing Bowl

http://makingmulticulturalmusic.wordpress.com/2013/02/16/gongs-handbells-and-singing-bowls-three-great-instruments-for-exploring-the-culture-of-china-tibet-nepal-and-asia/

Make Your Own Tinghsa

http://www.dariamusic.com/docs/MakeYourOwnTingsha.pdf

Make a Roly Poly Musical Thing!

roly poly things (3)There are so many great ways of enjoying musical play with a young child.  It’s a fun learning experience for kids of any age or ability and also a great de-stresser for mom, dad or caregiver.

Here’s a project that’s easy to make and provides an opportunity to take time out of a busy day to play and have fun with a little one that you love.

What’s A Roly Poly Musical Thing?

Anything you want it to be!  Start with any cylindrical container like these and gather a few supplies to decorate and fill them. Here’s a basic supply list.

roly poly suppliesSupplies

 Any recycled container that can roll.

Material to decorate: stickers, markers, colorful tape, etc.

Objects to fill: dried beans, rice, birdseed, jingle bells,

beads, buttons, macaroni, jingle bells, Q-tips, sand, salt, pebbles.

If your object is transparent – You may wish to add decorative objects that won’t change the sound but will add visual interest such as glitter, colorful puffballs or confetti.

Sturdy tape (such as electrical or duct tape) to seal the project.

Make Your Roly Poly Thing!

First clean and dry the container you’ll be using.  Then decide how you’ll decorate. You can do this as a coloring project, add stickers or apply colorful tape.

roly poly thingSince you’ll be playing with this homemade toy by rolling it, remember that it can be fun to create designs that will be interesting when they are rolled back and forth, like changes in color, various stripes, patterns or wiggly lines or different stickers that might appear like different “faces” of the roly poly thing.

If your object is transparent, consider what you might put inside to make interesting patterns when the object is rolled.

Next, add the items that will create sound as your object rolls.  Larger objects like dried pasta or large buttons make louder noises.  Smaller items like sand or seed beads make a quiet “whooshing” sound.

Once you are pleased with the look and sound of your project, you can seal it up.  Use a sturdy tape such as electric or duct tape and you’ll be ready to play.

Time To Play!rolling roly poly

There are lots of fun ways to play with a roly poly thing.  Here are some of our favorite ways:

Roll between two hands on the floor

Roll between two hands on a tabletop or at a desk

Roll back and forth between two players on the floor

Roll back and forth in time to music

roly on the tableRoll back and forth in time to slow quiet music

Roll back and forth in time to fast-paced, up-tempo music

Roll back and forth while singing or counting

Roll back and forth, rolling when music plays, stopping when music stops.

Make up your own games and your own rules.

Be creative and have fun!

————————

Looking for songs to “roll” along to?

Play Along With Any OF DARIA’s Songs on her Youtube Channel

www.youtube.com/user/DariaMusic

Make Your Own Recycled Shaker Eggs

Everyone loves those bright colorful eggs that go chugga-chugga-chugga when you shake them.  They’re a wonderful addition to any classroom or children’s music area.  But, can you whip up your own version at home from recycled or on-hand materials?   Absolutely!

Supplies

Shakee egg suppliesSupplies for this craft are easy.  Any “child-proof” medicine bottle.  A small amount of any type of filling such as dried beans, beads, rice, bird seed, grain (such as quinoa), sand, salt or tiny pasta like pastina.  You’ll also need a sturdy tape – colorful electric tape works wonderfully and doesn’t unravel after hours of play.

What if you don’t use that kind of bottle?  Ask around.  Often friends, colleagues, neighbors or family can save an item like this for you and you can save one more plastic product from making it’s way into the waste stream.

Make Your Own

This craft couldn’t be easier.  Simply fill and seal your bottle.  Before you add the tape, make sure you enjoy the sound. You might be surprised how having less filling in a bottle can create a nicer sound.  Is your rattle loud or soft enough?  If not, adjust what you’ve put inside.

Although I usually recommend that parents or caregivers make crafts with kids, this is one that may be best to make without the children present. Since the project uses aspirin or medicine bottles, it may not be a great idea to give the impression that these bottles; when filled with their original contents, are playthings.

To cover the bottle and turn into a shaker egg, wrap it in tape.  Feel free to be creative with striped patterns using different colored tape, if you like.

hands with shaker eggsShake Your Own

How complex can playing shaker eggs be?  You might be surprised at the many different ways you can play them.

Shake one quietly.
Shake one loudly.
Shake back and forth.
Shake up and down.
Swoosh the contents around inside (in a circular motion).
Shake two different eggs – one in each hand.
Shake two different eggs, alternating back and forth.

You get the idea – right?

Even this simple egg-style shaker can be great at building motor skills, listening skills or as a part of any musical activity.

All Eggs Are Not The Same

If you’ve made several eggs with different fillings, you’ve probably noticed that each sound a bit different.  Larger beads or dried beans will make a louder noise.  Tiny beads, grain or sand will make a very quiet sound. This can be a fun way of learning loud and soft or interacting with your child.  Ask them questions like:  “which egg shall we use for this song?  What sounds best to you?”.

Three Great Musical Projects For Kids Of All Abilities

This post was written as a contribution to the Living Life Special Blog Carnival. The participating bloggers are sharing their experiences in parenting or teaching children with special needs.  Also included are posts on how to educate others about special needs.

Crafting a simple musical instrument is a satisfying project and parents or siblings can each make their own versions of the same craft for added fun.  When the project is complete, you can play your instruments together or along with favorite music. Some instruments; like the quiet rattles or ocean drum, also make excellent activities for taking along in the car or to soothe a child through a rough moment in their day.

Here are three of my favorite crafty musical projects for sharing with kids of all abilities.

A DRUM THAT SOUNDS LIKE THE OCEAN

This is a musical instrument that can be amazingly relaxing.  Tilt it gently from side to side and you can hear the sound of the surf or the waves of the sea.  If you’ve filled it with things such as colored seed beads, you’ll also see a wonderful variety of patterns move as you listen to the sound of your hand-held drum.

Above is a picture of the actual instrument and here is one of our homemade versions as well. Supplies needed for this project are a thin cardboard box (like a shipping box), clear vinyl or a recycled book report cover and small, roundish items to fill the drum.  You can use whatever you have available such as birdseed, dried peas, tiny pasta or small beads.  Seed beads of various colors help create wonderful patterns when this drum is played and tilted from side to side.  You’ll also need some clear packing tape to seal up the project and materials for decorating the outside of the box.

You can find complete step-by-step instructions here:

www.wonderbaby.org/articles/drum-sounds-sea

THE WORLD’S QUIETEST RATTLES

I love making quiet rattles.  They can be played with any type of music and can be different each time you create them.

Supplies needed for this project include any clear recycled container such as a plastic water bottle, soda bottle or milk jug.  Then you’ll need some quiet fillings such as q-tips, cotton puffs, paper clips, tiny pasta, sand, salt or sugar.  You’ll also need some sturdy tape for sealing your instrument.  If you want to add decorative fillings, try confetti, glitter, craft feathers, colorful shredded paper or twisted pipecleaners.

Start with the clean recycled container and begin filling it until you find the sound you like the most.  You can find examples of really quiet rattles and complete instructions here:

http://www.theseedsnetwork.com/search_result.php?i=421/

A HOMEMADE RAINSTICK

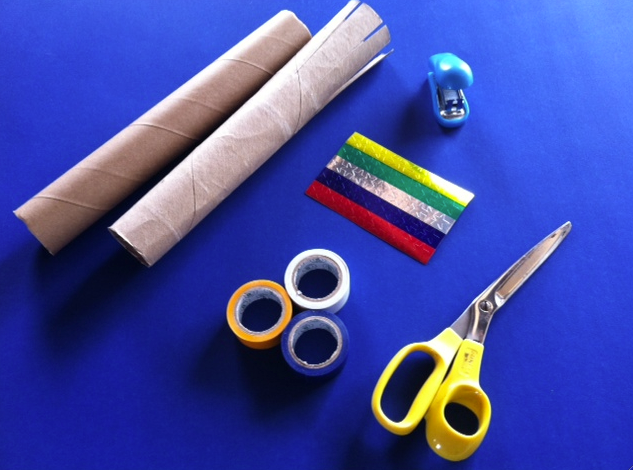
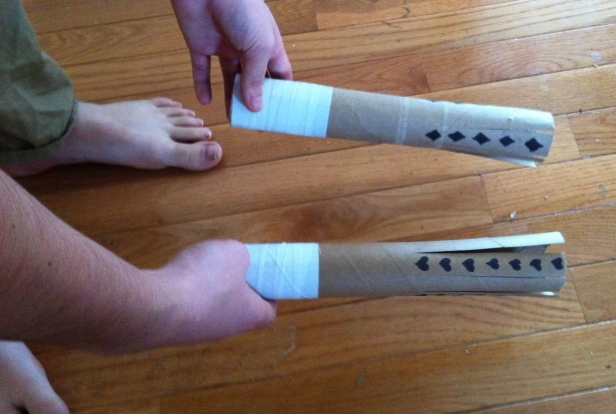
Travel to the rainforests by creating your own unique rainstick.  Add designs from South America, Australia or the American Southwest.  You can also decoupage or quilt one and it will last for years!  To make a homemade rainstick, you’ll need sturdy mailing tube (with end caps) a bit of floral wire, jewelry wire, pipecleaners and some different ingredients that will help create the sound of the rain as they trickle back and forth throughout the tube.

Playing a rainstick is easy.  You just turn it over and let the magic begin.  If you are playing one, few people can resist saying, “hey, can I try that, too!”  You can see some additional pictures of creative, homemade rainsticks and complete step-by-step instructions in a pdf here:

http://www.dariamusic.com/docs/RAINSTICK%20Instructions.pdf

WANT TO EXPLORE MORE INSTRUMENTS?

If you and your child would like to explore more musical instruments, feel free to stop by my website.  I have a special section set up where you can click on eight different world music instruments and hear them.  These instruments include didgeridoos, guitars, guiros, shekeres and pow-wow drums. You can also hear a song with each instrument and can color online or print-out coloring pages for each instrument that you find.  Check it out here at:

http://www.dariamusic.com/cajon.php

You can also get creative with 16 other musical instrument crafts such as Latin American maracas, Egyptian sistrums and a Chinese-style gong.  Feel free to explore and make them your own!

http://www.dariamusic.com/crafts.php

Be sure to check out the other amazing bloggers who are contributing to the Living Life Special Blog Carnival.
Living Life Special: Teaching Children CompassionAndie of Crayon Freckles recounts an encounter between her two children and a child with special needs.  Various activities are provided to help children develop compassion for others.
All Things Eyeron - Sylvia from Homeschooling Through Trials, Triumphs, and Tragedies shares a brief account of some experiences in the life of a younger sibling born into the family of a child with special needs.
From Boredom to Hyper-Focusing- Leann from Montessori Tidbits shares how special needs includes children who are gifted, as they have their own special set of needs that must be addressed on a daily basis.Beating the Loneliness of Special Needs - Kim from Tiaras & Bowties explores the loneliness that can accompany children, especially those with special needs as they journey into young adulthood.  Don’t miss these quick tips to help your child beat those feelings of exclusion and rejection while boosting self-esteem

Is There a Child with Special Needs in the Classroom? – Former teacher and insightful author, Susan Case offers guidance on how to prepare students for a child with special needs in the classroom.

One Thing You Should Know – Kim from The Little Stories writes about a mother of a child with autism shares the one that that all of us need to know – the one thing that will show her we understand her child is important and accepted.

I Call You - Sandy from We Can Do All Things, talks about how having a child with special needs pushes a parent into action.  They quickly become not just a parent, but a therapist, medical researcher, teacher, advocate, and expert in their child’s diagnosis.  They do things they never knew they could do, and be things they never knew they could do.

Fine Motor Leads to Fine Art – Debbie Clement is a children’s musician/song-writer, illustrator, author, and public speaker.  The also spent 10 years as a Resource teacher for young children with special needs.  Her article for the carnival examines Fine Motor Development and shares supportive observations for children with special needs on that
topic.