Tag Archives: kids musical crafts

Best Instruments For Quiet Time With A Child!

playing rainstick in the grassMost people associate making music with expressing yourself, having fun and making noise!  Although its great fun to sing, dance and play an instrument, there are also many world traditions that use music to quiet the soul, to learn to listen and to encourage rest, sleep or meditation.  Quiet time instruments or music are perfect for sharing with your children around naptime, bedtime or for a break during a busy  day.
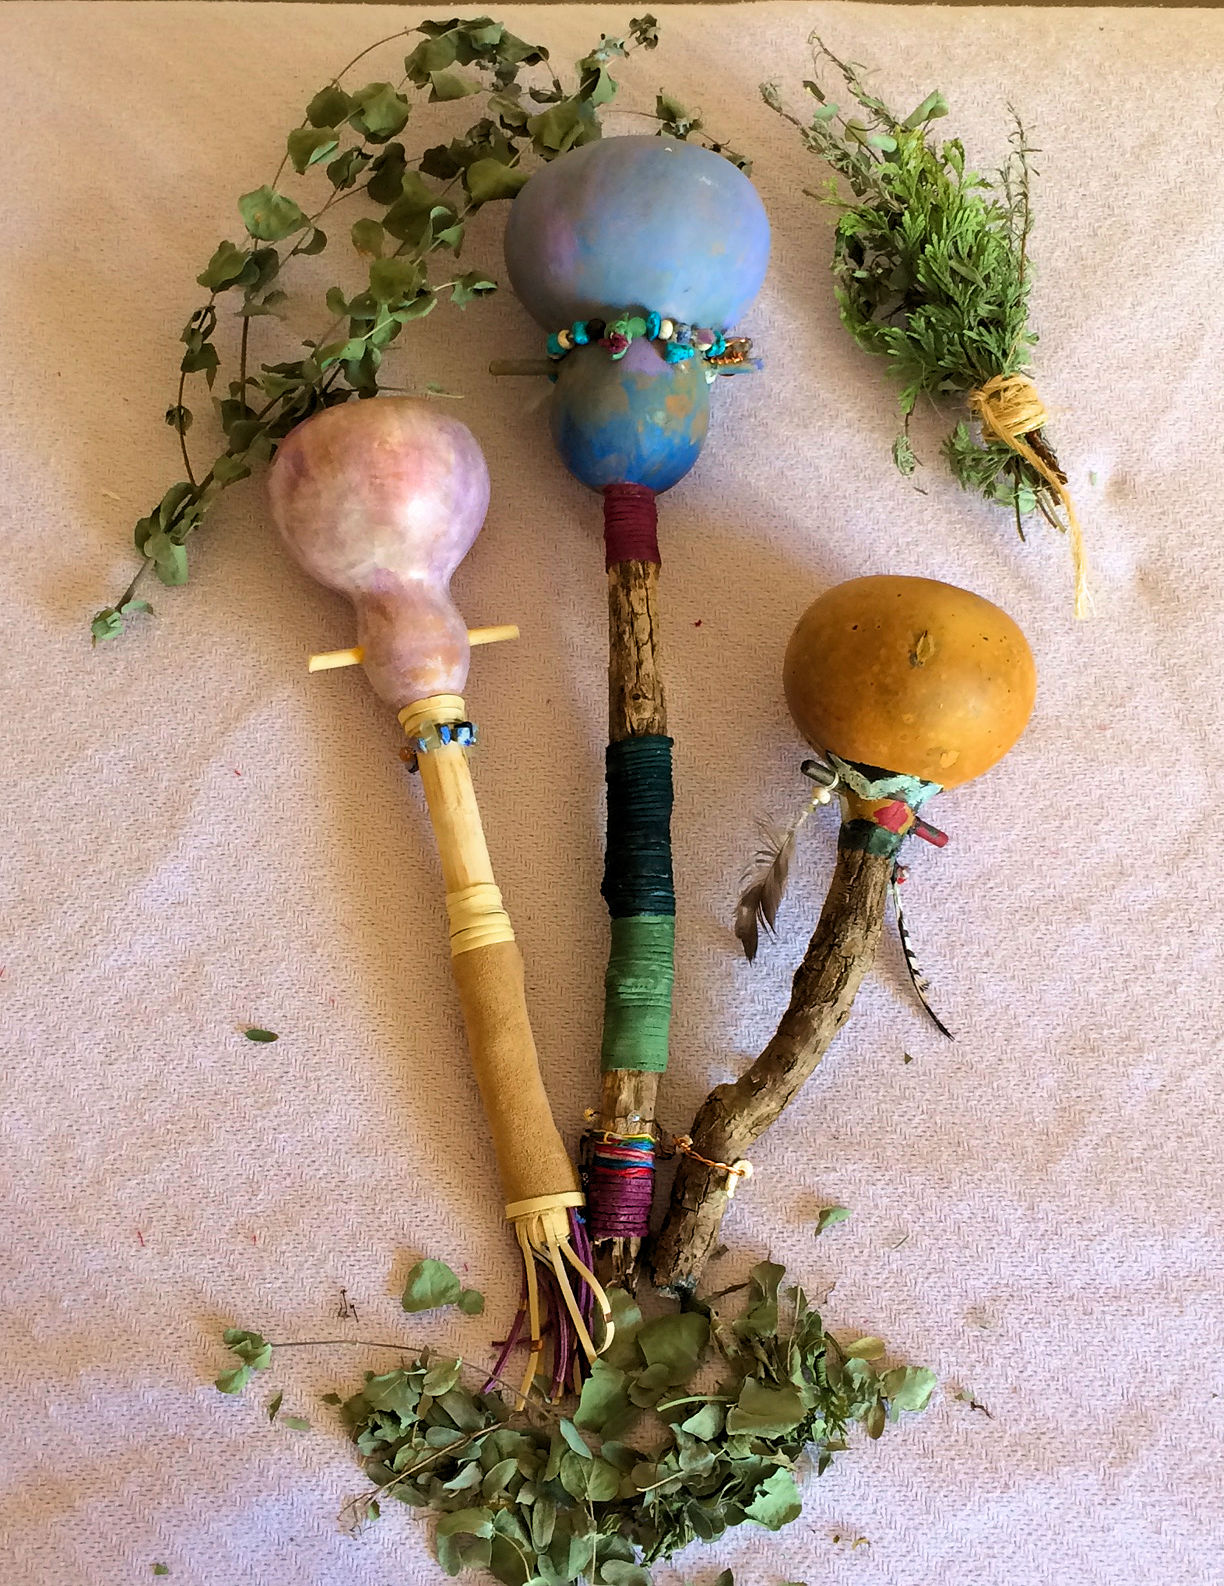
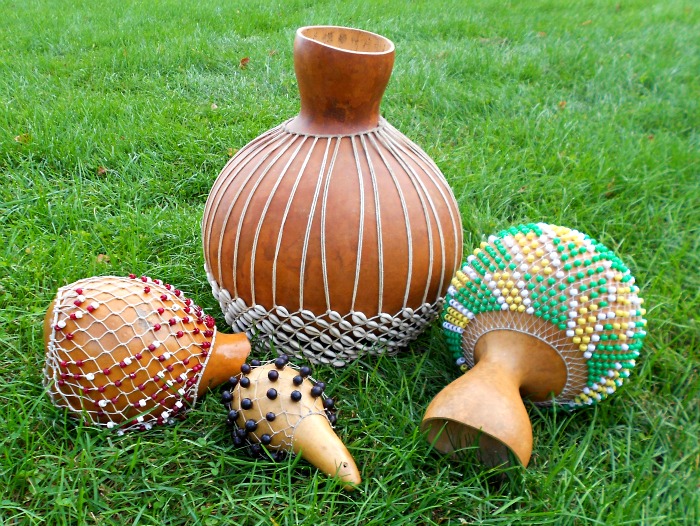
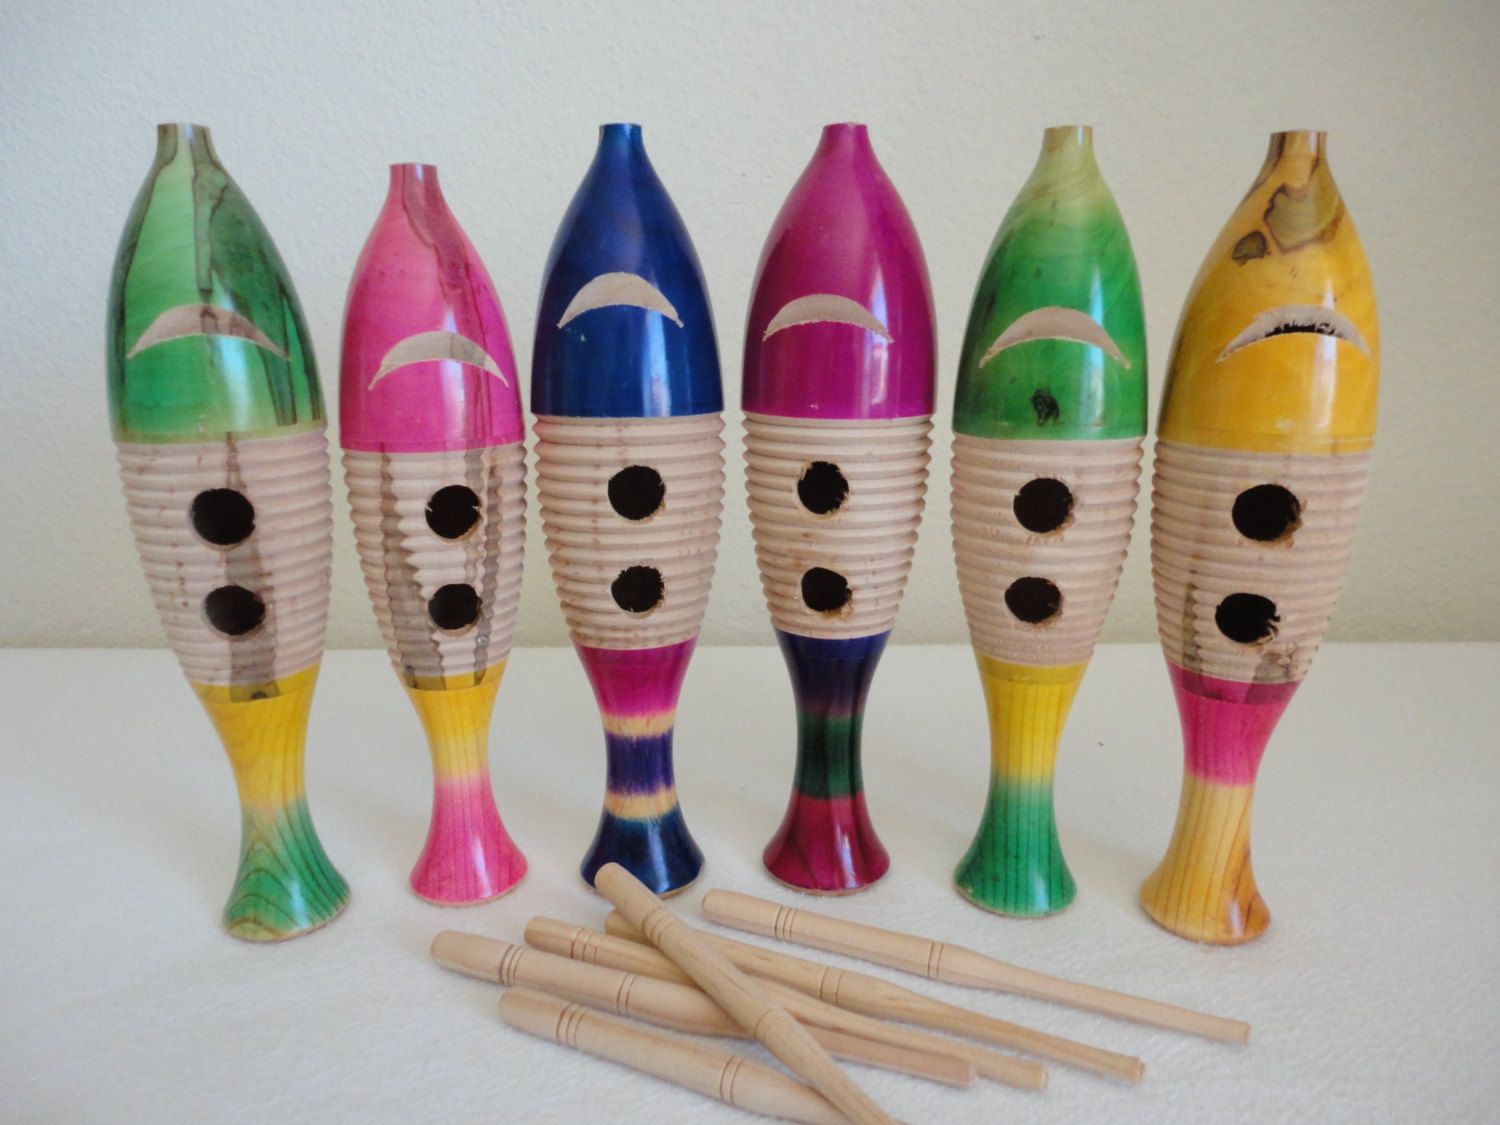
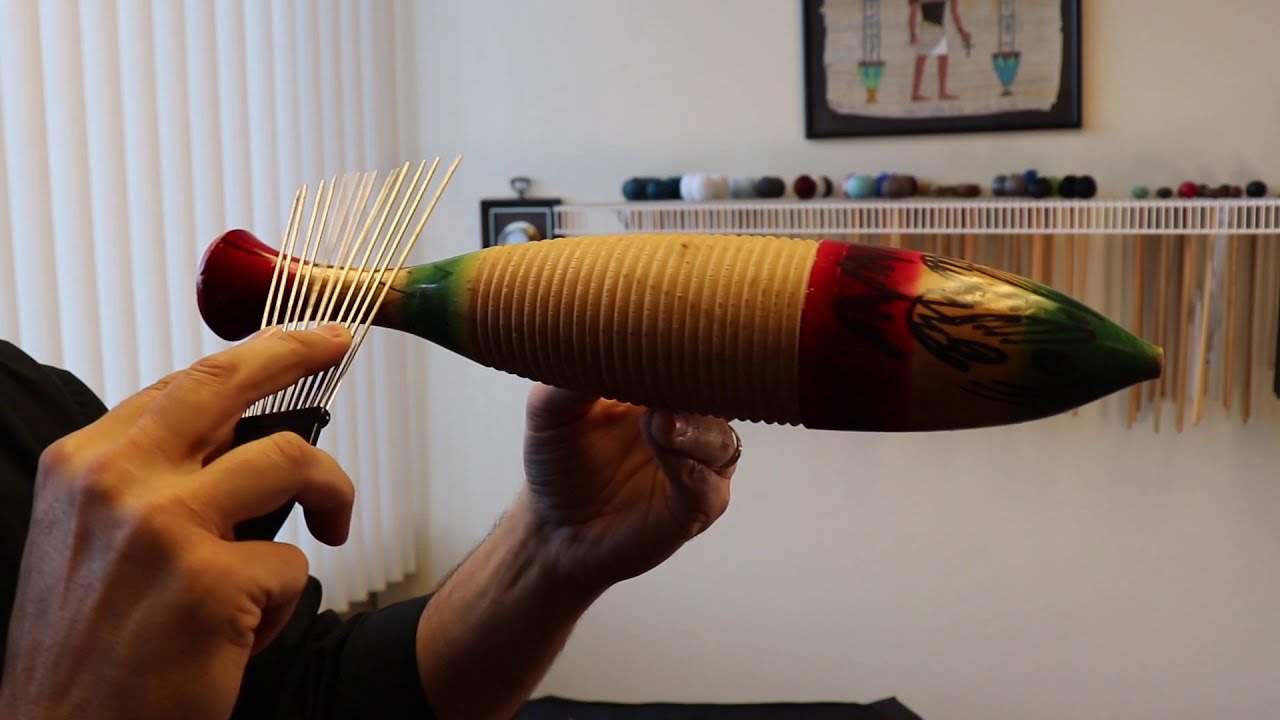
The Rainstick

Originally, rainsticks were made from a special cactus whose long “arms” dried and fell to the ground. They were filled with seeds, beads or pebbles and as these tiny objects fell from one side of the cactus to the other, the sound that emerged was like a gentle rain or a quietly trickling stream. The sound of a rainstick (known in South America as palo de lluvia) is so peaceful and relaxing that it is often heard in meditation tapes or used as part of music therapy.

How do you play a rainstick?  You turn it up-side-down or hold it at an angle so that the contents can flow from one end to the other.  Notice the difference in sound when you hold it vertically or at an angle.  You can also “shimmy” the rainstick gently as it flows or hold it horizontally and shake it like a rattle.

How can you use the rainstick as a quiet time instrument?  “Play” the rainstick along with relaxing music until you feel like resting or try some of these games.

          A class or group of children listen to rainstick while a teacher turns it over.  When the last pebble falls, the first child with their hand up gets to be the new leader or wins that round.

          Try the above game with the children’s eyes closed.

          Try this game with young children at naptime in a preschool setting.  After each child has a chance to play the rainstick, they lie down to rest.  The teacher picks each student by seeing which one is waiting most quietly and giving them the first turns until everyone is ready to rest.

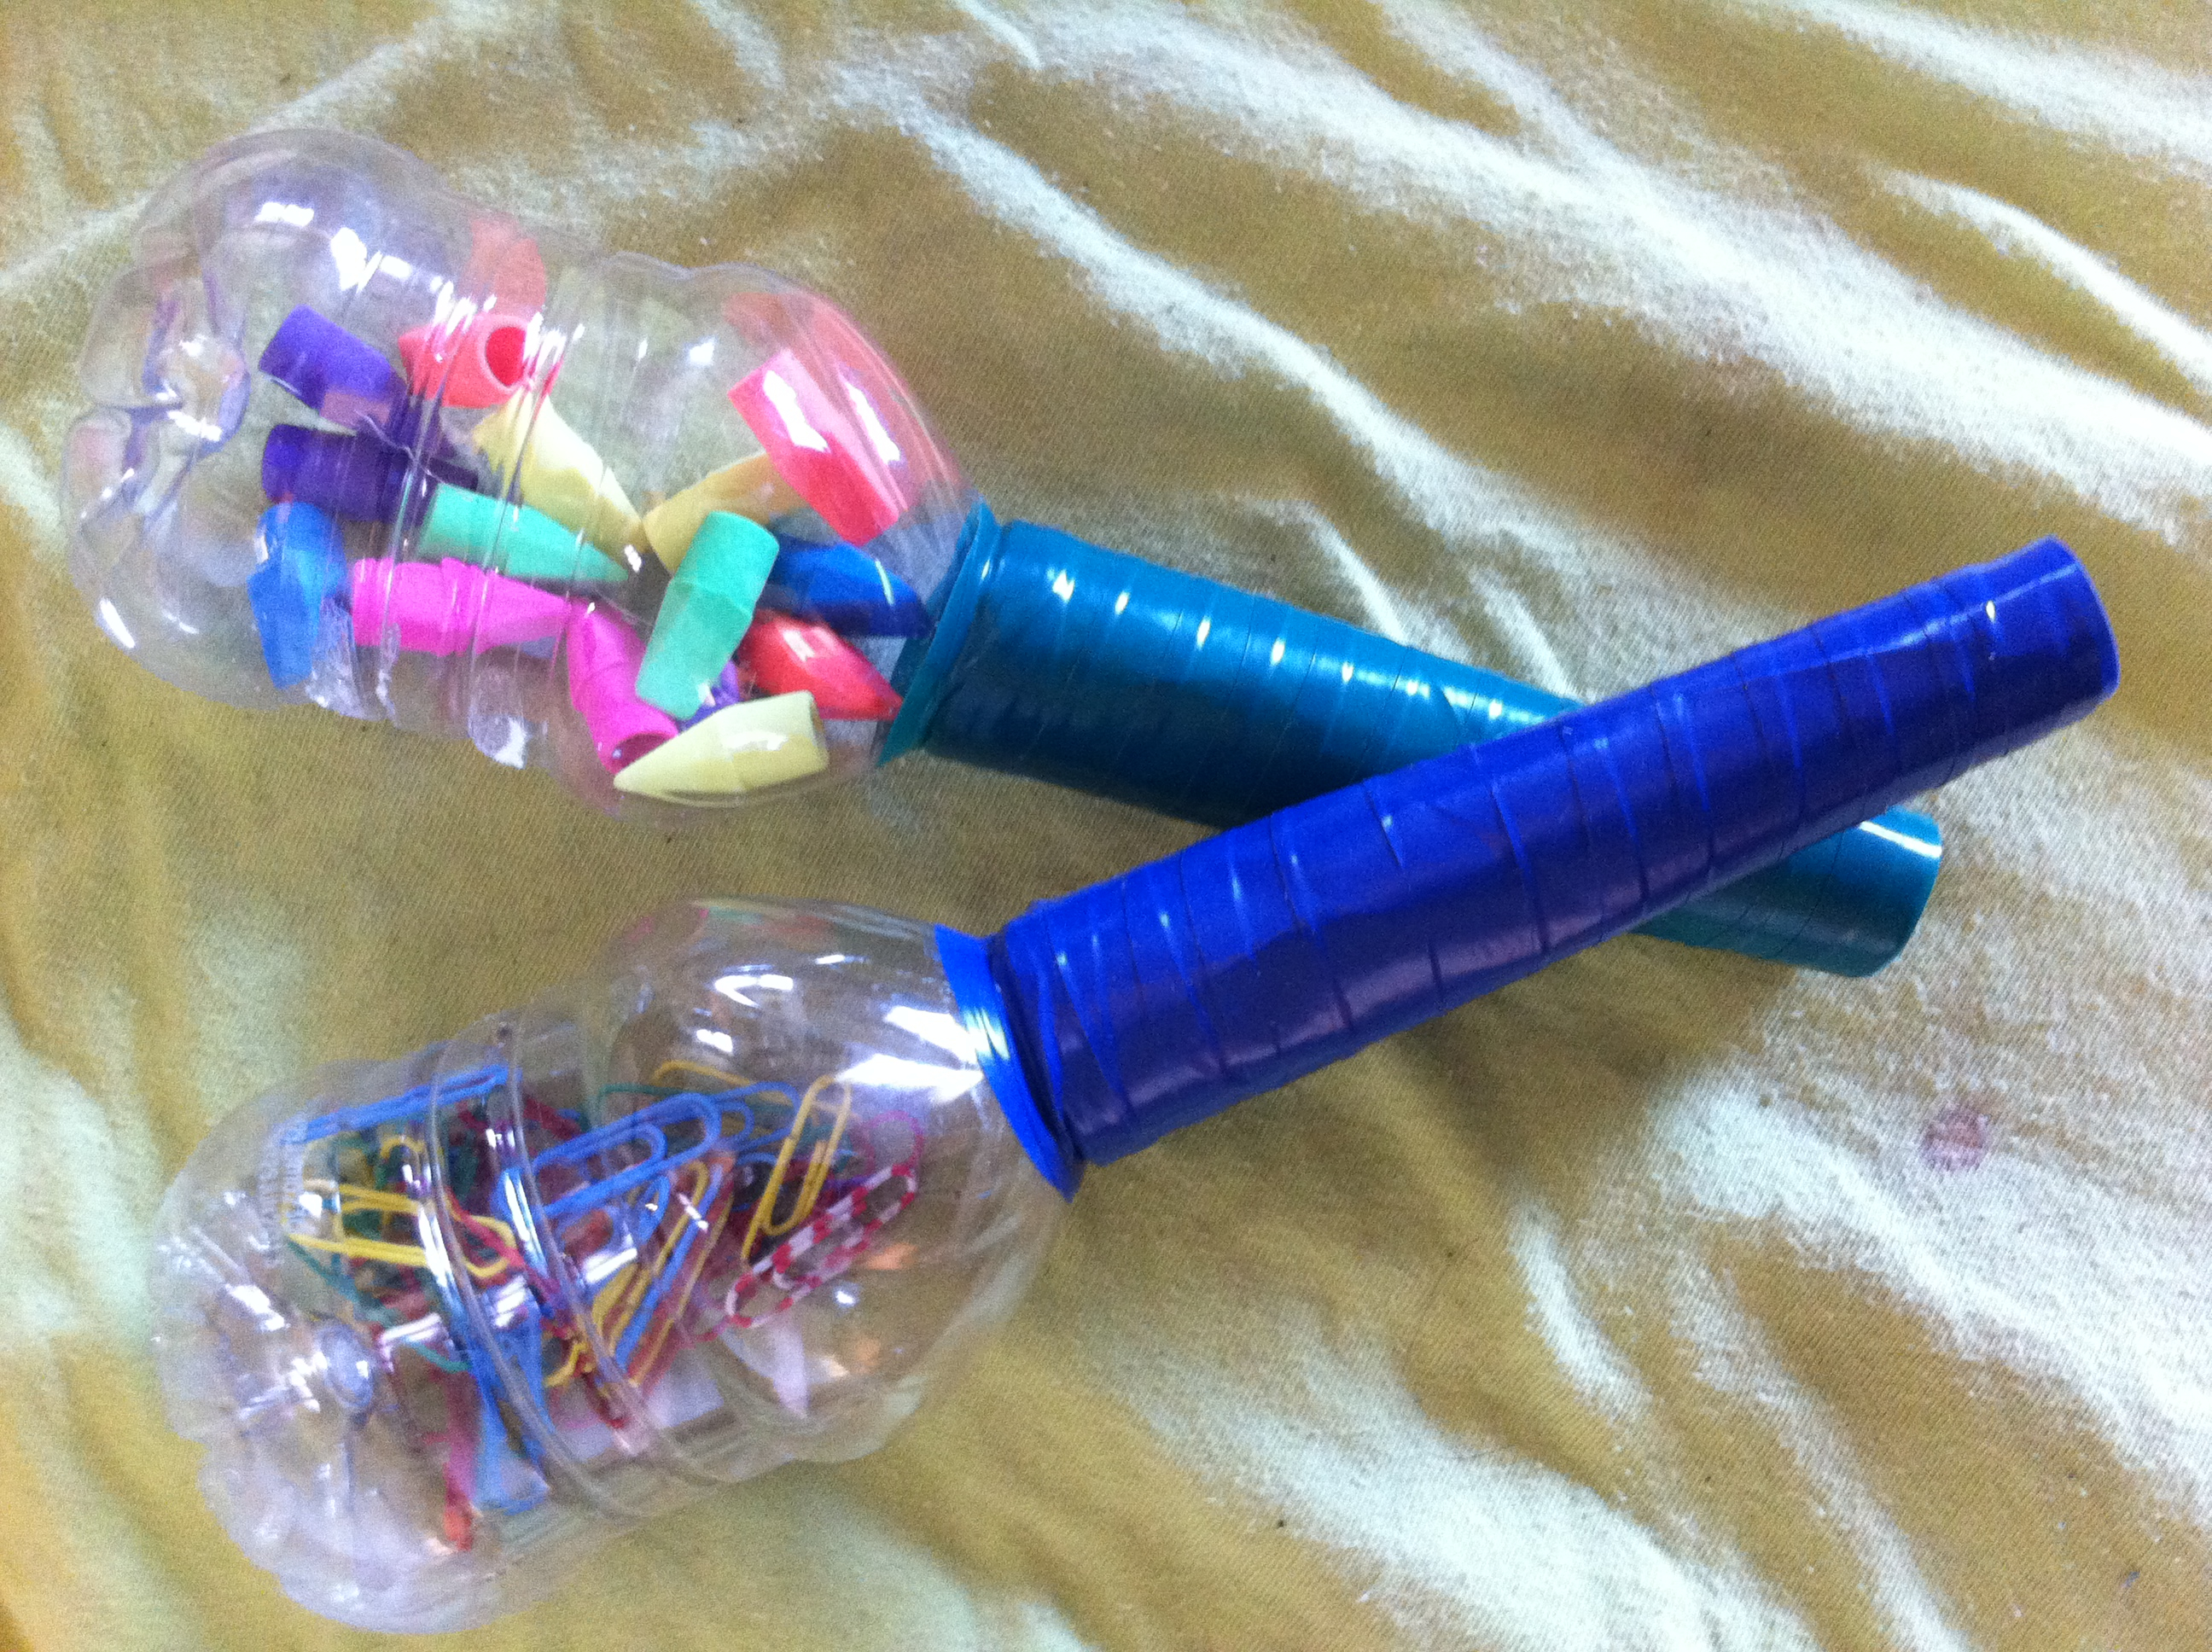
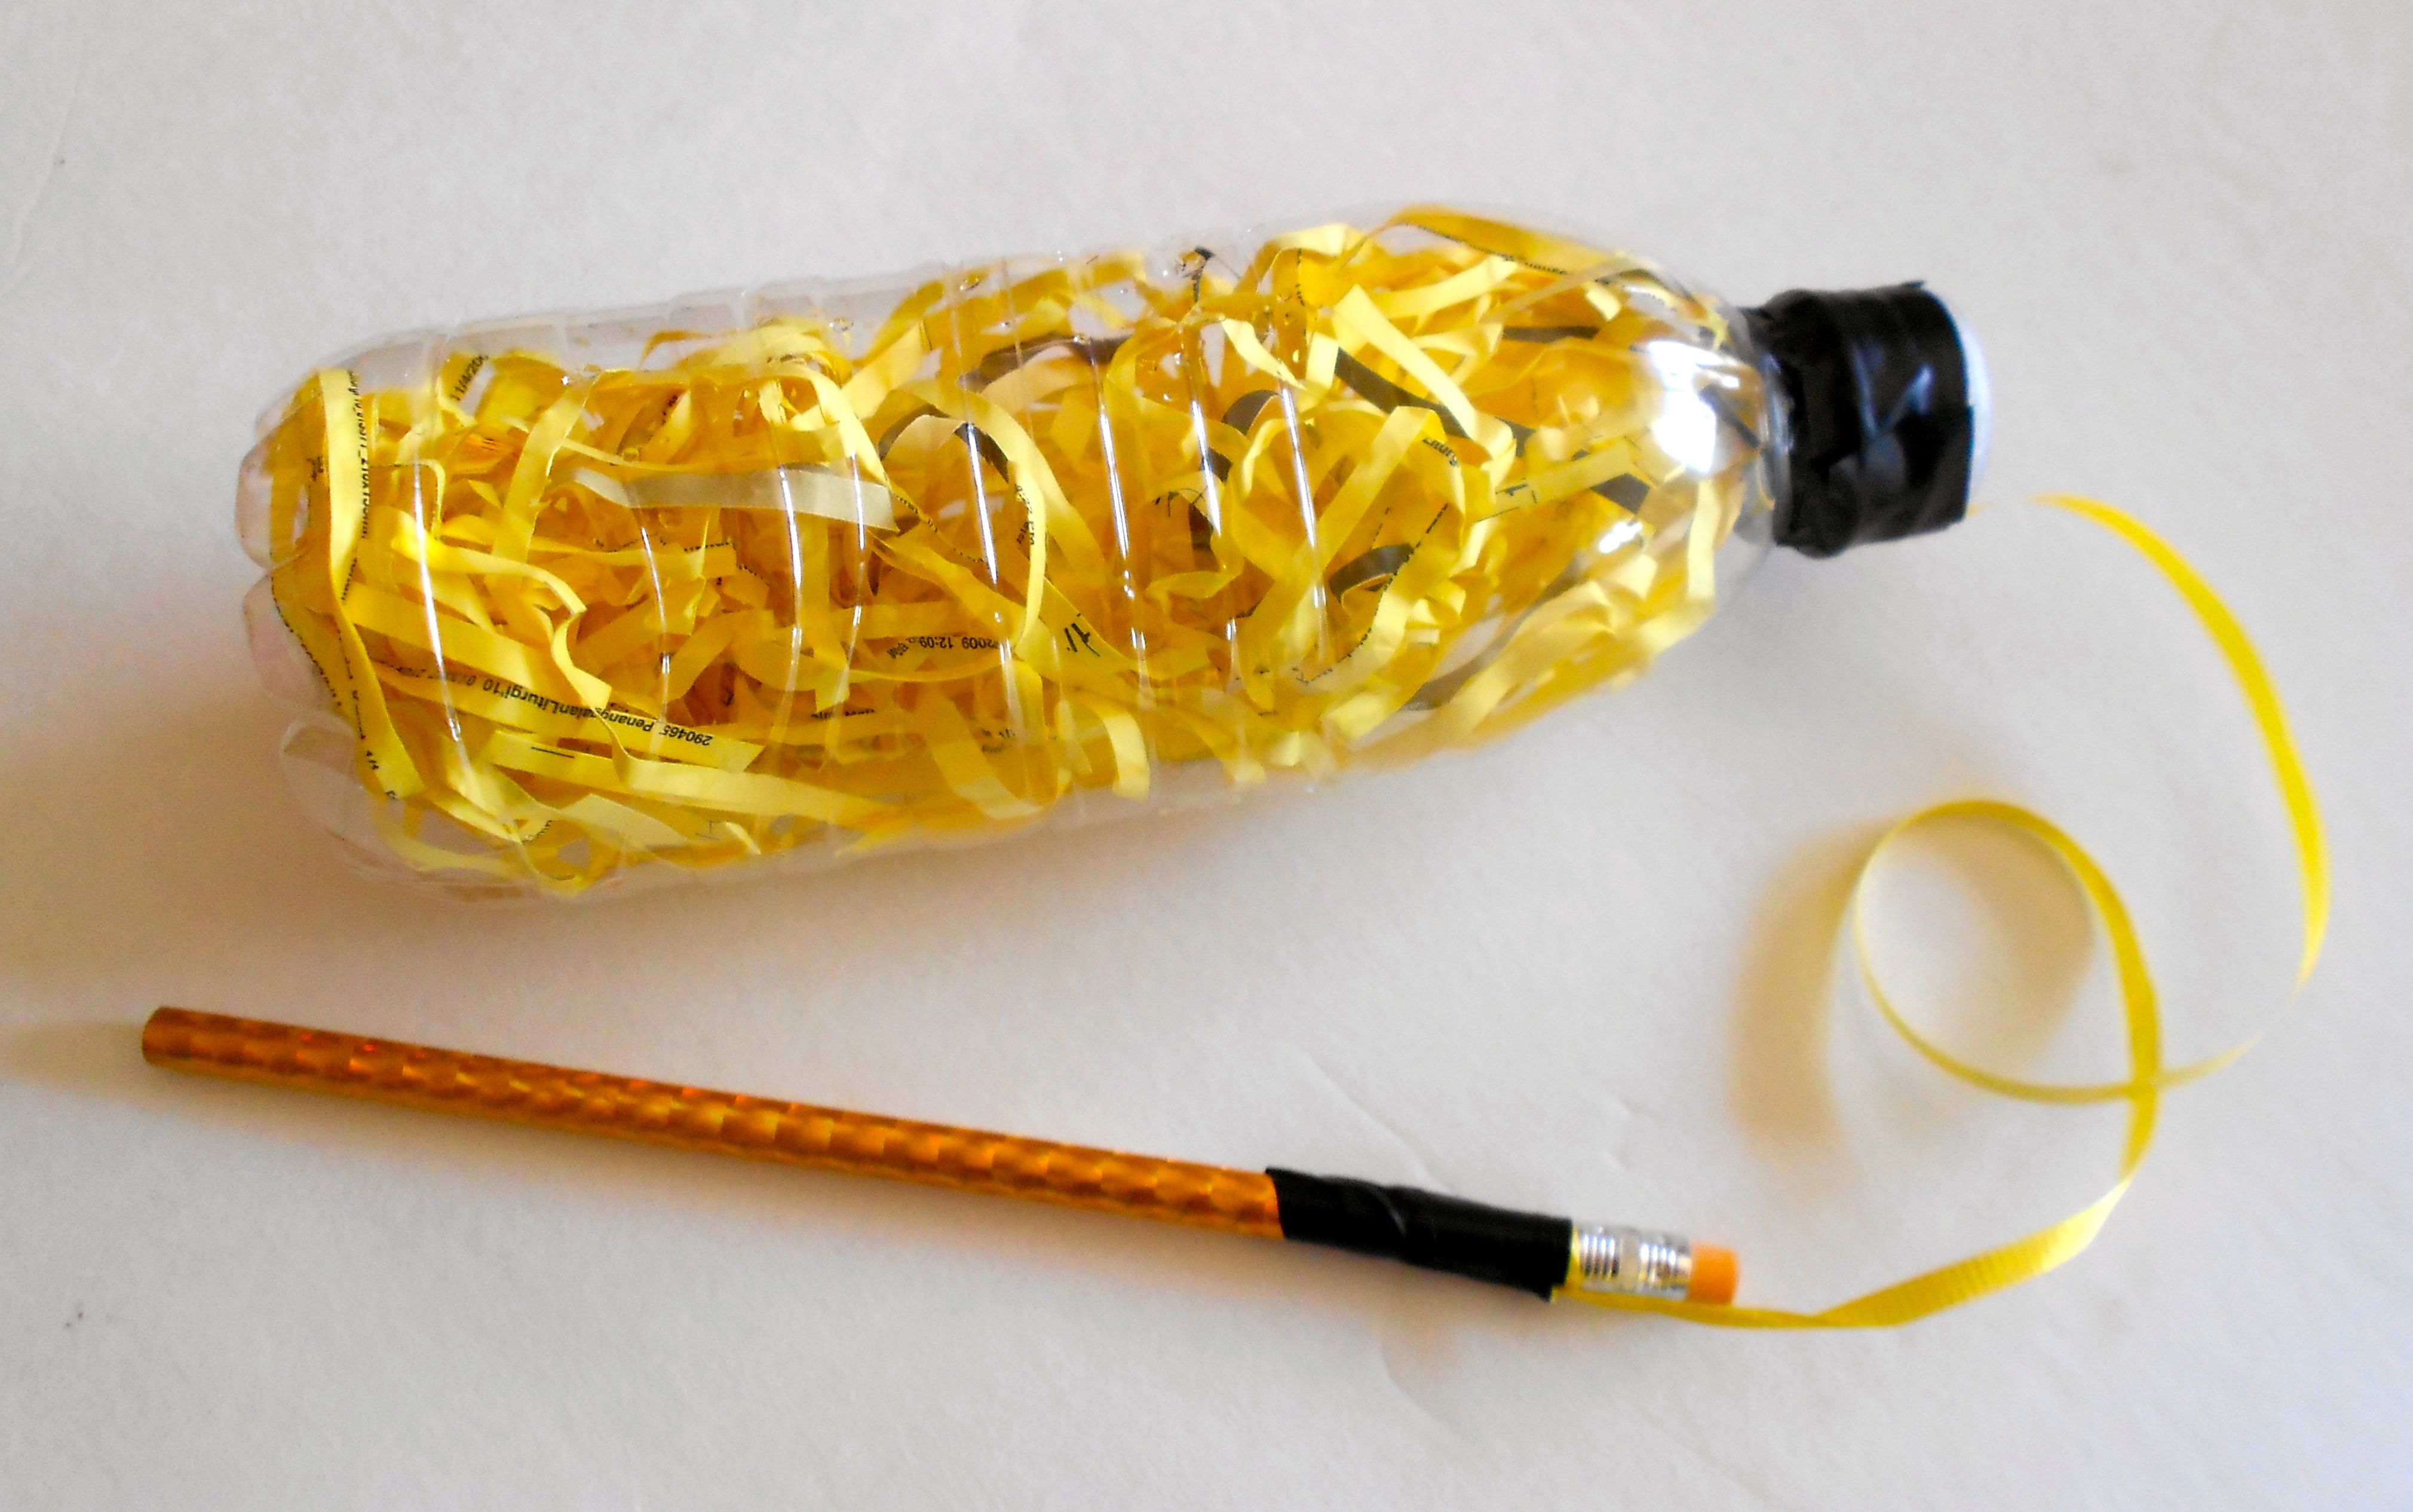
Use your own ideas and make up your own games or rainstick activities.  Don’t have a rainstick?  You can win one from DARIA’s world music for kids website or make your own version from simple, recycled materials, by checking out the links below.
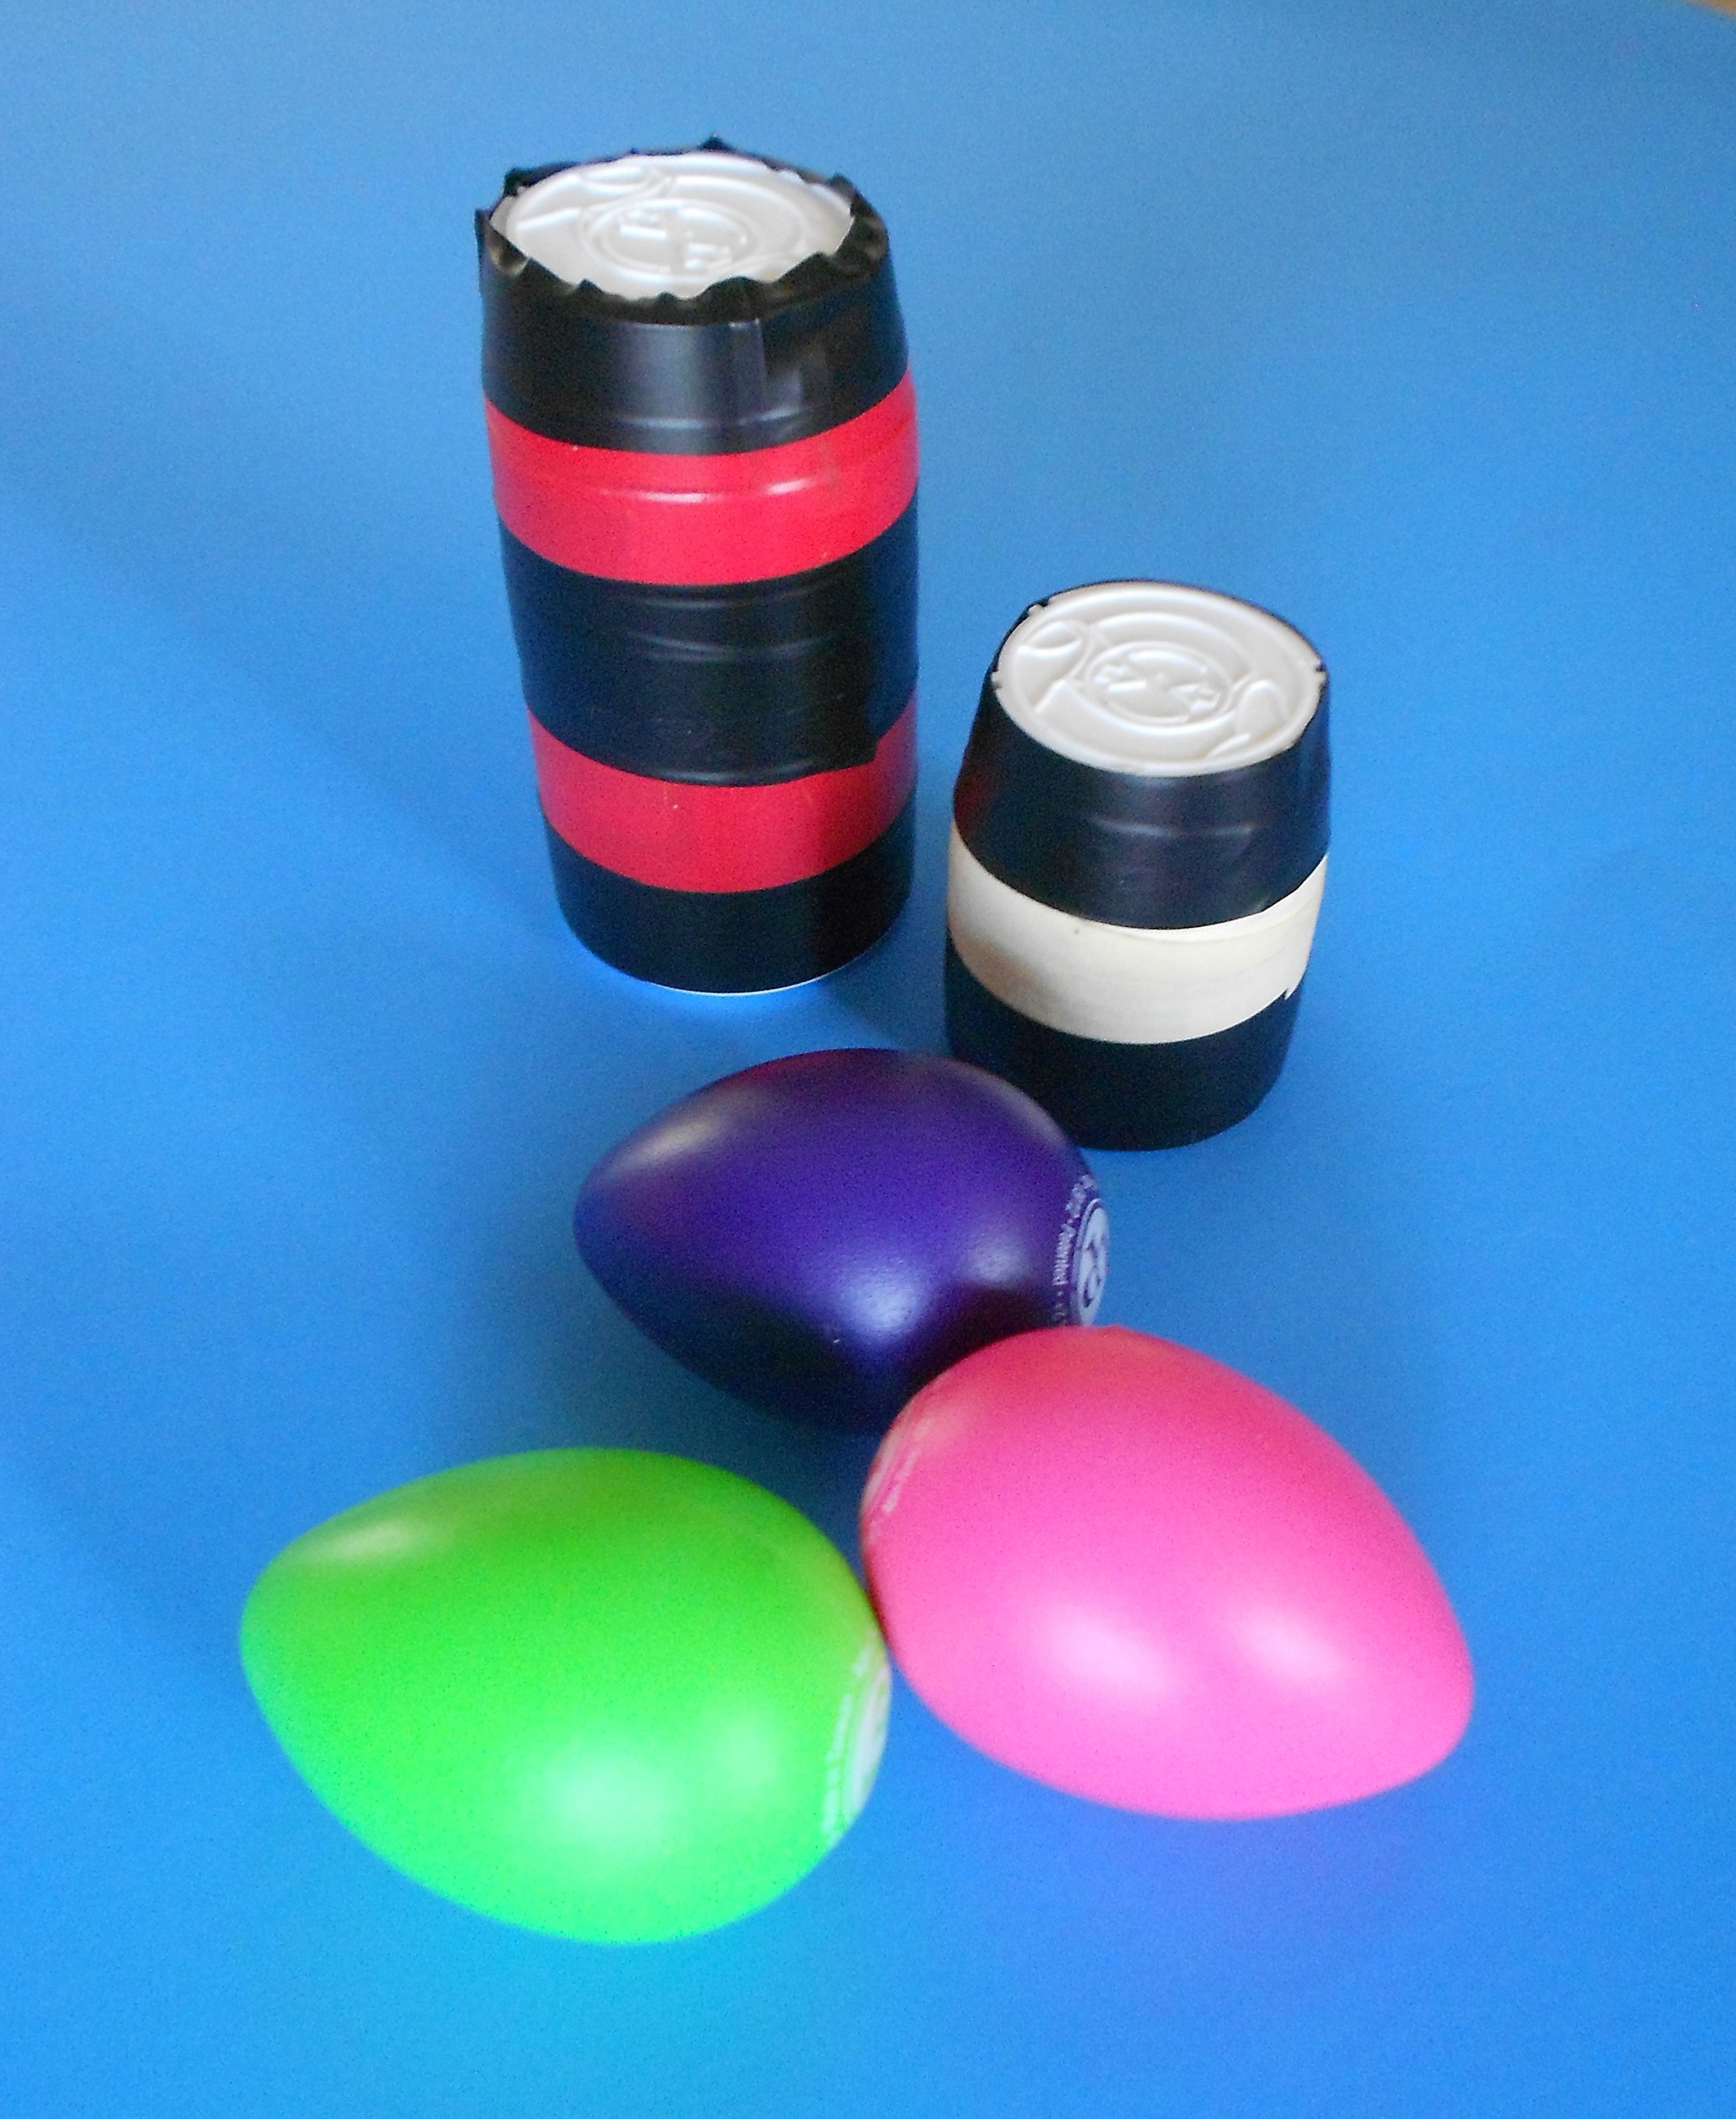
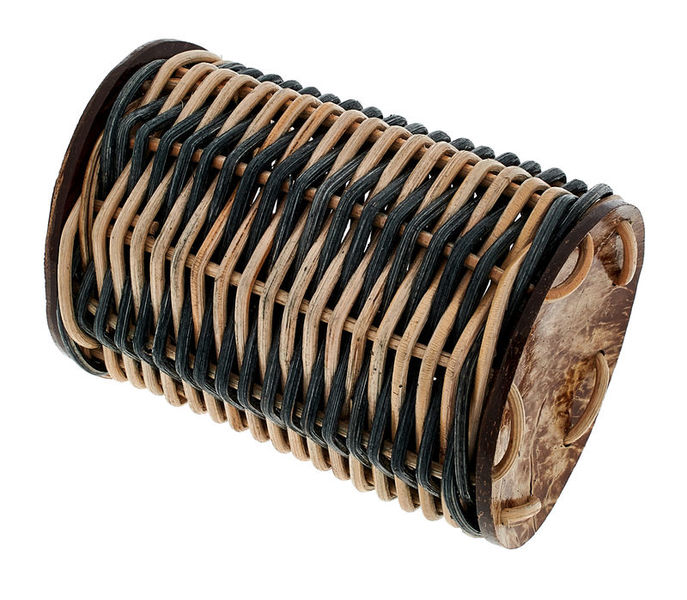
The Ocean Drum

The sound of the surf can be so soothing.  And playing an ocean drum, can help you bring the quiet sound of ocean waves right into your classroom or home, creating a relaxing space to rest or refocus your energies.

What is an ocean drum?  It’s a two-sided drum with clear material stretched over a round frame.  Inside the drum are small round objects such as bee-bees or pebbles.  As the drum is tilted back and forth, the tiny objects move across the head of the drum creating a sound remarkably like ocean waves gently breaking on a beach.

By holding the drum at different angles, the player can control how the waves move – quickly and enthusiastically or softly and quietly.  Along with the repetitive sound, the look of the small objects moving back and forth can create a relaxing experience that is remarkably comforting for any child but one that is especially appreciated by children on the autistic spectrum.

Don’t have an ocean drum?  You can make your own version from a shipping box.  Find the simple instructions at the link below.

bronze singing bowl 2Singing Bowl and Tingsha

In the near future, we’ll do a detailed article on using these additional two instruments for relaxation and quiet time with small children.  In the meantime, you can to find more general information and a “Make Your Own Tingsha” post at the links below.

———

Links:

Make Your Own Rainstick

http://www.dariamusic.com/docs/RAINSTICK%20Instructions.pdf

Make Your Own Ocean Drum

http://www.dariamusic.com/docs/Ocean%20Drum%20Instructions.pdf

The Singing Bowl

http://makingmulticulturalmusic.wordpress.com/2013/02/16/gongs-handbells-and-singing-bowls-three-great-instruments-for-exploring-the-culture-of-china-tibet-nepal-and-asia/

Make Your Own Tinghsa

http://www.dariamusic.com/docs/MakeYourOwnTingsha.pdf

FacebookTwitterGoogle+Share

Make a Roly Poly Musical Thing!

roly poly things (3)There are so many great ways of enjoying musical play with a young child.  It’s a fun learning experience for kids of any age or ability and also a great de-stresser for mom, dad or caregiver.

Here’s a project that’s easy to make and provides an opportunity to take time out of a busy day to play and have fun with a little one that you love.

What’s A Roly Poly Musical Thing?

Anything you want it to be!  Start with any cylindrical container like these and gather a few supplies to decorate and fill them. Here’s a basic supply list.

roly poly suppliesSupplies

 Any recycled container that can roll.

Material to decorate: stickers, markers, colorful tape, etc.

Objects to fill: dried beans, rice, birdseed, jingle bells,

beads, buttons, macaroni, jingle bells, Q-tips, sand, salt, pebbles.

If your object is transparent – You may wish to add decorative objects that won’t change the sound but will add visual interest such as glitter, colorful puffballs or confetti.

Sturdy tape (such as electrical or duct tape) to seal the project.

Make Your Roly Poly Thing!

First clean and dry the container you’ll be using.  Then decide how you’ll decorate. You can do this as a coloring project, add stickers or apply colorful tape.

roly poly thingSince you’ll be playing with this homemade toy by rolling it, remember that it can be fun to create designs that will be interesting when they are rolled back and forth, like changes in color, various stripes, patterns or wiggly lines or different stickers that might appear like different “faces” of the roly poly thing.

If your object is transparent, consider what you might put inside to make interesting patterns when the object is rolled.

Next, add the items that will create sound as your object rolls.  Larger objects like dried pasta or large buttons make louder noises.  Smaller items like sand or seed beads make a quiet “whooshing” sound.

Once you are pleased with the look and sound of your project, you can seal it up.  Use a sturdy tape such as electric or duct tape and you’ll be ready to play.

Time To Play!rolling roly poly

There are lots of fun ways to play with a roly poly thing.  Here are some of our favorite ways:

Roll between two hands on the floor

Roll between two hands on a tabletop or at a desk

Roll back and forth between two players on the floor

Roll back and forth in time to music

roly on the tableRoll back and forth in time to slow quiet music

Roll back and forth in time to fast-paced, up-tempo music

Roll back and forth while singing or counting

Roll back and forth, rolling when music plays, stopping when music stops.

Make up your own games and your own rules.

Be creative and have fun!

————————

Looking for songs to “roll” along to?

Play Along With Any OF DARIA’s Songs on her Youtube Channel

www.youtube.com/user/DariaMusic

Make Your Own Recycled Shaker Eggs

Everyone loves those bright colorful eggs that go chugga-chugga-chugga when you shake them.  They’re a wonderful addition to any classroom or children’s music area.  But, can you whip up your own version at home from recycled or on-hand materials?   Absolutely!

Supplies

Shakee egg suppliesSupplies for this craft are easy.  Any “child-proof” medicine bottle.  A small amount of any type of filling such as dried beans, beads, rice, bird seed, grain (such as quinoa), sand, salt or tiny pasta like pastina.  You’ll also need a sturdy tape – colorful electric tape works wonderfully and doesn’t unravel after hours of play.

What if you don’t use that kind of bottle?  Ask around.  Often friends, colleagues, neighbors or family can save an item like this for you and you can save one more plastic product from making it’s way into the waste stream.

Make Your Own

This craft couldn’t be easier.  Simply fill and seal your bottle.  Before you add the tape, make sure you enjoy the sound. You might be surprised how having less filling in a bottle can create a nicer sound.  Is your rattle loud or soft enough?  If not, adjust what you’ve put inside.

Although I usually recommend that parents or caregivers make crafts with kids, this is one that may be best to make without the children present. Since the project uses aspirin or medicine bottles, it may not be a great idea to give the impression that these bottles; when filled with their original contents, are playthings.

To cover the bottle and turn into a shaker egg, wrap it in tape.  Feel free to be creative with striped patterns using different colored tape, if you like.

hands with shaker eggsShake Your Own

How complex can playing shaker eggs be?  You might be surprised at the many different ways you can play them.

Shake one quietly.
Shake one loudly.
Shake back and forth.
Shake up and down.
Swoosh the contents around inside (in a circular motion).
Shake two different eggs – one in each hand.
Shake two different eggs, alternating back and forth.

You get the idea – right?

Even this simple egg-style shaker can be great at building motor skills, listening skills or as a part of any musical activity.

All Eggs Are Not The Same

If you’ve made several eggs with different fillings, you’ve probably noticed that each sound a bit different.  Larger beads or dried beans will make a louder noise.  Tiny beads, grain or sand will make a very quiet sound. This can be a fun way of learning loud and soft or interacting with your child.  Ask them questions like:  “which egg shall we use for this song?  What sounds best to you?”.

Easiest Instruments For Young Children – Recycled Rattles

Screen shot 2014-07-07 at 1.00.10 PMThere’s a reason you find rattles in almost every culture around the globe.

They are amazingly simple and very powerful at the same time.  A child playing a rattle becomes aware of how his or her movements change the sound they are making.  They realize how the sound they create can “fit” with a beat and most studies of young children show that they are keenly aware of rhythmic patterns.  Making and playing several varieties of homemade rattles can be a great way to explore music and have fun with a young child at the same time.

Recycled Rattles for Home or Classroom Play


Rattles made from gourds, seeds, feathers and a donkey's jawbone

Rattles made from gourds, seeds, feathers and a donkey’s jawbone

Most early rattles were made of materials such as dried gourds, seashells, clay, coconuts, bark and a variety of other natural objects.  In Africa, caxixi rattles are made from woven fiber.  In India, special rattles are made from colorful palm fronds woven together in clever patterns.  On the coast of Peru there’s even a rattle made from the jawbone of a donkey.  In short, people make instruments from materials that they have found available near their home.  We are going to take that same approach to creating recycled rattles!

Clean and dry a variety of small plastic containers (water bottles, juice containers, etc.) and assemble some objects that can serve as the contents of the rattles. Here’s a list of common materials that work well and the type of sound they create:

NORWESCAP the tableQuiet rattles: sand, salt, sugar, confetti, cotton balls, craft puff balls, paper bits, Q-tips, tiny pasta (such as pastina or acine de pepe).

Medium Rattles:  paper clips, small pebbles, birdseed, small beads, small dried beans, rice, smaller buttons.

Loud Rattles:  dried macaroni/pasta, large pebbles, large beads, coins, large dried beans, larger buttons.

The Inside of the Rattle

Choose the objects you’d like to add to the rattle to create the sound and also consider including some decorative elements.  Since plastic containers are transparent, you can easily add confetti, glitter, colorful ribbon, pipe-cleaners or similar items. They won’t alter the sound but they will add color, beauty and interest when the rattle is being played.

alphabet shekere 2The Outside of the Rattle

If you like, you can decorate the outside of the rattle with stickers, markers or add a handle made from pipe-cleaner, yarn or ribbon.  Feel free to get creative.  When you’re done, it’s time to seal it with some sturdy tape, such as electrical tape.  This helps keep the contents inside and generally makes it more child-safe around young music-makers.

Now you’re ready to have fun with your rattle!

Time To Play!

Peru_Preschool_ShakureShake along while you sing one of your favorite songs. Try playing slowly and shaking your rattle to the beat.  Then speed up the song. Can you keep up and keep in time?  Play along with recorded music.  Listen to different types of music and see how your rattle fits in with the music being played.

An Easy Rattle Game For Young Children

If everyone in a class or a small group has made a rattle, you try this easy game.

Ask the children to play a certain way until the music stops.  For instance, the teacher can say: “Shake your rattle softly until the music stops”.  The teacher stops the recorded music (like in a game of musical chairs) at an unexpected place and sees if all the students were able to stop at the same time.  Next, change the directions to other simple ways to play, such as:

Shake your rattle back and forth until the music stops.
Shake your rattle up and down until the music stops.
Shake your rattle round and round until the music stops.
Shake your rattle very softly until the music stops.
Shake your rattle loudly until the music stops.
Shake your rattle down low until the music stops.
Shake your rattle up high until the music stops.
Shake your rattle quickly until the music stops.
Shake your rattle slowly until the music stops.

Aside from this one game, there are lots of other ways you can make music and have fun with a rattle while you are learning, playing and recycling – all at the same time!

Here Are Some Variations On Rattle Crafts:

Monster Rattles – From Egg Cartons
https://www.teacherspayteachers.com/Product/HALLOWEEN-MUSICAL-RATTLE-BASED-ON-PERUVIAN-QUIJADA-1146672

Make Your Own African Coffee Can Drum – https://www.teacherspayteachers.com/Product/Make-Your-Own-African-Drum-Craft-3507618

chapchas (3) on red backgroundMake Your Own Maracas – https://www.teacherspayteachers.com/Product/Latin-American-Intruments-Make-Your-Own-Maracas-142802

MYO Chapchas- Goat Toe-Nail Rattlers from South America – https://www.teacherspayteachers.com/Product/Chapchas-A-Unique-Rattle-From-Latin-America-1426778

Easiest Instruments For Young Children – The Guiro!

The guiro is a perfect “first instrument” to share with young children.  It’s incredibly simple and versatile at the same time.  In a matter of minutes, a child can be exploring the sounds created by the guiro and making rhythms by rubbing the rasp back and forth or up and down along the surface of the guiro.

What Is A Guiro?

Although you can find similar instruments all over the world, a guiro is an instrument with Latin American roots that was originally made from wood, bone or gourds carved to have a ridged surface.  In the picture above you can see a bone guiro from Mexico, a wooden version and a homemade guiro made from a recycled plastic water bottle.  Some modern guiros are made of plastic or metal as well.

homemade guiro and 6 raspsPlay A Guiro With A Rasp

To play a guiro you rub an object across the ridges on the surface of your instrument.  Older guiros often have sharp metal rasps so it can be useful to substitute more child-safe choices.  Here are some fun ways to create sound on a guiro.  They include hair picks, plastic spoons/forks/sporks, chopsticks, an egg whisk or an unsharpened pencil.  Each will create a slightly different sound when used to play the guiro.

Make A Simple Guiro

Since it’s unlikely that you have the perfect dried gourd or an old bone lying around your house, start this musical craft in your recycling bin.  Sort through the plastic bottles to see if you have one that has ridges and is sturdy enough to use in this project.

Although your plastic bottle guiro is ready to play “as is”, you can also add some decoration inside the bottle and seal it up before you begin to play. You can look for things like confetti or colorful paper shreds.  Or you can choose to add objects that will make the bottle work as a rattle as well.  To make a guiro that doubles as a rattle, add a small amount of any on-hand material such as bird seed, beads, pebbles or dried beans, rice or pasta.

paper shred guiroIf you’ve add anything to the inside, it’s a good idea to seal the bottle with a strong tape; such as electrical tape, so the contents will stay inside and keep the bottle from being opened when played.  You might even want to attach your rasp to the guiro with some colorful ribbon or yarn as in the example here

Play Your Guiro!

You’ve probably already figured this out!  The guiro is played by scraping back and forth or up and down along the ridges.  You can put on some of your favorite music and let your child experiment with what sounds good to them.  Or you can learn some basic rhythms together with your child.  Here are some fun ways to begin.

Try playing along with a whole song by just scraping down or by just scraping up.

Try playing along with a song by scraping: down/up, down/up, down/up.

Try playing along with a song by scraping:

down/up – down/up/down…, down/up – down/up/down…

Discover the patterns that sound good to your ear or write a new song to go along with a rhythm you’ve just discovered.  If you start with this simple and clever little instrument, there’s no telling how much creative musical fun you can have!

Related Links:

See, Hear and Color A Guiro Here:

http://www.dariamusic.com/guiro.php

Play Along With A Bilingual Version of La Cucaracha here:


Make Your Own Simple Panpipes!

zampoñasHave you ever blown over the top of a bottle to create a wonderful whooshing musical note?

If you have, you’ve just learned the technique for playing the panpipes or the pan flute.

Although you can find this type of instrument in many countries around the world, it is most often associated with the music from the Andes mountains of South America.  The wonderful, breathy notes of the panpipes – known as zampoñas – play some of the most beautiful melodies of songs from that region.

zamponas front and backReal panpipes are made from hollow reeds that are similar to bamboo.  These long, straight reeds grow near the lakes in the mountains and are harvested and cut into individual lengths.  Single reeds turn into simple flutes called quenas.  Multiple reeds are bound together in different lengths to create the type of panpipes seen at the top of this page.

Can you create your own version of panpipes at home?  Definitely.  Here are the supplies you need:

Supplies

Straws – find the largest ones you can!

Small piece of sturdy cardboard

Transparent tape

Scissors

A small length of ribbon for decoration (optional)

This is a wonderfully easy craft!

Cut a length of sturdy cardboard. A six to eight inch piece works well for a basic set of panpipes.  Next, cut different lengths of straws and attach them to the cardboard with transparent tape from longest to shortest.  Make sure you leave about one inch between the straws as it allows a child’s mouth to blow on each straw individually to get a good-sounding note.

josef playing straw zamponasTest out your panpipes by blowing over them to see if you like the series of notes you’ve created.  It can be helpful to have enough materials to try this craft several times in order to create a set of panpipes that sound great and are the perfect size for your child.

Last, you can add a bit of decoration, if you want.  Cover the outer cardboard area with a bit of cloth or ribbon to give it a more festive look and tape it into place.

Here’s a quick suggestion about playing the panpipes.  It can be tricky for most kids and adults to get the hang of blowing over the tops of the straws.  Almost everyone wants to blow down into the straws.  Remember that you can create the best notes by blowing over the tops of the straws at a ninety degree angle.  You can also think of it as imitating the way the wind might rush across the tops of these reeds as they are found in nature.

Experiment with your panpipes and enjoy!

Links And Resources

Free Zampoñas Coloring Page - https://www.teacherspayteachers.com/Product/Color-the-Zamponas-Panpipes-From-The-Andes-650601

You can hear several different types of panpipes on DARIA’s new cd – Cancioncitas De Los Andes/Little Songs of the Andes.

CancioncitasCover-V4On Itunes:  https://itunes.apple.com/us/album/cancioncitas-los-andes-little/id602798167

On Amazon Mp3

http://amzn.com/B00BG9ABEE

Make Your Own Woven Caxixi Rattle

caxixis 4 lying downMaking and playing simple instruments from around the world can be a great way to spend time with your young child.  It offers a chance to get creative, explore art, celebrate diversity and make music all at the same time.  Here’s a perfect example of a fun instrument that you can make to explore world cultures and add to your music basket – a woven caxixi rattle.

Caxixi (pronounced ka-shee-shee) rattles are beautifully woven, small, hand percussion instruments that can be found in Africa as well as in South America.  The rattle has a flat bottom piece that can be made from a gourd or from plastic or metal.  The rest of the rattle is the woven “basket” that holds the small items that create the sound.  The basket part can be woven with beautiful patterns of colored fiber and some caxixi’s consist of two baskets attached to one handle.  Although this instrument may look quite simple, the caxixi can make a wide variety of sounds.  You can shake the contents against the softer side of the woven rattle for one sound or against the harder bottom part for another tone.

How are caxixi rattles played in traditional cultures?  In West Africa, they are often played by the singers who are accompanied by drummers.  In this setting, the rattle is believed to bring call good spirits and drive away bad ones. In Brazil, the caxixi is often seen creating the percussion sound for a really unique instrument called a birembau.

2 recycled caxixi rattlesMake Your Woven Rattle

Here’s a list of supplies that you can use for this simple and fun project:

Supplies:

Small milk carton or plastic container

Construction paper

Pipe cleaners or yarn

scotch tape

Any small material for filling the rattle such as bird seed, tiny pasta, pebbles, dried beans or beads

Directions:

Clean and dry a used milk carton or a round plastic bottle.

Cut a rectangle of recycled paper to fit over the main area of the container  – the square part of the milk carton or the lower part of the plastic bottle.

Cut “weaving strips” that are exactly as long as the wide side of the rectangle.  Make them as wide as you like.  Larger strips are easier for smaller hands to weave.

Cut the main rectangle vertically, leaving the space of about one weaving strip in the bottom.

weaving a caxixi rattleWeave the rectangle with any color combination you like and then fit it onto your container and tape it into place.

Next, braid or twist several pipecleaners together to form the handle.

Before you assemble the final rattle, add the materials that will create the sound.  Add any small fillings to the rattle and see if you like what you hear.  Smaller, lighter items make softer sounds.  Larger, harder objects like dried beans and buttons make a louder and harsher sound.  When you find the perfect mix, put on the lid.

homemade caxixi rattleFor the milk carton caxixi – poke two small holes in the carton on the top and thread pipeclearners through them for a handle.

For the plastic bottle caxixi – seal the bottle with sturdy tape and wind extra tape around the handle to hold it in place.

Play along with your favorite music and have fun!

————————

For more multicultural musical fun, check out these related resources:

DARIA’s Musical Craft Activites and Coloring pages:

http://www.dariamusic.com/crafts.php

Musical cd’s by DARIA featuring songs in 8 different languages: 

http://www.dariamusic.com/CDs.php

Daria’s monthly song page with free songs, contests, give-aways and lots of resources for parents and teachers: 

http://www.dariamusic.com/monthly_song.php

Creciendo Con Música – A Spanish Language Kids Music Blog

http://creciendoconmusicblog.wordpress.com


Easy and Fun…Button Castanets!

Have you ever seen Spanish castanets?  Traditional ones are beautifully crafted or carved from wood and often painted with themes like the Spanish countryside or elegant dancers. Playing the castanets is a fun way of allowing a child to develop a sense of rhythm, fine motor skills and also a great way to explore the music and culture of Spain.

Many historians think that castanets – or castañuelas in Spanish – were originally made from the shells of walnuts or chestnuts. Since creating “walnut shell” castanets might be complicated and require tools such as drills, we wanted to share a simpler version of homemade castanets that can be made from sturdy paper, buttons and glue.

Start by cutting rectangles of the sturdy paper about 4 – 6 inches long and about ½ to 1 inch wide. Fold the paper in half so that it leaves a crease in the middle.

Next, choose a pair of buttons and glue one on each end. After the button castanet is dry, pick it up and play by clicking the buttons together. Make several pairs with different kinds of buttons and notice how the sound is unique with each one. (One safety note: If you are working with small children or have younger children nearby, be cautious about the buttons as potential choking hazards if swallowed.)

Playing Button Castanets

This craft is so easy that even an adult can do it! Feel free to learn and play along with your child. Simply put the button castanets between your thumb and first finger and click away. Play fast, slow, or tap back and forth between the left hand and right hand. Click or clack along to a favorite song or rhyme or put on a recording of music that you love. See if you can match the beat you hear or create a new one that works with the song.

Intrigued by castanets and what you can do with them? Here’s an article that tells you more about their background and shares one woman’s amazing talent in playing this type of hand percussion.

What Are Castanets or Castañuelas

http://makingmulticulturalmusic.wordpress.com/2012/05/14/what-are-castanets-or-castanuelas/

Supplies For This Project:

A small amount of sturdy paper (such as a recycled manila folder or poster board)

Pairs of buttons

Glue or glue gun

An Easy Musical Craft For Young Children – Back To School Maracas!

maracas-back-to-schoolDo you have a young child going to school for the first time?  Or maybe a little one staying home while an older sibling returns to their Fall schedule?  Here’s a fun craft that gives you some time together with your child while preparing for a new routine at home.  And you get to make use of recyclables from around the house as well as extra supplies – like paper clips or colorful erasers – left over from back-to-school preparation.

Start with two clean 8 oz (smaller) water bottles.  If you don’t use plastic water bottles – ask around.  You may have friends or neighbors who can collect a few for you!  Fill each one with small items such as the colorful paper clips and erasers seen above.  Each one will sound a bit different when they are shaken because you’ve chosen two different fillings.  If you don’t have these items on hand, you can use dried beans, rice, pebbles, buttons, beads, sand, salt or small pasta.  Feel free to get creative with what you add!

homemade-maracas-adding-tapeOnce you’ve chosen your fillings, put the cap on each water bottle.  To create the handle, take two toilet paper rolls and make a straight cut down each one with scissors.  Twist the roll until it fits onto the cap side of the water bottle and begin wrapping it with electrical tape.  Start by wrapping the bottle to the paper handle with the tape and proceed down the handle.  This creates a sturdy way to hold onto your maracas as they are being played.  Then you’re ready to shake, rattle and roll!

Maracas are one of the simplest instruments to play for young children or the beginning musician.  Put one in each hand and rock out!  You can let your kids experiment with shaking them in different ways or encourage them to move and dance while playing them.  You can make a pair for yourself and create rhythms together.  Since each maraca (and each hand) will sound slightly different, create rhythm patterns by shaking the different hands or calling out patterns by what’s inside each instrument.  You can play patterns such as:  “right hand, left hand, right hand, left hand” or get creative with something like:  “Rice, beans, rice, rice, beans” or “buttons, buttons, beads, buttons, beads!”.  There are no wrong ways to create these patterns.  Play with your new maracas and see what sounds best to you.  Or put on a favorite cd and find patterns that fit with the music you enjoy.

Supplies

Two small plastic water bottles ( 8 oz.)

Two toilet paper rolls

Electrical tape

Two different maraca fillings such as paper clips, beads, seeds, erasers, rice, beans or pebbles.

Want to play your new maracas along with a  song from Latin America?  Check out DARIA’s bilingual version of La Cucaracha – a silly folksong from Mexico about a cockroach.  In this version, the cockroach plays a guiro and maracas!