Tag Archives: Easy Instruments kids

Make Your Own Bolang Gu – Chinese Pellet Drum!

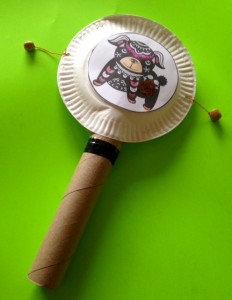
doggy bolang gu

The Chinese Lunar New Year is quickly approaching!   Here’s a fun musical craft for one of the most popular noise-makers played by children at this time of year.

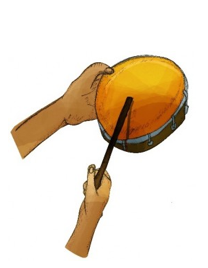
The Bolang Gu (波浪鼓;pinyin: bo lang gu) is a simple instrument also called a monkey drum, a pellet drum or a rattle drum.  It’s  a two-sided drum with small beads or pellets attached to it’s sides. When the drum is played the pellets bounce off both sides and create a really unique sound.  Although these clever little instruments are often used by street vendors and seen as children’s toys, they also date back to ceremonies held in the Song Dynasty of China and are part of religious rituals in Tibet, Mongolia, India, and Taiwan.

Make Your Own Bolang Gu
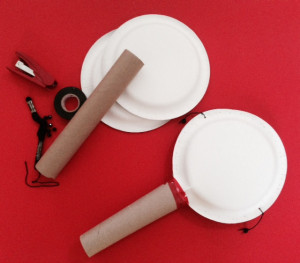
Bolang gu suppliesMaking your own version of this creative little craft is easy.  The supplies you need for one drum are: 2 paper plates, 1 cardboard paper towel roll, stapler, tape, a bit of string or twine, 2 beads and any materials you like for decoration.

Decorate Your Drum

If you’re going to decorate your plates, it helps to do this first. In fact, it can be a good idea to have many plates and try lots of designs, then select your favorites for the two faces of your drum.

What themes to use for your decorations? Choose any of the Chinese zodiac animals, Chinese calligraphy, Chinese New Year printables or whatever else inspires you! Once your plates are created, move on to the next step.

Assemble Your Drum

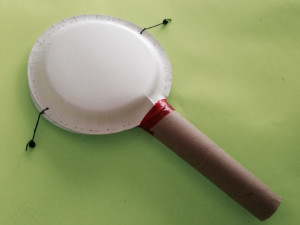
Place your two paper plates “back-to-back”. Apply a few staples to hold them in place. Press the top part of your cardboard tube together slightly and insert about 1 – 2 inches inside the paper plates, where you want the handle to be. Bolang Gu halfway craftContinue stapling around the plates until you reach the other side and staple right up to the handle. This should hold it firmly in place, but you can also add decorative tape to make it even more sturdy and to add a design element.
Add the Pellets

Now it’s time to add the beads. Start my making two holes on the right and left side of the drum halfway up the paper plates. Use a hole punch to make your 2 holes or have an adult help by poking the holes in the paper plates with the tip of a nail or an awl. Knot a bead onto a small piece of string, twine or embroidery thread and tie onto each side, leaving about 2 – 3 inches of string. The length of string allows the beads to bounce back and forth to create the signature sound of the drum.

Play Your Drum

Although this little drum looks so simple, there are actually quite a few ways to play it. Place the handle between two hands and “rub” back and forth for the classic sound effect of a monkey drum. Or hold in one hand and rotate the drum back and forth while you move your arm like a dancer. In fact, if you take a look at the video below, the three dancers are using bolang gu as part of a wonderful and energetic dance routine.

Feel free to get just as creative and make up your own moves and inventive ways to make music with your new drum!

Links And Resources

Make a Bolang Gu -  Activity PDF:  https://www.teacherspayteachers.com/Product/Monkey-Drum-Chinese-New-Year-Drum-Craft-1748044

colorful brown dog screensnapMake Your Own Chinese Gong – https://www.teacherspayteachers.com/Product/Make-Your-Own-Chinese-Gong-From-Recycled-Materials-486935

Year of the Dog Artwork https://www.teacherspayteachers.com/Product/Chinese-New-Year-Brown-Dog-Art-Work-for-2-Musical-Crafts-3644746

Color an Erhu – A Two-Stringed Chinese Violin https://www.teacherspayteachers.com/Product/The-Erhu-Chinese-Violin-Instruments-From-Around-The-World-1037355

Gong Xi Gong Xi- About The Song Plus Lyrics https://www.teacherspayteachers.com/Product/A-Chinese-New-year-Song-Gong-Xi-Gong-Xi-3629545

FacebookTwitterGoogle+Share

Explore Australian Instruments With Your Child

Instruments from Australian Aboriginal culture are wonderfully easy to make and play.  Whether you’re turning a cardboard roll from wrapping paper into a working didgeridoo or a broomstick into “bilma” clapsticks, these projects are creative, artistic and encourage your children to feel connected to world traditions as young global citizens.

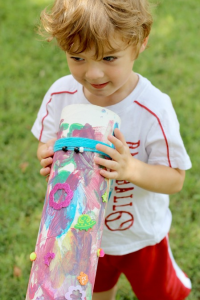
twodaLOO DIDGWhat Can A Didgeridoo?

If you’ve seen any movie or video about Australia, you’ve heard the sound of a didgeridoo.  Although traditional didgeridoos are made from long branches hollowed out by termites, modern ones can be crafted from pvc piping or the sturdy cardboard rolls found inside paper towels or wrapping paper.

Playing the basic sound of a didg can quickly be mastered by kids and adults alike!  If you can “blow raspberries” (pucker your lips and blow air out while the lips flap back and forth a bit), then you can make a didg drone. Sound clips, coloring pages and easy instructions on making a homemade didg can be found at the link below.

The Didgeridoo – A Legacy of Kindness

Along with being a unique instrument, the didgeridoo comes with a wonderful origin story.  You can read about how this instrument was created by a thoughtful elder who was so kind that he would not harm an ant.  The Legend of the Didgeridoo can be found at the link below.

bilmas in handSimple Clapsticks

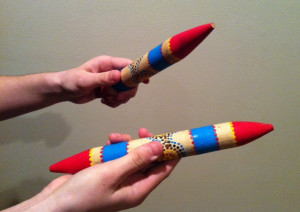
Almost every culture has discovered clapsticks – two pieces of wood, held in the hand and tapped together to make a beat.  In Australia, clapsticks are called bilma and can be as simple as two sticks found in the woods or as elaborate as the decorated ones pictured here.  Bilma are frequently used as part of ceremonies along with a didgeridoo.  Special bilma made of hardwoods; such as mahogany, have a beautiful tone and can be heard for long distances.

Stay tuned for our next post where we share easy and fun methods for making and decorating bilma clapsticks with kids.

bullroarers - plasticA Buzzing Bullroarer

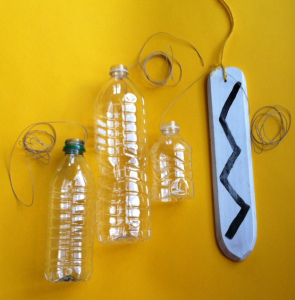
If you don’t mind getting outside and can find a bit of elbow room, a recycled water bottle makes a fine bullroarer.  Directions and a video of this really unique instrument can be found in the Links and Resources section below.

You Gotta Didg!

If you haven’t watched it yet, check out the video at the top of this article that features a didgeridoo and bullroarer.   It’s a music video of DARIA’s  “You Gotta Didg” song.  The animation shows didgeridoos being played,  beautiful Aboriginal face and body paint and the sacred site of Uluru in Australia, formerly known as Ayers Rock.  Like the song?  Add it to your Spotify, Apple Music or Pandora playlists at the links below.

Links and Resources

“You Gotta Didg” on Spotify: https://open.spotify.com/track/3j6k7ftRC13AFWFAz9ZXza
On Apple Music https://itunes.apple.com/us/album/beautiful-rainbow-world/id208109471
On Pandora: https://www.pandora.com/artist/daria-childrens/AR3qdptJ5Vzh7r2

Screen shot 2018-11-15 at 7.25.00 PMHear, Color or Create A Recycled A Didgeridoo
http://www.dariamusic.com/didgeridoo.php

What is a Didgeridoo Freebie: https://www.teacherspayteachers.com/Product/What-is-a-Didgeridoo-2816257

Australian Instrument Mini-Course: https://www.teacherspayteachers.com/Product/Australian-Aboriginal-Instruments-Music-Mini-Course-2816723

Legend Of The Didgeridoo
http://makingmulticulturalmusic.wordpress.com/2012/08/24/the-legend-of-the-didgeridoo/


Go Ahead, Play With The Box – A Little Box Instrument From Peru

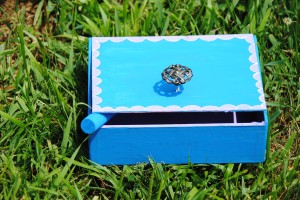
cajita on grass (homemade)It’s almost a cliche. A child is given a special present and they prefer to play with the box!

But, did you know that in Peru, there are two different types of boxes that are actually used as instruments?  We’ve already shared a post about a cajón, a box drum from Afro-Peruvian culture that you can make at home (link below). Now we’d like to show you another box instrument called the cajita. Making and playing a cajita is a wonderful way to develop motor skills, explore rhythms, discover new music and just plain have fun!

WHAT IS A CAJITA?

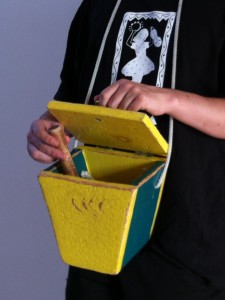
The cajita is a small, hexagonal box that comes from Afro-Peruvian culture. Originally, it was used to collect donations in Catholic churches. The altar boys wore the donation box around their necks as they collected the offerings. Then; after they removed the money intended for the church, they used the box as a percussion instrument.

josef plays cajitaHow did they make music with a cajita? They opened and closed the lid for one sound. They took a small stick and tapped the sides and top, for another sound. They opened the lid and “stirred” the inside for still another type of percussion. And then they mixed all those different sounds together.

Since it might be a bit hard to imagine, here’s a short video with two cajitas and one cajón (box drum) that will demonstrate what it looks and sounds like.

MAKING A HOMEMADE CAJITA

Making a wooden box cajita requires special materials as well as woodworking tools and skills.  A bit easier to create is a cigar box cajita which is sturdy enough to be played like the real thing, but can be made from some basic materials and supplies found around almost any home.

Here’s what you need to create a cigar box cajita.

SUPPLIES

Cigar box
Small knob and matching screw (knobs from kitchen cabinets or small dressers work perfectly)
Hammer and nail or awl tool (to make a hole for the knob to be inserted in lid)
Two dowels or sticks – about 8” in length
Materials for decorating such as paint, construction paper, stickers, glitter and glue

DECORATE A HOMEMADE CAJITA

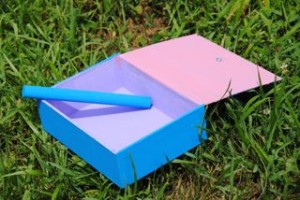
homemade cajita (inside)If you’d like to decorate your cajita, begin this project by personalizing the cigar box. You can paint it, decoupage it, add stickers, construction paper or glitter and glue to make it unique. Since you’ll be opening and closing the lid, you may want to decorate the inside as well as the outside.

Next, add the knob so you can easily lift the cajita’s lid up and down. To do this, the adult can help with the process of hammering a small nail or using an awl to pierce a hole in the lid of the box. Position that hole in the exact center of the box, about an inch or so away from the edge of the lid that opens up. Once the hole is created, it’s easy to insert the knob in the top of the box and use the screw to tighten it into place. Now you should be able to open and close the lid of the box easily.

Finally, cut two wooden dowels. One will weigh down your box so you can play your instrument without the cajita bouncing up and down.  The other will be the playing stick that you use to tap and play your instrument. If possible, cut the first dowel to a length just a bit short of the inner width of the box.  Glue the dowel in place in the inner front of the box and leave it to dry. In the meantime, cut and decorate your second dowel. This one can be any length that is comfortable to hold in your hand while playing.

OLYMPUS DIGITAL CAMERATIME TO JAM

Now the musical fun begins. If you’ve watched the video above and are ready to dive right in, then skip this section. If you prefer some playing tips, here are some good suggestions to get you started.

Get to know your cajita by tapping the sides and the front and making a rhythm pattern. Notice how each sound is a bit different. Try something like “front, front, side. Front, front side.” Try a similar pattern with the sides and the top. Later, add the sound of the lid opening and closing. Since this can sometimes feel like “rubbing your stomach and patting your head”, it’s best to start with simpler patterns and then work up to more complicated ones. If working with younger children, it can be good to let them explore the instrument before trying to play specific patterns.

You can also put on any type of music and allow your child to create a beat that goes along with it.

A CAJITA JAM AS A GROUP

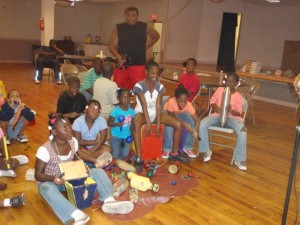
After getting the hang of creating rhythms with a cajita, you can play as a group, with several cajitas or with different instruments playing together as well. This can be a fun way of building rhythm in a classroom or a homeschool setting because each child or person hears how their musical part plays an important role in the overall beat.

An easy way to start a jam is to have one person – like the cajita player – play a very simple pattern such as opening and closing the lid. The next person adds another sound, the third and forth, add their own simple parts. If you check out this jam, you’ll see how the rhythm starts on one instrument (a quijada jawbone), the cajita is added next and finally, a large cajón (or box drum) joins in.

Links and Resources

What Us A Cajita? https://www.teacherspayteachers.com/Product/What-Is-A-Cajita-Latin-American-Percussion-Instrument-1388694

Make Your Own Cajón Box Drum – Free From TeachersPayTeachers

http://www.teacherspayteachers.com/Product/The-Cajon-Make-And-Play-Your-Own-Box-Drum-1236616

Best Instruments For Young Children – A “Play By The Numbers” Dulcimer!

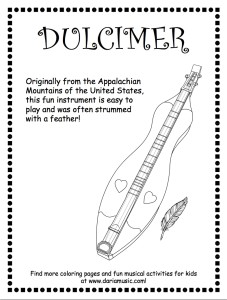
dulcimer black + white coloring pageThis simple and satisfying “first instrument” is a lot of fun and  introduces any child or grown-up to the basic skills needed to play any fretted, stringed instrument such as the guitar, ukulele or mandolin.

Play For A Child, With A Child, Or Let The Child Play!

Learning an instrument with a child is a great way to teach them about the learning process.  It can be helpful for a child to see that every person continues to learn throughout their lifetime and how that process works.  Watching you try to play and struggle a bit, then persist, and succeed teaches persistence, patience and determination.  Learning a simple instrument – even with the ups and downs involved – is a great way to bond with a child while building musical skills at the same time!

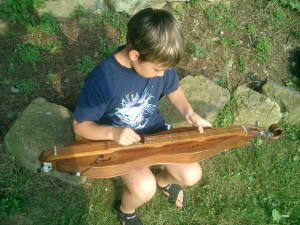
josef and dulcimerPlay By Numbers

Play-By-Numbers song sheets for the tin can dulcimer or any dulcimer are just as easy as they sound.   Each number corresponds to a “fret”, one of the long spaces you’ll find on the fretboard of your instrument.  To play, push down gently but firmly at the center of each fret and then strum or pluck the string with the other hand.

If the songbook says 2, then press the 2nd fret in the middle and strum until you get a good sound.  Get the picture?  And if you see a “0”, that simply means to pluck or strum the instrument without holding down any fret.

Play By Numbers Songs

Want to start with an easy song?  How about “Mary Had A Little Lamb”?

5   4   3   4   4   5   5    5             4   4   4        5   7   7
Mary Had A little Lamb, Little Lamb, Little Lamb

5   4   3   4           5   5    5
Mary Had A little Lamb,

5        4      4           5      4     3
It’s fleece was white as snow

“Happy Birthday” By The Numbers

Here’s “Happy Birthday” on the Appalachian lap dulcimer.  Numbers for both “Happy Birthday” and “Feliz Cumpleaños”, a Spanish version of that song, are below.

0               1      0      3   2        0           1   0          4    3
Happy Birthday to you.  Happy Birthday to you.

0              7    5          3       2      1                         6     5        3         4     3
Happy Birthday, dear (add their name), Happy Birthday to you.

0             1  0   3  2      0      1   0    4  3
Cumpleaños feliz, te deseamos a ti.

0               7 5  3  2  1   6     5   3  4      3
Cumpleaños felizes, te deseamos a ti.

Have any questions about these instruments?  These are two instruments I really enjoy playing so I’d be happy to answer your questions.  Drop me a line in the comments section below.

Links And Resources

Freebie Dulcimer Coloring Page (Follow Me On TPT for more freebies like this!) https://www.teacherspayteachers.com/Product/Appalachian-Dulcimer-Free-Coloring-Page-3863460

Post On The Tin Can Dulcimer
http://www.tinytappingtoes.com/classroom-music/best-first-instruments-for-kids-a-tin-can-dulcimer/

Hear A Dulcimer   
http://www.dariamusic.com/dulcimer.php
Hear A Dulcimer Song   
http://www.dariamusic.com/dulcimer.php
Color A Dulcimer (Online)  
http://www.dariamusic.com/color_Dulcimer.php


Best “First” Instruments For Kids – A Tin Can Dulcimer!

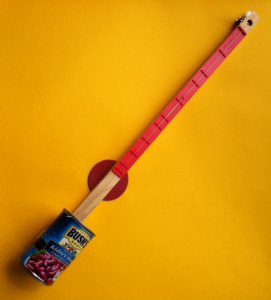
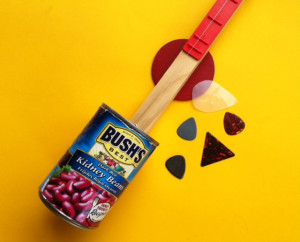
bean can instrumentIf you can count, you can play this instrument.

It’s just that easy!

This simple one-stringed instrument made from a humble tin can is a great confidence booster for either young kids or adults who may doubt their musical ability.  Constructed like an Appalachian (stringed) dulcimer, you can play any note up and down the fretboard and sound great!  And check out the “play-by-the-numbers” songs or songbook and you’ll be able to master songs you recognize literally within minutes.  What fun!

It’s Bigger Cousin – The Dulcimer

The stringed dulcimer from Appalachia is a really similar instrument made with a wooden body and a few more strings.  If you’d like to see one, color one or hear one being played, check out the links below. This tin can instrument simplifies it even more.  There’s only one string to play and a long fretboard marked with numbers.  To play it, you read the numbers to the song and push down the correct fret with your fingers.

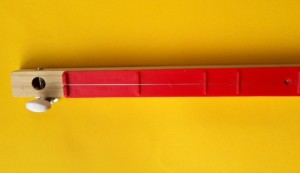
fretboard yellowWhat’s A Fret?  Don’t Fret About It!

Okay, pardon my pun here.  The frets are the long spaces on the  fretboard.   When playing the instrument, push down gently but firmly at the center of each space – or fret- and then strum or pluck the string with the other hand.

So if the songbook says 3 – 4 – 5.  They press down of the 3rd fret in the middle, the 4th fret in the middle and the 5th fret in the middle.

And if you see a “0”, that just means to pluck or strum the instrument without holding down any fret.

can and picks yellowPick-Ing It All Up!

You might want to pluck the one string with your fingers, but most folks prefer a pick.  That’s a tough piece of plastic shaped in a teardrop or triangular shape used to strum over the strings.  Some picks are softer and some are harder.  If you have a few picks from a music store, try them out and see which ones you like the best.  It not, cut up a milk jug or a similar piece of tougher recycled plastic (like a coffee can lid) and make your own.

What Does It Sound Like?

The tin can instrument is a ton of fun.  Check it out here as we play the first song we learned on it – “Oh When The Saints Go Marching In”.

Links And Resources

Hear A Dulcimer
http://www.dariamusic.com/dulcimer.php

Hear A Dulcimer Song
http://www.dariamusic.com/dulcimer.php

Color A Dulcimer (Online)
http://www.dariamusic.com/color_Dulcimer.php


Outdoor Musical Play – Make Your Own Bullroarer!

bullroarers - plastic

You may not recognize the word “bullroarer”, but you probably recognize the sound it makes. Used by both Native Americans and Aboriginal Australians, this simple instrument spins around and produces a whirring sound that is truly unique.

Since it’s really hard to describe, take a minute to watch “Jungle Jay” demonstrate his homemade bullroarer here:

What Is A Bullroarer?

Made from a simple piece of wood attached to a string, the bullroarer is spun with one hand then swung around in a circle with the other. As it spins, a remarkable whirring, buzzing noise is produced that can be heard quite a distance away.

bullroarer - realIt’s easy to see how this was used originally to signal other people or to communicate in times before telephones or modern devices.

Make Your Own Version

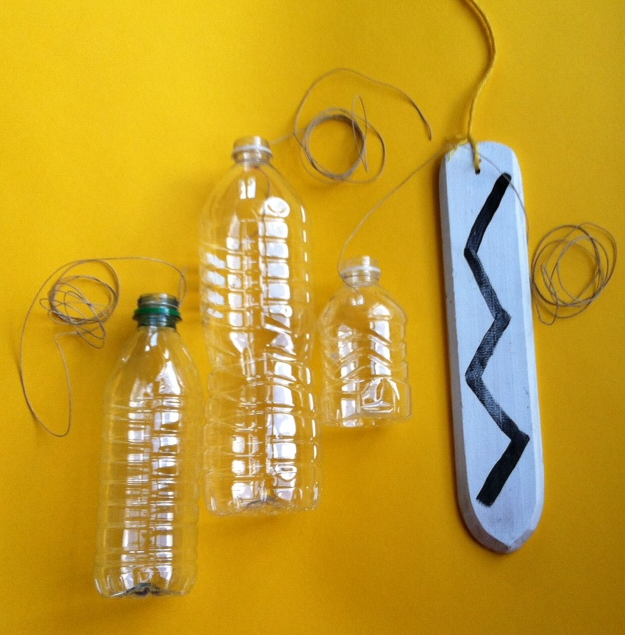
This activity could not be easier. All you need are recycled water bottles of various sizes and sturdy string or twine. Start by tying the string around the neck of the plastic water bottle, securing it tightly with several sturdy knots.   If you like, add a stick to the other end of the twine or tie the string into a loop to make it easier to hold while spinning.  A good length for the string is about 3 feet, but feel free to adjust this length for the size and shape of any player.

Although this technically isn’t a bullroarer, your plastic bottles will make odd, eerie noises when swung around in a circle just like the authentic aboriginal instrument. One hint: pick plastic bottles with smaller openings as they seem to make the best sounds when used in this project.

Safety First

Although spinning a plastic water bottle is much safer than spinning a piece of wood, it helps to consider safety when playing this instrument. Anyone playing a bullroarer should be outside in an open area, away from people or things that things that could be hit accidentally.

How To Play A Plastic Bullroarer

Once you’re positioned safely away from any people or objects, simply hold the one end of the string and swing it around. Swing it either in a circle in front of you, to the side or over your head. As you vary the speed, the sound will shift both in volume and in tone. Play with your one plastic bottle or different bottles to find the type of sound you like the most.

A Bullroarer Orchestra

If playing with a group, you can position kids or people in different areas with plenty of space between them. For instance, if you’re on a playground, you can position kids within large chalk circles with ample distances between them. Participants can all play together or someone can call out names so each player can add their instrument or stop playing. This is a fun way of creating a sonic landscape, especially if different size and shape water bottles are used.

Be safe – and have fun!

Celebrate International “Make Your Own Instrument Day” – June 21, 2014

MAID graphicRecently a friend of mine came up with an exciting idea – to create a holiday to focus on making your own musical instrument. It’s part learning, part creativity and part crossing cultures to share our common desire to have a blast, blast a horn, strum a stringed instrument or bang a gong!  With the first celebration scheduled for June 21, 2014, you can find out all about International Make Your Own Instrument Day at the link below.

Who created this new holiday that is more fun than donut day or national overalls appreciation week?  It was dreamed up by Jay Sand, guitarist and children’s music teacher as well as the active dad of three beautiful young girls, ages 4-9.  Along with this holiday, Jay also created the All Around This World music curriculum as a way to introduce children to the countries he’s already visited and the many more he hopes to visit with them.  Jay uses his music to really connect kids with a wide world of cultures and creativity.

And – you’re gonna love this!  Every time Jay plays music he starts his show with a song he learned in Uganda called “We Are Happy”.   It’s a song that was originally used to greet special guests who came to visit the tribe in Africa, but  Jay’s changed a few things and now it’s a great way to begin any activity or put a smile on any child (or adults) face.   You can read about the “We Are Happy” song at the post below.

So – on June 21st or any day -  be happy, create an instrument and make some joyful noise!

Resources And Links

International Make Your Own Instrument Day
http://www.allaroundthisworld.com/international-make-your-own-instrument-day/

All Around This World Music Programs
http://www.allaroundthisworld.com/

We Are Happy – A Song Of the Abayudya of Uganda
http://makingmulticulturalmusic.wordpress.com/2014/06/15/we-are-happy-a-song-of-the-abayudya-of-uganda/

Whistle A Merry Tune – With A Tin Whistle

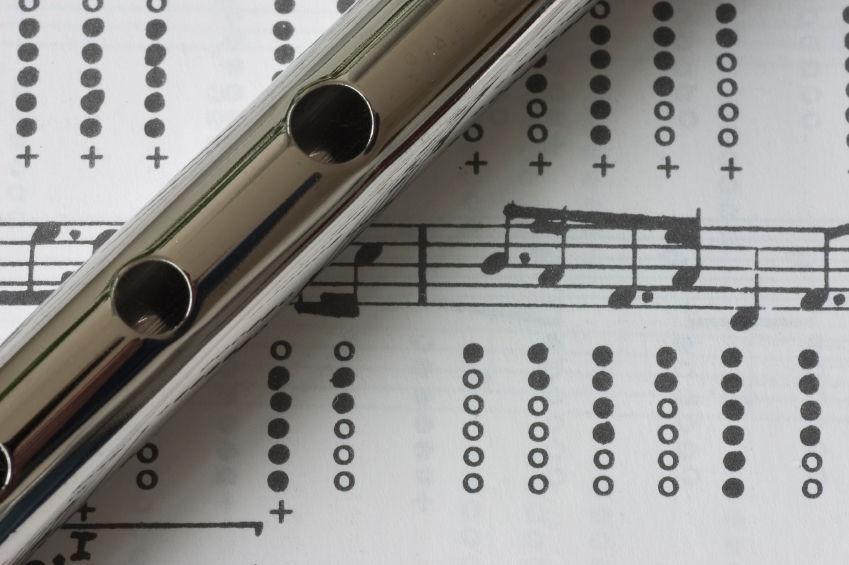
Tin whistle sheet music

It’s wonderful when a “first instrument” is so simple that a child can begin playing melodies and making music right away!  For just this reason, the tin whistle makes a great wind instrument to share with a child – or learn along with your child.  Even adults who consider themselves “musically challenged” can surprise themselves with what they can accomplish on this basic instrument.

In other words, if you can read a simple chart and place your fingers over the holes of a tin whistle, then you can play this instrument.  And, with a little bit of practice, it can sound great!

A Whistle With Many Names

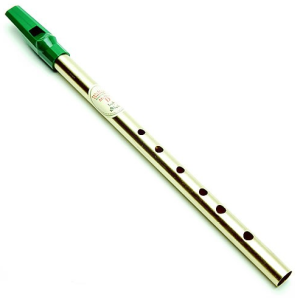
Also known as a penny whistle or an Irish whistle, the tin whistle has a plastic or wooden mouthpiece; called a fipple, and a metal tube for the body.  Although they are made in all major keys, the most popular tin whistles are in the key of D and C.  Best of all, the fingerings used to play any tin whistle are similar to those used on the clarinet, flute and saxophone, so exploring this instrument can be a wonderful “headstart” for any child who might continue on with other wind instruments in the future.

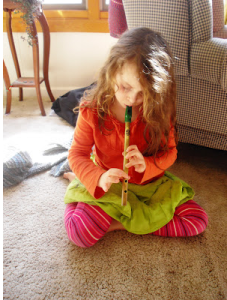
child and tin whistleHow To Hold A Tin Whistle

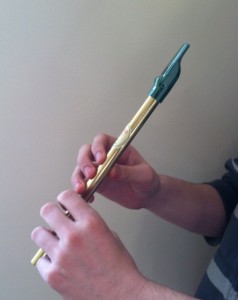
Here are a few tips for playing the tin whistle.  First, hold the whistle at a 45 degree angle, facing downward and away from you.  If you’re right-handed, put that hand on the bottom and use your left hand on the top.  If you’re a lefty, reverse that order. Thumbs hold the whistle from below and you cover the six holes with your fingertips.

Now…blow!

With the mouthpiece between your lips (not between your teeth), give a steady breath of air.  You’ll know if you’ve got the right technique immediately because if you blow too softly, you’ll hear an airy or all-too-quiet note.  If you blow too forcefully, you’ll hear a shrill pitch or a squeak. Some musicians recommend that you blow as if you were saying the word “toooooo!”

holding the tin whistleLet Your Fingers Do The Walking!

Once you’ve found the right way to blow a note, begin removing your fingers starting at the bottom and going to the top (until they all are uncovered).  You’ll hear the difference in the sound and you can begin to play these notes to form your own melodies.

And, then?

From there, you can jam with your tin whistle or learn to play specific melodies.  You can try some advanced techniques like blowing a bit harder and getting a second octave (a set of higher notes) out of your tin whistle.  You can try different whistles in different keys or look for books that share your favorite songs or traditional Irish music which is perfectly suited to this simple folk instrument.

————————————

Prize Green tin whistle - key of D

Above photo of a young girl exploring the tin whistle is courtesy of from a blog written by an amazing percussive dance teaching artist named Malke Rosenfeld (www.malkerosenfeld.com).   You can read the full post here:
http://mathinyourfeet.blogspot.com/2012/03/all-in-good-time.html

Irish Music For Kids – Resource Round-up

MYO Bodhran and Tipper tutorial: https://www.teacherspayteachers.com/Product/Irish-Drum-Make-and-Play-Your-Own-Bodhran-and-Tipper-2410657

Whistle a Merry Tune – With A Tin Whistle http://www.tinytappingtoes.com/early-learning-with-music/whistle-a-merry-tune-with-a-tin-whistle/

Morris Dancing Bells For Kids http://www.tinytappingtoes.com/early-learning-with-music/easy-morris-dancing-bells-for-children/

Easy Introduction to 10 Irish Instruments https://makingmulticulturalmusic.wordpress.com/2014/03/11/an-easy-introduction-to-irish-instruments/

All Natural Instruments – Sticks, Stones and Bamboo Percussion For Kids

natural instruments

How were the first musical instruments created?

It’s most likely they were made from “all natural” materials and were probably the result of wonderful coincidences.  Perhaps someone was gathering wood and realized that two sticks tapped together could create a beat.  A rock fell on another rock and made a pleasing sound.  Bamboo made a wonderful noise when rustling in the wind and inspired Hawaiian rhythm sticks. And since these noise-makers are made of such basic materials, they make great “first instruments” for exploring music with children at home, in the classroom or in the homeschool environment.

Here are three of our favorite “all natural” percussion instruments.

Austalian Clapsticks – “Bilma”

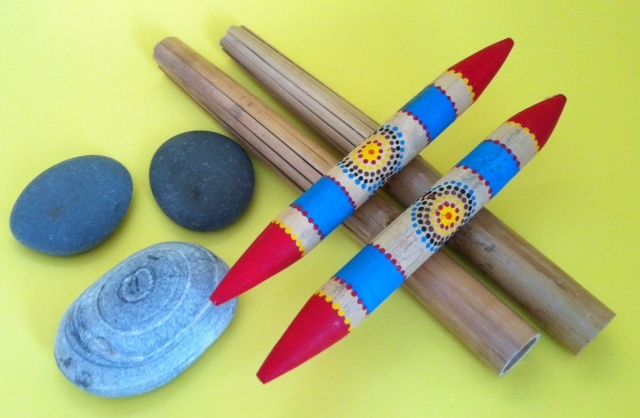
stick bilma1In Aboriginal Australia, two sticks struck together form a beat that can accompany the didgeridoo and become a part of singing, dancing and celebrating.  Whether you tap together two unsharpened pencils or take a nature walk to retrieve two perfect sticks, bilma making dots with q-tipsthese simple clapsticks can keep a beat while you sing or play along to any your favorite songs.

If you want to decorate your clapsticks with an Australian theme, you can use a dot motif.  In the activity below you can find step-by-step directions for making several different versions of crafty “dot” bilma.

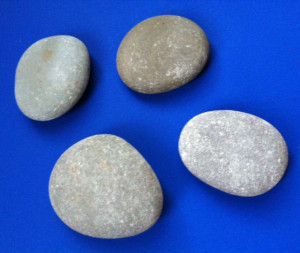
hula rocks on blueRiver Rocks – Hawaiian `ili`ile

Can rocks make music?   Take a nature walk, collect a few and see for yourself.

In Hawaii, special smooth river rocks are part of the hula tradition. These small stones; called ‘ili’ili, are held in a dancer’s hand and tapped together for a percussion sound and that becomes part of the arm movements of the dance.  If you want to play “Hawaiian-style”, check out the post below for more about this tradition.

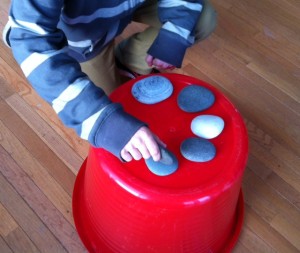
But you can also get creative and make up your own way of “playing rocks”.  Try josef rocks outsetting a few rocks out on the ground or table and hold one in your hand.  Use the rock in your hand to tap out a beat on one – or several- of the other rocks while you sing along, play recorded music or create your own rhythms with a friend, sibling, parent or fellow musician.

Bamboo Rhythm Sticks

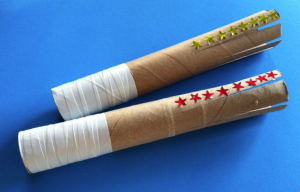
Hawaiian pu’ili are rhythm sticks with one distinct difference.  They are made of lengths of bamboo, left whole on one side and split on the other.  When tapped together, the split ends rattle against each other making a unique sound.

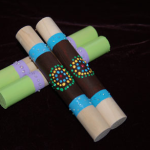
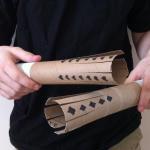
Although making traditional bamboo pu’ili is not too hard, it does require some special tools and involves sharp edges.  An easier version; especially for young children, can be made from cardboard rolls from paper towels. They are easily cut and decorated and sound great for percussion play.

You can get complete instructions for homemade pu’ili at the post listed below.

Explore Nature and Music

Sticks, stones and reeds can make music.  Why not combine an exploration of music and nature to see what kind of inventive creations you can discover and play!

Screen shot 2014-03-03 at 5.26.10 PMLinks and Resources

Australian Bilma (From Teachers Pay Teachers)
http://www.teacherspayteachers.com/Product/Australian-Instruments-Make-Your-Own-Bilma-Clapsticks-1133140

Playing River Rocks As An Instrument – Hawaiian `ili`ile
(Post in Making Multicultural Music)
http://makingmulticulturalmusic.wordpress.com/2014/02/13/playing-river-rocks-as-an-instrument-hawaiian-iliile/

Play Some Pu’ili  (Post in Tiny Tapping Toes)
http://www.tinytappingtoes.com/classroom-music/make-your-own-puili-hawaiian-rhythm-sticks/

Musical Craft pdf’s from DARIAMUSIC
http://www.dariamusic.com/crafts.php

E-books, CD’s and more Musical Fun from DARIA’s TeachersPayTeachers Store
http://www.teacherspayteachers.com/Store/Daria-Marmaluk-Hajioannou

Jingle Marching Sticks

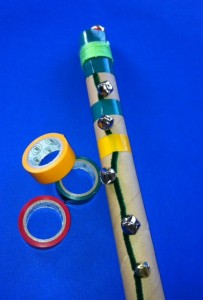
making jingle sticksOne of the most wonderful things about making music with young children is that it easily becomes part of an active day.  Who can resist making a parade or dancing around the house or the classroom when they are carrying a marching jingle stick?  Best of all, the materials needed for this craft are often trashed (extra ribbon, tape, cardboard wrapping tubes, stray jingle bells) so this craft encourages you to upcycle, exercise and make music all at the same time.  What a great way to begin the holiday fun!

Make Your Own Jingle Stick

Here are the supplies to assemble:

A jingle stick – look for a cardboard tube from wrapping paper, 3 foot ruler or large stick

1 (or more) pipecleaners

6 – 10 jingles per pipecleaner

Colorful electrical tape or duct tape

Optional: Paint, stickers, yarn or duct tape, for decoration.

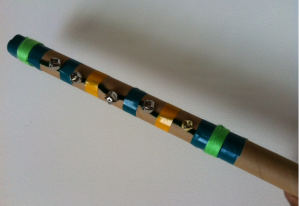
Screen shot 2013-11-15 at 3.05.34 PMBegin by stringing any number of jingles onto a pipecleaner.  Use electrical tape to fasten the pipecleaner into place on the stick.  It helps to fasten the pipecleaners to the stick between the jingles as well.  If you like, make several pipecleaners strung with bells to add to different parts of your stick.

Once the jingles are in place, decorate the rest of the marching stick.  Use paint, more tape, colorful ribbon, yarn or stickers to make it unique and wonderful.

Time To Play!

Other then using the jingle stick to lead a parade, there are lots of ways to get creative with your new instrument.

Sing any of your favorite holiday songs along to a beat created by your marching jingle stick.

Try tapping the stick on the floor while marching and use that sound as part of the rhythm being created.

Use marching jingle sticks as part of a holiday music presentation.

Try playing the jingle stick at a particular part of the song (like the chorus) or when you hear a particular word in a holiday song.  For instance, a class can jingle the bells only when you hear the word “jingle” in the song “jingle bells”.

If you like, try it along to this version of Jingle Bells which shares lots of different ways to say “Happy Holidays” in different countries around the globe.

Resources

Jingle Anklets –  http://www.dariamusic.com/docs/jinglebells.pdf

4 Easy Jingle Bells Instruments For Holiday Fun  – Craft Booklet from TeachersPayTeachers http://www.teacherspayteachers.com/Product/4-JINGLE-BELLS-CRAFT-ACTIVITIES-940926

4 Easy Jingle Bells Instruments For Holiday Fun  – Craft Booklet from DARIA’s Little Village Store http://dariasvillagestore.storenvy.com/collections/34585-all-products/products/3498803-4-jingle-bell-craft-activities-booklet